Graphcoal Portrait Blog
Painting realistic skin tones can be a bit like solving a colorful puzzle. With a basic understanding of color theory and a little experimentation, you can create lifelike skin tones that bring your portraits to life. In this easy-to-follow guide, we'll demystify the process of color mixing for realistic skin tones using oil paints.

Graphcoal Portrait Blog
E N D
Presentation Transcript
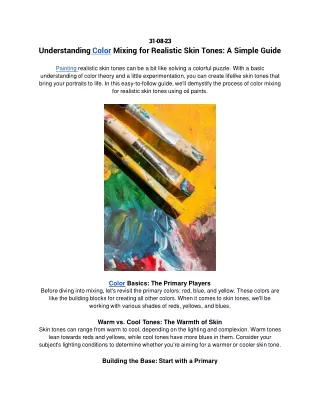
31-08-23 UnderstandingColorMixingforRealisticSkinTones:A Simple Guide Paintingrealisticskintonescanbeabitlikesolvingacolorfulpuzzle.Withabasic understanding of color theory and a little experimentation, you can create lifelike skin tones that bring your portraits to life. In this easy-to-follow guide, we'll demystify the process of color mixing forrealistic skin tones using oil paints. ColorBasics:ThePrimaryPlayers Beforediving into mixing, let's revisit the primary colors:red, blue, and yellow. These colors are like the building blocks for creating all other colors. When it comes to skin tones, we'll be workingwith various shades of reds, yellows,and blues. Warmvs.CoolTones:The Warmth ofSkin Skin tones can range from warm to cool, depending on the lighting and complexion. Warm tones lean towardsredsand yellows,whilecooltones havemorebluesin them.Consideryour subject'slighting conditionsto determine whetheryou're aimingfor a warmeror coolerskin tone. BuildingtheBase:StartwithaPrimary
Begin by selecting a primary color that represents the undertone of the skin. For a warm undertone, start with a red or orange. For a cool undertone, choose a blue or green. Mix a small amountof your chosen primary color withwhite to create a base color. AddingDepth:IntroducingSecondaryColors Toadd depth andrichness, introduce secondarycolors. For example,to achieve awarm skin tone, mix a bit of yellow and red into your base color. For a cooler tone, mix a touch of blue and abit of red. These secondarycolors will help you achievethe nuanced variations of skin. ThePowerofWhite:HighlightsandShadows White is your secret weapon for creating highlights and shadows. Mix a dab of white into your basecolor to create highlights, and mixa bit of the base color intowhite for subtle shadows. Thistechniquehelps youcapture thenatural playof lighton theskin. BlendingisKey:SmoothTransitions Smooth transitions between different shades are crucial for realism. Use a clean brush to gently blendcolorstogether,creatingsofttransitionsbetweenthedifferenttones.Thistechnique mimicsthe natural gradation of coloron theskin. PracticeMakesPerfect:ExperimentandLearn Don'tbe discouraged if you don't get it right on the first try. Color mixing for realistic skin tones takes practice. Experiment with different ratios of colors, test various undertones, and observe how light interacts with skin. Over time, you'll develop an intuitive sense for achieving the perfect skintone. Conclusion: Color mixing for realistic skin tones is an artistic journey that combines the magic of color theory with the precision of observation. By understanding warm and cool tones, blending techniques, andthe power of primary and secondarycolors, you're well on your wayto creating lifelike skin
tones that add depth and authenticity to your portraits. So grab your paints, mix with confidence, andwatch your portraits cometo life with vibrant andnatural skin tones.