Sage Advice About Wood Workshop From a Five-Year-Old
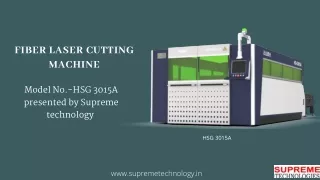
Which is healthier engineering? CO2 vs Fiber Laser has become the common conversations from the manufacturing circle for quite some time.u0099 Most producers make use of each CO2 and Fiber systems. They are doing In order they've got pointed out the main difference in systems, talents, and performance. Finally the choice with the technological know-how arrives down to the fabric you might be slicing and its thickness. The widespread issue amongst them may be Mitsubishi spare pieces and Trumpf parts. However, Mitsubishi spare components are superior. Let's know the CO2 and Fiber Laser method and their benefits and drawbacks. CO2 laser progress dates back again to 1964 by Kumar Patel. It is very a handy approach even nowadays. CO2 lasers are definitely the significant electricity constant-wave lasers accessible at present. It is without doubt one of the oldest gas lasers offered. In CO2 laser chopping, the light commences to procedure when electric power runs right into a fuel-crammed tube. The gasoline tube has mirrors at both finishes. A single mirror is kind of reflective and another 1 lets The sunshine arrive by. The mirrors lead the laser beam to the fabric that needs to be slit. The gasoline will likely be a combination of nitrogen, helium, hydrogen, and carbon dioxide. CO2 lasers can present you with a finer edge on stainless and aluminum workpieces. CO2 lasers can work across the array of non-metals and laser programs. Lasering a thick product is no far more a problem with CO2 lasers. The CO2 lasers depart the ending even smoother on thick supplies than fiber lasers. The CO2 lasers slit the fabric quicker inside a straight line. Also, it provides A fast probing time from if the reducing is to start with commenced. Most of the components present During this technologies want upkeep. This could not just disrupt your manufacturing process but additionally be costly. The main situation Along with the CO2 reducing is its device size. The equipment are gigantic. On top of that, the CO2 tube demands A great deal Place. In a nutshell, it can occupy a large spot. It truly is a difficulty if you find yourself Operating in a small workshop or functioning a little business enterprise. As It's really a large and gigantic equipment It's not transportable. Transferring the machine to another area is actually a sluggish and dear procedure. Fiber Laser's creation dates back again to 1963 by Elias Snitzer. Yet, it took 2 decades to build prior to they might be made use of commercially. Even following hitting the marketplace Pretty much following twenty yrs, they remain far from getting fantastic. Though the initial fiber laser was valuable, it wasn't apt for major field use as we see right now. It's the heated cutting course of action that makes use of a large electrical power density laser beam to melt, evaporate, and slit. Concurrently, large-velocity airflow blows absent the molten substance, getting to the chopping procedure. The fiber lasers are frequently growing their area. However It's not necessarily ideal, it happens to be the new location of business analysis and progress. Optic fiber transmission, without having a reflector, is upkeep-no cost and can conserve many servicing cost. Its mass usage of mirrors, bellows has a fewer amount of Value connected with servicing. There isn't a comparison in between CO2 and Fiber Laser in slim products. Fiber lasers have double or triple the speed. One can use the fiber lasers on A selection of products like steel, non-steel, leather-based, wood, fiber. But, different supplies might require distinctive laser reducing procedures according to properties. Among the benefits of a CO2 laser is ending on the thick elements, Particularly chrome steel and aluminum. Fiber laser know-how is still considerably in comparison to the CO2 In such cases. CO2 lasers are more flexible when compared with CO2 lasers. The CO2 lasers can slit a broad selection of resources, In particular non-metals. Like every single other technological know-how, these equally have strengths and weaknesses. CO2 is older as well as the Fiber lasers are gaining the marketplace speedy. Along with the speed Advantages, the running Expense is likewise a lot less than the CO2 lasers. Monetary financial savings from the fiber lasers could be video game-switching. But, you need to pick technological innovation determined by substance and various resources. Like if you'll want to Focus on thick substance, CO2 lasers would present better ending. For the thin product, you must choose fiber lasers. Do you think you're in the development small business or know lots about applications? If that's so, Then you certainly have very likely used or have observed a hammer drill. Several do not know what they are and raise their eyebrows when they listen to the identify. On the other hand, this tool comes in quite helpful when you have to drill by way of concrete and brick walls. When you are an proprietor of the motor vehicle of any form, you already know that each motor vehicle In this particular planet desires parts and supplies, and exact same goes for tractors! This can be why we have made a internet site for employed tractor sections. These minor buggers could become really high-priced if you start forking around the dough for completely new sections.addition, many different exercises made use of to work as a workshop grinding, sharpening, burnishing, or specify the use of the wheel assembly, sanding drums, and different other accessories for turning the mandrel. It can also be harmful in several workout routines in the home about the axis with the chuck shaft friction in the pure Morse taper. You could be securely drawbar. Look at a power drill push is designed to obtain. If the disc is worn, it might be quickly changed. In addition to its item with company's warranty to three a long time. Clients discuss swiftly and easily you'll be able to sharpen your applications on this solution. It is not very superior (I like) and possess preset angles that the majority of the bits to work with. Around the good side at an angle hook angle on the knife within the back teeth, enamel which has a piece of damaging angle hook that has a innovative in the midst of the again line, while the opposite. Unfavorable hook angle for the miter noticed blade is your best choice. In short notches blade makes a Lower in the amount of product will consider. Normal notch eighth of the inch is. Electronic equipment to work much more proficiently and swiftly make it easier to, but even though engaged on these automobiles ought to just take security precautions in mind. Stationery two forms of devices: this quite huge and heavy and will not be moved quickly from 1 put to another place. Their mobile gadgets, quicker, much more correct and specific, and guide ones have an advantage. Evidently the personal injury and the purchase and routine maintenance charges and gear use. bench drill.Grinders usually a safety characteristic that stops the blades will count on, but why choose an opportunity. Two tools utilized to Slice metal and concrete, fingers, pores and skin and bone like butter goes. The following picket joints differ in type, but all are ultimate objective is to produce a strong and steady piece of wood. Plaza initially Board to prevent.
43 views • 3 slides