Download
1 / 9
0 likes | 15 Views
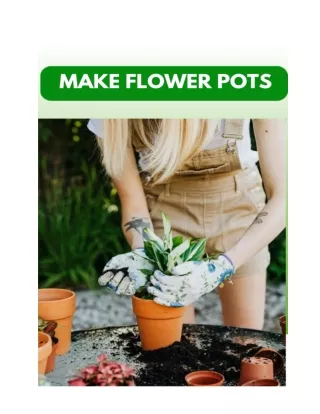
Creating your own flower pots is a delightful way to add a personal touch to your garden or indoor plant collection. Whether youu2019re a seasoned gardener or just starting out, making flower pots can be a fun and rewarding experience. This guide will walk you through various methods of crafting your own planters, from traditional clay pots to modern concrete designs and upcycled creations.<br>

E N D
How to Make Flower Pots 2024: A DIY Guide to Beautiful Planters Creating your own flower pots is a delightful way to add a personal touch to your garden or indoor plant collection. Whether you’re a seasoned gardener or just starting out, making flower pots can be a fun and rewarding experience. This guide will walk you through various methods of crafting your own planters, from traditional clay pots to modern concrete designs and upcycled creations. I. Introduction The art of making flower pots has been around for centuries, evolving from simple clay vessels to an array of creative and functional designs. DIY flower pots offer numerous benefits. They allow you to customize your planters to match your decor perfectly. Plus, they’re often more cost-effective than store-bought options. Most importantly, they provide a sense of satisfaction and pride in creating something beautiful with your own hands. II. Materials and Tools
Before diving into pot-making, it’s essential to gather the right materials and tools. Here’s what you’ll need: A. Essential Materials: ● ● ● ● Clay, concrete mix, or wood (depending on your chosen method) Water Sand (for concrete mixing) Waterproof sealant B. Necessary Tools: ● ● ● ● ● Mixing bowl Measuring cups Gloves Sandpaper Drill (for drainage holes) C. Optional Supplies: ● ● ● Paint and brushes Decorative items (mosaic tiles, pebbles, etc.) Molds (for concrete pots) Having these items ready will ensure a smooth pot-making process. III. Choosing Your Flower Pot Style The style of your flower pot should reflect your personal taste and complement your plants. Here are some popular options: A. Traditional Clay: Pots Clay pots have a timeless appeal and are excellent for plant health. They’re porous, allowing roots to breathe and excess water to evaporate. B. Modern Concrete Planters: Concrete planters offer a sleek, contemporary look. They’re durable and can be molded into various shapes and sizes. C. Rustic Wooden Containers: Wooden planters bring a warm, natural feel to any space. They’re versatile and can be easily customized. D. Upcycled Household Items: Transforming everyday objects into planters is eco-friendly and allows for unique, conversation-starting pieces. Choose a style that resonates with you and fits your skill level. IV. Step-by-Step Guide: Clay Flower Pots
Creating clay flower pots is an ancient art that connects you to centuries of pottery tradition. It’s a tactile and rewarding process that allows for endless creativity. Here’s a detailed guide to making your own clay pots: A. Preparing the Clay 1. Choose the right clay: Opt for a low-fire earthenware clay for beginners. It’s easy to work with and doesn’t require extremely high firing temperatures. 2. Wedging the clay: This process removes air bubbles and ensures even consistency. Place the clay on a canvas-covered surface and repeatedly slice it with a wire tool, then knead it back together. 3. Achieve the right consistency: The clay should feel like firm putty — pliable but not sticky. If it’s too dry, mist it lightly with water. If it’s too wet, let it air dry a bit. B. Shaping the Pot 1. Centering: Form the clay into a ball and place it on a pottery wheel or turntable. Use your hands to center it perfectly. 2. Opening the clay: Press your thumbs into the center of the ball, creating a depression. Gradually work your way outward and upward, forming the walls of the pot. 3. Pulling the walls: Use your fingers to gently pull the clay upwards, thinning and shaping the walls as you go. Keep the thickness consistent. 4. Refining the shape: Use a pottery rib tool to smooth the sides and create your desired profile — straight, curved, or tapered. 5. Finishing the rim: Smooth the top edge with a damp sponge. You can leave it round or create a flat rim using a wooden tool. C. Adding Drainage Holes 1. Timing is key: Add drainage holes when the pot is leather-hard (slightly dry but still workable). 2. Creating holes: Use a pottery needle tool or small dowel to carefully poke holes in the bottom of the pot. Aim for 3–5 holes for a medium-sized pot. 3. Smoothing: Gently smooth the edges of the holes to prevent cracking during drying and firing. D. Drying and Firing 1. Slow drying: Allow the pot to dry slowly to prevent cracking. Cover it loosely with plastic, gradually exposing more of the pot over several days. 2. Bisque firing: Once bone dry, fire the pot in a kiln at a low temperature (around 1800°F) for its first firing. This creates a porous surface ready for glazing. 3. Glazing: Apply ceramic glaze to your pot if desired. Be sure to leave the bottom unglazed for proper drainage. 4. Glaze firing: Fire the pot again at a higher temperature (around 2200°F) to set the glaze and fully vitrify the clay.
Remember, clay pot making is as much an art as it is a science. Don’t be discouraged if your first attempts aren’t perfect — each pot you make will improve your skills and understanding of the material. V. Creating Concrete Planters Concrete planters offer a modern, industrial look. Here’s how to make them: A. Making the Mold Create a mold using two containers of different sizes, with the smaller one nested inside the larger one. The space between them will form your planter. B. Mixing the Concrete 1. Combine concrete mix and water according to package instructions. 2. Stir until you achieve a thick, paste-like consistency. C. Pouring and Setting 1. Pour the concrete mixture into the space between your molds. 2. Tap the sides to remove air bubbles. 3. Let it set for 24–48 hours.
D. Finishing Touches Once set, remove the planter from the mold. Sand any rough edges and drill drainage holes if needed. VI. Crafting Wooden Flower Boxes Wooden planters add a rustic charm to any garden. Here’s how to make one: A. Selecting the Right Wood Choose a rot-resistant wood like cedar or redwood. Avoid pressure-treated lumber for edible plants. B. Cutting and Assembling 1. Cut your wood to size for the bottom and four sides. 2. Assemble using weatherproof wood glue and galvanized screws. 3. Sand any rough edges. C. Waterproofing Apply a waterproof sealant to protect the wood from moisture and extend its life. D. Adding Decorative Elements Consider adding trim, painting, or staining your planter for a personalized touch. VII. Upcycling Everyday Items into Planters Upcycling is a creative way to reduce waste and create unique planters. Here are some ideas: A. Transforming Tin Cans Clean and remove labels from tin cans. Paint or wrap them in rope for a decorative touch. Don’t forget to add drainage holes. B. Repurposing Old Tires Clean the tire thoroughly. Paint it in bright colors or wrap it in rope. Place a liner inside before adding soil and plants. C. Using Plastic Bottles Creatively Cut large plastic bottles in half. Paint or decorate the bottom half, and use it as a colorful planter.
VIII. Decorating Your Flower Pots Once you’ve created your basic pot, it’s time to let your creativity shine through decoration. Here’s an expanded look at how to make your pots truly unique: A. Painting Techniques 1. Choosing paints: For clay or concrete pots, use acrylic paints designed for outdoor use. For wooden pots, opt for exterior wood paint. 2. Priming: Apply a coat of primer to ensure better paint adhesion and longevity. 3. Base coat: Apply a solid base color to your pot. This can be the final color or a background for more intricate designs. 4. Decorative techniques: ● Ombre effect: Blend two or more colors for a gradient look. ● Stenciling: Use stencils to create repeating patterns or intricate designs. ● Sponge painting: Create a textured look by dabbing paint on with a sponge. ● Drip technique: Allow paint to drip down the sides for an artistic effect. ● Sealing: Once the paint is dry, apply a clear, waterproof sealant to protect your design. B. Mosaic Designs
1. Planning: Sketch your design on paper before starting. Consider color schemes and patterns. 2. Choosing materials: Use small tiles, broken china, glass beads, or even seashells for your mosaic. 3. Adhesive: Apply tile adhesive to small sections of the pot at a time. 4. Placing pieces: Carefully place your mosaic pieces according to your design. Use spacers for even gaps if desired. 5. Grouting: Once the adhesive is dry, apply grout over the entire surface, making sure to fill all gaps. 6. Clean-up: Wipe away excess grout with a damp sponge, revealing your beautiful mosaic design. C. Adding Texture and Patterns 1. Rope wrapping: Glue natural or colored rope around the pot in patterns or full coverage. 2. Decoupage: Use mod podge to adhere fabric, paper, or natural elements like leaves to your pot. 3. Embossing: Create raised patterns using puffy paint or a hot glue gun. 4. Etching: On concrete or clay pots, use etching cream to create permanent designs. 5. Textured spray paint: Use stone-effect or textured spray paints for an instant makeover. 6. Natural elements: Glue on pebbles, seashells, or bark for a nature-inspired look. IX. Caring for Your Homemade Flower Pots Proper care will ensure your DIY pots last for many growing seasons: A. Proper Drainage Ensure all pots have adequate drainage holes to prevent waterlogging. B. Weatherproofing For outdoor pots, apply a weather-resistant sealant annually to protect from the elements. C. Maintenance Tips Clean pots between plantings. Check wooden planters regularly for signs of rot or damage. X. Conclusion Making your own flower pots is a rewarding way to enhance your gardening experience. Whether you choose clay, concrete, wood, or upcycled materials, the process allows you to create planters that are uniquely yours. Remember, perfection isn’t the goal — each handmade pot tells a story and adds character to your green space.
So grab your materials, let your creativity flow, and start crafting your own beautiful flower pots today. Your plants will thank you, and you’ll enjoy the satisfaction of nurturing your green friends in containers you made with your own hands. Happy pot-making and planting. <<Grow your own herbs easily with a medicinal garden kit. Start today and enjoy fresh, natural remedies>>