Download
1 / 10
0 likes | 17 Views
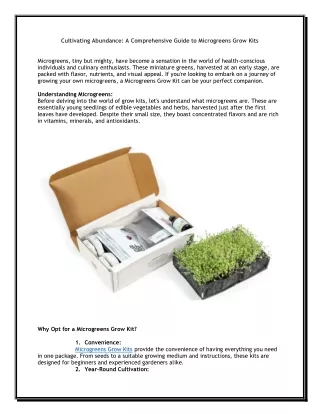
Growing an avocado from seed is a rewarding journey that combines patience, care, and a touch of green-thumb magic. While it might take years before you can enjoy homegrown avocados, the process of nurturing a seed into a thriving plant is an adventure in itself. This guide will walk you through each step, from selecting the perfect seed to caring for your maturing avocado tree.<br>

E N D
How to Grow an Avocado Seed 2024: A Comprehensive Guide Growing an avocado from seed is a rewarding journey that combines patience, care, and a touch of green-thumb magic. While it might take years before you can enjoy homegrown avocados, the process of nurturing a seed into a thriving plant is an adventure in itself. This guide will walk you through each step, from selecting the perfect seed to caring for your maturing avocado tree. I. Introduction Avocados have become a staple in many households, prized for their creamy texture and nutritional benefits. Growing your own avocado tree from a seed not only provides a fun and educational project but also offers the potential for fresh, homegrown fruit in the future. While the journey from seed to fruit-bearing tree is long, the process of growing an avocado plant is relatively simple and can be incredibly satisfying. II. Selecting and Preparing the Avocado Seed
A. Choosing a suitable avocado The foundation of your avocado-growing journey begins with selecting the right seed. While any avocado seed can potentially grow into a plant, choosing a healthy seed from a ripe fruit increases your chances of success. When selecting an avocado: 1. Look for fruits that are fully ripe but not overripe. 2. The avocado should yield slightly to gentle pressure. 3. Avoid fruits with visible bruising or damage. 4. If possible, choose organic avocados to avoid potential growth inhibitors. Remember, the size of the seed doesn’t necessarily indicate its growing potential. Both small and large seeds can develop into healthy plants. B. Cleaning the seed Proper cleaning of the seed is crucial to prevent mold growth and ensure optimal sprouting conditions. Follow these steps: 1. After enjoying your avocado, carefully remove the seed. 2. Rinse the seed under cool running water. 3. Use your fingers to gently remove any clinging flesh. 4. For stubborn bits, use a soft brush or sponge, being careful not to damage the brown seed coat. 5. Avoid using soap, as it may leave residues that could hinder growth. 6. Once clean, pat the seed dry with a paper towel or clean cloth. 7. Inspect the seed for any damage or signs of disease. C. Identifying the top and bottom Correctly orienting your avocado seed is crucial for proper growth. Here’s how to identify the top and bottom: 1. The top (pointed end): This is where the stem will emerge. It’s usually slightly pointier and may have a small, circular scar where the seed was attached to the fruit. 2. The bottom (flat end): This end is typically broader and flatter. The roots will grow from this part. 3. If you’re unsure, look for a slight ridge running around the seed. The top will be at the narrower end of this ridge.
Understanding this orientation is vital because planting the seed upside down can significantly delay or even prevent sprouting. III. Methods for Sprouting the Seed There are several methods to sprout an avocado seed. We’ll explore three popular approaches: the water method, the paper towel method, and the soil method. A. The water method This classic method is popular for its simplicity and the ability to watch the sprouting process. 1. Insert toothpicks: Stick three or four toothpicks into the seed at its widest part, spaced evenly around the circumference. These will support the seed over water. 2. Suspend over water: Place the seed, pointed end up, over a glass of water. The bottom should be submerged about an inch. 3. Place in a warm spot: Find a warm location with indirect sunlight for your setup. 4. Change water regularly: Refresh the water every five days to keep it clean and oxygenated. 5. Wait patiently: It can take 2–8 weeks for the seed to sprout. Look for the top to split and a stem to emerge.
B. The paper towel method This method can be faster than the water method and requires less space. 1. Dampen a paper towel: Moisten a paper towel until it’s damp but not soaking wet. 2. Wrap the seed: Envelop the clean seed in the damp paper towel. 3. Place in a plastic bag: Put the wrapped seed in a sealable plastic bag, leaving it slightly open for air circulation. 4. Store in a warm place: Keep the bag in a warm spot, like on top of a refrigerator. 5. Check regularly: Every few days, check for sprouting and ensure the paper towel remains damp. C. The soil method Some growers prefer to start their avocado seeds directly in soil. 1. Prepare a pot: Choose a small pot with drainage holes and fill it with well-draining potting soil. 2. Plant the seed: Bury the seed about an inch deep, with the pointed end facing up. 3. Water thoroughly: Give the soil a good soaking, then allow excess water to drain. 4. Maintain moisture: Keep the soil consistently moist but not waterlogged. 5. Provide warmth: Place the pot in a warm location. Some growers use a heating mat to encourage sprouting. IV. Caring for the Sprouting Seed A. Providing proper light Light plays a crucial role in the healthy development of your avocado seedling. While the seed doesn’t need light to sprout initially, once it shows signs of growth, proper lighting becomes essential. Guidelines for lighting: 1. Initial sprouting phase: Keep the seed in a warm, dark place until it sprouts. 2. After sprouting: Move to a location with bright, indirect sunlight. 3. Ideal light conditions: ● 6–8 hours of indirect sunlight daily ● Morning sun is preferable to harsh afternoon light ● If indoors, a north or east-facing window often works well 4. Signs of inadequate light: ● ● ● Leggy, stretched-out growth Pale or yellowing leaves Slow overall growth
5. Signs of too much light: ● ● Scorched or brown leaf edges Wilting despite adequate water 6. Artificial lighting: If natural light is insufficient, consider using grow lights. LED or fluorescent lights can supplement or replace natural light. 7. Rotating the plant: Turn your avocado plant a quarter turn weekly to ensure even growth on all sides. B. Maintaining optimal temperature Avocados are tropical plants that thrive in warm conditions. Providing the right temperature is crucial for successful sprouting and growth. Temperature guidelines: 1. Ideal temperature range: 60–80°F (15–27°C) 2. Minimum temperature: Avoid exposing your avocado to temperatures below 50°F (10°C) 3. Maximum temperature: While avocados can tolerate heat, try to keep them below 90°F (32°C) for optimal growth 4. Sprouting temperature: Slightly warmer temperatures, around 70–80°F (21–27°C), can encourage faster sprouting 5. Avoiding temperature fluctuations: Sudden changes in temperature can stress the plant. Keep it away from drafty windows or air conditioning vents 6. Winter care: If growing indoors, be mindful of cold windowsills during winter months 7. Using a heat mat: For faster sprouting, especially in cooler climates, a seedling heat mat can provide consistent bottom heat C. Monitoring water levels Proper watering is crucial for the health of your sprouting avocado seed. The key is to maintain consistent moisture without waterlogging. Watering tips for different methods: 1. Water method: ● Change the water every 5–7 days, or when it becomes cloudy ● Always use room temperature water to avoid shocking the roots ● Ensure the water level remains consistent, keeping the bottom of the seed submerged 2. Paper towel method: ● Check the paper towel every 2–3 days to ensure it remains damp
● ● If it’s drying out, lightly mist with water Avoid soaking the paper towel, as this can lead to mold growth 3. Soil method: ● ● ● Water when the top inch of soil feels dry to the touch Ensure the pot has good drainage to prevent waterlogging Water deeply, allowing water to flow from the drainage holes, then empty the saucer General watering guidelines: ● Use filtered or distilled water if possible, as avocados can be sensitive to chemicals in tap water Water in the morning to allow excess moisture to evaporate during the day Adjust watering frequency based on environmental conditions (humidity, temperature, sunlight) Look for signs of overwatering (yellowing leaves, mold on soil surface) or underwatering (drooping leaves, dry soil) ● ● ● V. Transplanting the Seedling As your avocado seedling grows, it will eventually need more space and nutrients. A. When to transplant The right time to transplant depends on your sprouting method: ● ● ● Water method: When the stem reaches about 6 inches and leaves have appeared. Paper towel method: Once roots and a stem have developed. Soil method: When the seedling outgrows its initial pot. B. Choosing the right pot Select a pot about 10 inches in diameter with good drainage holes. As your tree grows, you’ll need to repot it into progressively larger containers. C. Preparing the soil mix Use a well-draining potting mix. A combination of regular potting soil, perlite, and coarse sand works well. Avocados prefer slightly acidic soil with a pH between 6.0 and 6.5. Transplanting steps: 1. Gently remove the seedling from its current environment. 2. If coming from water, carefully remove the toothpicks.
3. Place the seedling in the new pot, ensuring the top of the root ball is level with the soil surface. 4. Fill around the roots with your prepared soil mix, firming gently. 5. Water thoroughly and place in a sunny spot. VI. Ongoing Care and Maintenance With your avocado seedling successfully transplanted, focus shifts to long-term care. A. Watering schedule Avocados prefer soil that’s moist but not waterlogged. Water deeply when the top inch of soil feels dry. Ensure good drainage to prevent root rot. B. Fertilizing Start fertilizing your avocado plant when it’s about a year old. Use a balanced, water-soluble fertilizer every few months during the growing season. Always follow package instructions to avoid over-fertilizing. C. Pruning and shaping Regular pruning encourages bushier growth:
1. Pinch off the top leaves and stem when the plant reaches about 12 inches tall. 2. When new shoots reach 6–8 inches, pinch off their tips. 3. Continue this process to maintain a desirable shape and promote fuller growth. VII. Troubleshooting Common Issues Even with the best care, you may encounter some challenges. Here’s how to address common problems: A. Dealing with pests Avocado plants can attract pests like spider mites, mealybugs, and scale insects. Regularly inspect your plant and treat issues promptly: ● ● For minor infestations, wipe leaves with a damp cloth or use insecticidal soap. For severe cases, consider using neem oil or a suitable insecticide. B. Addressing leaf problems Yellow or brown leaves often indicate issues: ● Yellowing leaves: May signal overwatering or nutrient deficiency. Adjust watering and consider fertilizing. Brown leaf tips: Often caused by low humidity or salt buildup. Increase humidity and flush the soil occasionally. ● C. Managing growth challenges ● Leggy growth: Indicates insufficient light. Move to a brighter location or provide supplemental lighting. Slow growth: Could be due to cool temperatures or insufficient nutrients. Ensure warm conditions and proper fertilization. ●
VIII. Long-term Care and Expectations As your avocado plant matures, consider these long-term factors: A. Indoor vs. outdoor growing Avocados can be grown as houseplants or outdoor trees, depending on your climate: ● ● Indoor: Provide bright light, maintain humidity, and rotate the plant for even growth. Outdoor: Only suitable in warm climates (USDA zones 10–11). Protect from frost and strong winds. B. Time to fruit-bearing Patience is key with avocado plants. Trees grown from seed may take 5–13 years to produce fruit. Some may never fruit at all due to genetic variability. C. Realistic expectations Remember, growing an avocado from seed is more about the journey than the destination. Enjoy the process of nurturing your plant, even if it never bears fruit.
IX. Conclusion Growing an avocado from seed is a rewarding experience that teaches patience and nurturing skills. While the path from seed to fruit-bearing tree is long, the joy of watching your avocado plant grow and thrive is immeasurable. Whether you’re aiming for a lovely houseplant or dreaming of homegrown avocados, the process is filled with learning opportunities and small victories. Remember, every avocado seed is unique, and results may vary. Don’t be discouraged if your first attempt doesn’t succeed — gardening is all about learning and trying again. With patience, care, and a bit of luck, you’ll soon have a beautiful avocado plant to call your own. So, the next time you enjoy a delicious avocado, don’t toss that seed! Instead, embark on your own avocado-growing adventure. Who knows? You might just be nurturing the start of your very own avocado tree. Happy growing! <<Grow your own Avocado Seed easily with a medicinal garden kit. Start today and enjoy fresh, natural remedies>>


![How to Reset Slotomania [A Comprehensive Guide]](https://cdn7.slideserve.com/12664843/how-to-reset-slotomania-a-comprehensive-dt.jpg)