Download

1 / 4
40 likes | 50 Views
There are thousands of individual components that make up wheel loaders and it would take days of work to check each of your Volvo loader parts individually. However, if you decide that this means you donu2019t have to check any of them, that will end with the most important Volvo wheel loader parts breaking right when you need your machine the most. So how do you keep on top of it?

E N D
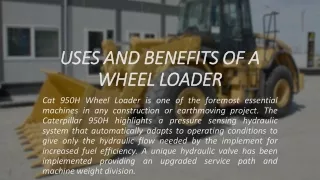
Parts of a Volvo Wheel Loader and Maintenance Explained There are thousands of individual components that make up wheel loaders and it would take days of work to check each of your Volvo loader parts individually. However, if you decide that this means you don’t have to check any of them, that will end with the most important Volvo wheel loader parts breaking right when you need your machine the most. So how do you keep on top of it? Firstly, the equipment dealer who sold you your wheel loader will know the best practices for ensuring your machine is maintained properly and remains safe. This includes maintenance and safety checklists which are made for your specific machine model in mind. These usually have four stages of inspection to them: ground level, engine, the rest of the loader outside the cab, and inside the cab. On top of this, they will know which after-market loader parts it’s best to keep a supply of on hand, so you can repair your machine with minimal downtime.
Ground Level Inspection The first step of carrying out the maintenance and safety checklist is usually a ground level inspection, which is about walking around the machine and ensuring nothing sticks out as damaged or in need of repair. The easiest thing to check is if there are puddles of liquid that can be seen underneath the loader. These puddles may be oil, hydraulic fluid, or even fuel. If you see any of these puddles, look for where the leak could come from and be sure any serious leaks are dealt with before the machine is put to use. Even if you don’t see leaks or puddles, your loader needs to have enough oil, hydraulic fluid, and fuel to remain fully operational and to prevent damage to internal components. Part of the ground level inspection is to check any grease nipples, grease lines, oil sticks, hydraulic fluid gauges, and fuel tank levels to make sure they’re at an acceptable range for loader operation. Bucket The bucket is a very important component which needs to be considered during the ground level inspection. Inspecting the bucket means checking any bucket teeth, and each of the points where the bucket connects to other components, such as the pivot points between the bucket and the boom arms. Pins and adaptors that are looking dodgy and like they could possibly break are important to fix before they break under the strain of a load, which would be a serious hazard to people as well as the worksite and materials being carried. Wheels Also, a key inspection to make is of the wheels. Are there any foreign objects stuck into the wheels, like rebar? Are there any holes, gouges or even deep scratches in the wheels that may become an issue? These need to be fixed (possible meaning tyre replacements) before they get worse with continued usage. If you want to be thorough, it’s a good idea to inspect all of the surface of the wheel which is visible in their current position and then do another inspection after rolling the wheels a quarter turn. This allows you to see the underside or any other sides which were obstructed beforehand, such as the top of the wheel which may sit too closely to wheel guards to be properly inspected. Also check for loose/turned wheel nut indicators or rust. Loose nuts need to be tightened and rusted wheel bolts should be addressed before they become too much of an issue, so at least by the next maintenance date, or earlier, if you have time.
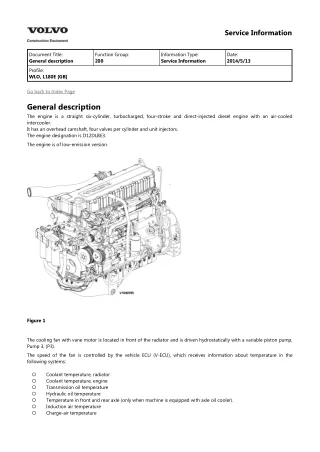
Final Drive The wheels on wheel loaders also have a final drive, which provide extra torque. This final drive has gears and bearings, including bushings. This means oil and if oil levels in a final drive get too low, that can break the part. The other most common reason for final drives failing is when the unit simply wears out after hours and hours of wear and tear, which is clearly more of a risk for older machines that have been put through their paces. The main bearing of a final drive is a common part which fails. Hearing a clanking and squeaking or grinding noise coming from the wheels is a sign the bearing is likely going to fail. Other signs to watch out for are the outer seal leaking, as well as overheating in the gearbox. These signs can be harder to look for in the initial inspection and may need to be done while the machine is running or has been in use for at least a short period of time. For instance, clanking or squealing may be hard to hear from within the cab but much easier to hear outside of it, which requires two people – one to drive the loader and one to listen for the tell-tale noises. From the ground level inspection, the main thing to check for final drives is the grease nipple and to make sure the final drive is not leaking. The Hitch The hitch area is where the wheel loader wheels pivot, to make it an articulated driving loader. There are several hoses and wiring tubes which cross this gap between the two main loader body segments. During the ground level inspection, make sure none of these components are rubbing so much that they are becoming damaged. Articulated driving is done by hydraulic cylinders (steering cylinders) rotating the two body segments around the pivot or hitch. These steering cylinders and the hitch pin need to be checked for damage and for regreasing. The loader’s manual should provide a schedule for regreasing these parts, but otherwise it can be done as you see fit (just make sure there’s enough grease to prevent scraping and damage). Engine Inspection Inspecting the engine of a wheel loader is similar to inspecting any other engine. To do an engine inspection, you will have to level up the engine cover, or gain access to the engine in whichever way your wheel loader is designed to let you. When inspecting the engine, you will need to check for leaks once more but this time check not just for oil or fuel leaks but also coolant leaks, exhaust leaks, and intake leaks. And, once again, check oil levels.
The Rest of the Loader Outside the Cab Depending on your dealer’s maintenance and safety checklist, some of the items covered in the ground level inspection may be separated into a section like this one. This section for everything else that’s outside the cab can include things such as steps or ladders. It’s always worth checking that anything you need to take your whole body weight looks stable and is undamaged, to prevent falls or accidents. Part of this process may be checking for safety signs or stickers, such as maintaining three points of contact at all times when climbing into a wheel loader. Cab Inspection Inspecting inside the cab includes checking gauges and dials that appear to be working properly, as well as making sure that all the lights function (both exterior and interior). Also worth checking are the mirrors and all the controls, such as steering wheel or joysticks, and buttons. Additional items that you might forget about but which should be on all checklists are the cab filter (which filters the air inside the cab, if it’s closed) and seatbelt dates (which are sometimes required to be changed out for new ones after several years). Overview If you plan on doing your own wheel loader maintenance, make sure that you get the best advice on offer, which is most likely to come directly from the equipment dealers who have the most knowledge and experience with your model of machine. Making use of a checklist for daily inspections of maintenance and safety concerns is critical to ensuring your machine remains functional and safe today and for the years to come.