Download
1 / 18
180 likes | 420 Views
Using advanced PowerPoint tools

E N D
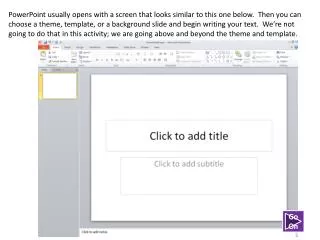
PowerPoint usually opens with a screen that looks similar to this one below. Then you can choose a theme, template, or a background slide and begin writing your text. We’re not going to do that in this activity; we are going above and beyond the theme and template. Go On
The first thing that we’re going to do is delete the two text boxes that are already on the slide so that the first slide is blank. Then, we are going to add some blank slides. Click on the tiny arrow to bring down the menu under the New Slide icon. Select the blank slide. Delete these 2 boxes. Go On
Now, see the slides on the left? That’s called the Navigation Pane. Right-click on the blank slide you just created and select Duplicate Slide. Do this a few more times so that you have a total of 5 slides. Navigation Pane Go On
Your screen should look similar to mine below. Click up in the first slide on the Navigation Pane to select that slide. We are going to work on “drawing” in PowerPoint first. Click the little arrow to bring down the drawing menu. Choose the rectangular shape. Draw a rectangle on slide 1. Navigation Pane – click on Slide 1 Go On
Here is mine. Click on the rectangle you drew to select it and you will see the Drawing Tools part of the ribbon appear. Click on Shape Fill and select a new color for the shape. Click on Shape Outline and select a new color for the outline. Go On
Experiment on with drawing shapes. Adjust the fill and outline colors and effects. Add a picture fill to a shape. Add shadows or gradients. Change the outline colors, sizes and types. Layer one shape on top of another shape. Here are some examples. Rectangle, orange fill, red outline Rectangle, picture fill, no outline Star, gradient radial fill, dotted outline, glow effect Smile shape, yellow fill, black outline Rectangle (hold shift while drawing to make square), gradient rectangular fill, 10 pt outline Oval (hold shift while drawing to make circle), picture fill, no outline, bevel & shadow effects Trapezoid, picture fill, blue outline Yellow circle, no outline, 10 pt soft edges effect & Star shape, no fill, orange outline, reflection effect on top of circle shape Rectangle, texture fill, no outline, bevel, shadow, and soft edges 25 pt effects Oval, path gradient fill, no outline, glow & shadow effects 1. 2. 3. 9. 10. 8. 4. 6. 5. 7. Go On When you are finished, select slide 2 in the Navigation Pane.
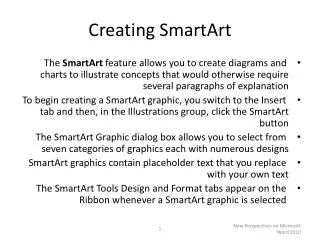
Have you heard about Smart Art? Smart Art is a feature with a lot of educational possibilities. Click on the Smart Art icon on the Insert Ribbon. You will get a screen similar to this one. Click through the different graphics to see what is available to use. A preview of each one will appear when you click on the sample. Go On
Select the pyramid graphic. When the shape is selected, the SmartArt Tools menu appears above the ribbon. Experiment with colors, styles, and formatting. Enter text on the left. Go On
Select the pyramid graphic. When the shape is selected, the SmartArt Tools menu appears above the ribbon. Experiment with colors, styles, and formatting. Enter text in the box on the left. Add a text box for a heading. Adjust font, color, style, effects, as desired. Go On When you are finished, go on to the next slide.
Here are some examples of ways you can use Smart Art in your classroom presentations. Proof-Reading Your Papers Composer Time Line Go On
The Life Cycle of a Butterfly You can insert pictures into your Smart Art to add interest and personalization. You can also change the styles and add effects to the Art. Go On
Now, we’re going to see what PowerPoint (and you) can do with photographs and pictures. Right-click on the picture of the Statue of Liberty below, left, and copy and paste it onto Slide 3 of your PowerPoint. (Do not copy the statue picture on the right – you are going to create that picture!) With the picture selected, you see the Picture Tools menu appear above the ribbon. Click on it to access the Picture Tools. Go On
It was a beautiful, cloudless day when we went to visit Miss Liberty. But what if we want to use this picture in another setting? We’re going to work on that now by removing the sky from this photo. Follow the directions below to remove the background. Go On
On the left side of the ribbon, click Remove Background icon. Go On Everything that is magenta will be removed. But, do you see how the torch and pedestal are magenta? We want to keep them.
Expand the selection area Click on the Mark Areas to Keep icon and pull down on handles on the selection box under the pedestal. Repeat the same action for the torch. When you have selected what you would like to keep, click on Save Changes. Go On
Now, let’s play around with Miss Liberty and see what we can do with her. Copy this picture of a New Zealand lighthouse and paste it onto Slide 3 of your Presentation. Did you notice that the statue disappeared? It’s still there. It’s just behind this picture. Let’s fix that. Go On
With the lighthouse picture selected, click on the Arrange icon and select Send to Back, which sends the lighthouse picture to the background and brings the Statue of Liberty picture forward. These little circles are called “handles”. Click and drag to change the size of your picture. Hold the shift key down if you want to keep the picture proportions the same. To resize the statue photo, press and hold the Shift Key and click on one of the little circle handles and drag it to make it smaller. The Shift Key will maintain the aspect ratio of the photo. Move the statue so that it covers the lighthouse. Go On