Download
1 / 1
10 likes | 28 Views
Are you tired of experiencing dead zones and weak signals in your home or office? Fret not, as My WiFi Ext comes to the rescue! In this comprehensive guide, we will delve into the world of WiFi range extenders and explore how they can amplify your wireless signal to reach every nook and cranny. Say goodbye to spotty connections and welcome uninterrupted browsing, streaming, and gaming experiences.<br><br>

E N D
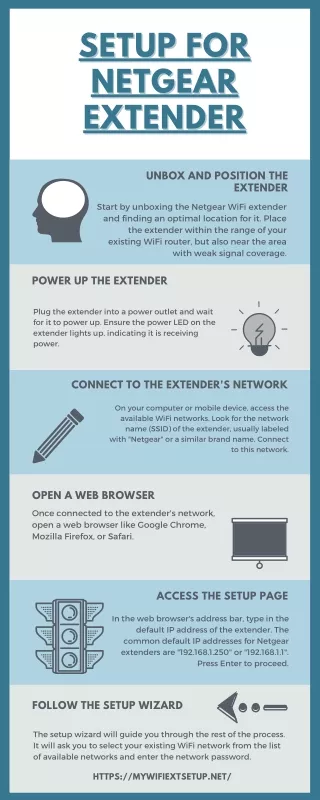
SETUP FOR SETUP FOR NETGEAR NETGEAR EXTENDER EXTENDER UNBOX AND POSITION THE EXTENDER Start by unboxing the Netgear WiFi extender and finding an optimal location for it. Place the extender within the range of your existing WiFi router, but also near the area with weak signal coverage. POWER UP THE EXTENDER Plug the extender into a power outlet and wait for it to power up. Ensure the power LED on the extender lights up, indicating it is receiving power. CONNECT TO THE EXTENDER'S NETWORK On your computer or mobile device, access the available WiFi networks. Look for the network name (SSID) of the extender, usually labeled with "Netgear" or a similar brand name. Connect to this network. OPEN A WEB BROWSER Once connected to the extender's network, open a web browser like Google Chrome, Mozilla Firefox, or Safari. ACCESS THE SETUP PAGE In the web browser's address bar, type in the default IP address of the extender. The common default IP addresses for Netgear extenders are "192.168.1.250" or "192.168.1.1". Press Enter to proceed. FOLLOW THE SETUP WIZARD The setup wizard will guide you through the rest of the process. It will ask you to select your existing WiFi network from the list of available networks and enter the network password. HTTPS://MYWIFIEXTSETUP.NET/