A Step by Step Guide to Develop Temperature Sensor IoT Application Using IBM Bluemix
This blog is about utilizing IBM Bluemix’s readily available environment capabilities for the development of IoT application by integrating it with IBMWatson, Raspberry Pi and virtual device.

A Step by Step Guide to Develop Temperature Sensor IoT Application Using IBM Bluemix
E N D
Presentation Transcript
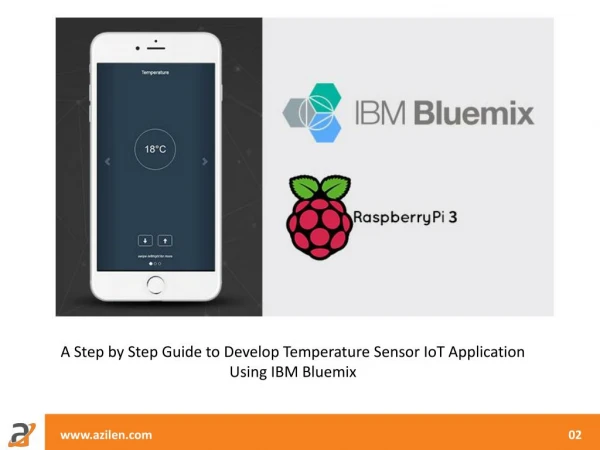
A Step by Step Guide to Develop Temperature Sensor IoT Application Using IBM Bluemix www.azilen.com 02
What is IBM Blue-mix? • IMB Bluemix provides readily available environment for applications, infrastructure and services. Integrated with IBMWatson, it offers possibilities of cognitive services as well. • We have developed an IoT application using IBM Bluemix, Raspberry PI – 3 and a virtual device that sends email notifications to user as and when there is a fluctuation in temperature. • Process flow: Virtual device will be placed at desired location >> If temperature at that location rise more than 21 degree centigrade, the user will simply get notification about it by email. • This blog is a step by step guide to develop temperature sensor IoT application and it includes: • Virtual device & Raspberry PI integration with IBM Blue-mix • Register Virtual Device and analyze the device data • Register Raspberry PI – 3 and analyze the device data • Linking Raspberry PI with our device through IBM Bluemix www.azilen.com 02
Virtual device & Raspberry PI integration with IBM Blue-mix www.azilen.com
You register Raspberry PI – 3 with Blue Mix. Up to scertain extent the process of registering and adding Raspberry PI – 3 will be quite similar to registering and adding virtual device that you have gone through in first phase of this blog. www.azilen.com 02
Step by Step Virtual device & Raspberry PI integration with IBM Blue-mix • Open www.bluemix.net • Create free trail account in blue-mix • Once the registration & email verification process gets completed, you can login in to blue-mix. www.azilen.com 01
4. While you log in for the first time, you need to complete several formalities such as • Provide your organization name / create your organization • Create Space (The spac where you can manage your applications and services) www.azilen.com 02
5. Then, click on ‘Catalog’ and it will display the list of services provided by IBM Blue-mix. www.azilen.com 04
6. You need to follow the path: Services >> Internet of things >> Internet of Things Platform. • 7. Write down the name of service you are trying to create in the field Service Name and click the Create button www.azilen.com 05
8. Once your service has been created, you will be able to see ‘Launch’ button that will navigate you to IoT service dashboard 9. From this IoT service dashboard you can manage your devices, schema, charts etc. We will start with registering our virtual devices and analyzing the data. www.azilen.com 06
Register Virtual Device and analyze the device data www.azilen.com
You register Raspberry PI – 3 with Blue Mix. Up to ascertain extent the process of registering and adding Raspberry PI – 3 will be quite similar to registering and adding virtual device that you have gone through in first phase of this blog. www.azilen.com 06
1. From the dashboard, go to Device and click on Add Device. You need to choose your device type there from a dropdown list. If you have not defined any device, click on Create Device Type button to define it. www.azilen.com 01
2. Once you have defined device type through Create Device Type, you will able to see device type in the drop-down. www.azilen.com 02
3. Then you need to provide Device ID, which can be any friendly name. www.azilen.com 03
4. Once the device is created, IBM will provide your device credentials. Please save it in safer place. www.azilen.com 04
5. Once your device has been added, you’ll see your device in • listing panel. www.azilen.com 05
6. Your device status will be displayed as disconnected. To connect your virtual device to IoT platform, use the url below, which is the IBM virtual simulator. • http://watson-iot-sensor-simulator.mybluemix.net/?cm_sp=dw-bluemix-_-recipes-_-devcenter www.azilen.com 06
7. You need to key in the device credentials here which are provided to you by IBM. www.azilen.com 07
For example: Organization ID : rri9kn Device Type :virtualdevice Device ID : virtualdevice123 Authentication Method : token Authentication Token : eOTP?4zGr-LYo&Rmn8 www.azilen.com 08
8. Now IoT sensor simulator will try to connect with IBM blue-mix (You can see that in device listing panel your device status has been updated as Connected with IBM blue-mix in device listing panel.) www.azilen.com 09
9. Click on device to view json data received by IBM blue-mix from “Recent Events” tab. www.azilen.com 10
10. Now go to Boards >> Create one board. www.azilen.com 11
11. Click on add chart. www.azilen.com 12
12. Click on Donut chart >> Select your device and add data set. www.azilen.com 13
13. Now you’ll able to see donut chart on your dashboard. www.azilen.com 14
14. Now, if you change the temperature in simulator, you will be able to see the changes in charts as well. • 15. If there is requirement to perform any actions based on data analysis of collected data, there is flexibility to define relevant notifications settings in Blue-mix. It means, we can get notifications by mail or by phone in accordance with settings. • 16. For notifications settings, you need to create schema first. For that follow the path: Device >> Manage Schema Tab >> Create Schema www.azilen.com 15
Select details for device and move to next www.azilen.com 16
17. Now, you need to add properties to schema, hence, click on Add property. Please note that, you need to design our schema based on json we are getting from the device. For example : {"d":{"name":"virtualdevice123","temperature":19,"humidity":57,"objectTemp":23}} www.azilen.com 17
18. First we will add “d” as parent property based on our json, and then we will add child properties. • 19. Click on “Finish” to add schema. www.azilen.com 18
20. Now go to Rules >> Create Cloud Rule www.azilen.com 19
21. Click on “Next” to create cloud rule. www.azilen.com 20
22. Click on Edit condition to set cloud condition. Then select Temperature property from drop-down and provide static value as 21. www.azilen.com 21
23. Follow the path: Edit action >> Add action • 24. Click on Activate to add & activate the rule. • 25. Now go to simulator and change device temperature to 21 to get • email alert. www.azilen.com 22
26. Go to Boards >> Rule-Centric Analytics • Alert details will be displayed here in different boards www.azilen.com 23
Register Raspberry PI - 3 and analyze the device data www.azilen.com
Dashboard >> Device >> Add Device >> Create Device Type >> IBM will share credentials for the Raspberry PI – 3 device >> Raspberry PI – 3 device will be displayed in device listing with disconnected status >> Connect the Raspberry PI – 3 device 2. In the list you can see our Raspberry PI device status is disconnected. www.azilen.com 02
3. Setting up Watson IoT on Raspberry PI To setup Watson IoT platform, you need to download Watson IoT platform installer from IBM’s Github. Run below command in Raspberry PI terminal to download Watson IoT platform installer. curl -LO https://github.com/ibm-messaging/iot-raspberrypi/releases/download/1.0.2.1/iot_1.0-2_armhf.deb 4. Once installer has been downloaded, run below command to install it. sudodpkg -i iot_1.0-2_armhf.deb www.azilen.com 03
5. Run below command to verify iot service status. service iot status 6. If you can see message as shown below, you’re good to go. iot.service - LSB: IoT service Loaded: loaded (/etc/init.d/iot) Active: active (running) since Fri 2017-05-26 21:42:09 IST; 51s ago CGroup: /system.slice/iot.service └─2730 /opt/iot/iot /dev/null www.azilen.com 03
Linking Raspberry PI with our device through IBM Bluemix www.azilen.com
1. To link the Raspberry PI with your virtual device in IBM Bluemix, first of all you need to IoT service running in Raspberry pi. Run the below command to stop it. sudoservice iot stop 2. Type the below command to device configuration file. sudonano /etc/iotsample-raspberrypi/device.cfg www.azilen.com 01
3. Copy and paste the device information to device.cfg file. You have received this information while getting registered with IBM Bluemix. #Device configuration file org = p29vg0 type = RaspberryPI3 id = PiBrain auth-method = token auth-token = 3*)DPXWa+NFQl&Zgjs #End of Configuration file www.azilen.com 02
4. The newer version of Raspberry PI has already come up with Node-RED and Watson IoT. If you are using the newer version, run following command to update Raspberry PI sudo apt-get update sudo apt-get dist-upgrade 5. Type below command to start Node-RED. node-red www.azilen.com 02
6. Once your node-red server has started, you can see it from below url. www.azilen.com 03
7. IBM offers set of nodes that we can use potentially. Open below url and copy JSON from it. https://raw.githubusercontent.com/ibm-messaging/iot-device-samples/master/node-red/device-sample/quickstart.json www.azilen.com 04
8. In Node-RED editor go to Menu >> Import >> Clipboard www.azilen.com 05
9. Paste JSON value to import nodes www.azilen.com 06
10. Double click on Event node www.azilen.com 07
11. A pop-up will appear, select “Registered” radio button and click on edit button. www.azilen.com 08
12. Add the data which have configured in our device.cfg file. www.azilen.com 09
13. Click on “Add” button to save the data which help to connect to IBM Bluemix. 14. Click on “Deploy” button to connect your device with IBM. www.azilen.com 10