Download
1 / 3
30 likes | 41 Views
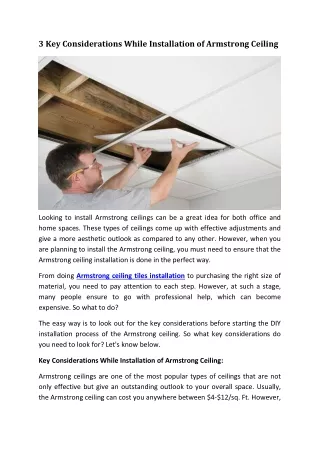
Looking to install Armstrong ceilings can be a great idea for both office and home spaces. These types of ceilings come up with effective adjustments and give a more aesthetic outlook as compared to any other. However, when you are planning to install the Armstrong ceiling, you must need to ensure that the Armstrong ceiling installation is done in the perfect way.<br>The easy way is to look out for the key considerations before starting the DIY installation process of the Armstrong ceiling. So what key considerations do you need to look for? Let's know below.

E N D
3 Key Considerations While Installation of Armstrong Ceiling Looking to install Armstrong ceilings can be a great idea for both office and home spaces. These types of ceilings come up with effective adjustments and give a more aesthetic outlook as compared to any other. However, when you are planning to install the Armstrong ceiling, you must need to ensure that the Armstrong ceiling installation is done in the perfect way. From doing Armstrong ceiling tiles installation to purchasing the right size of material, you need to pay attention to each step. However, at such a stage, many people ensure to go with professional help, which can become expensive. So what to do? The easy way is to look out for the key considerations before starting the DIY installation process of the Armstrong ceiling. So what key considerations do you need to look for? Let's know below. Key Considerations While Installation of Armstrong Ceiling: Armstrong ceilings are one of the most popular types of ceilings that are not only effective but give an outstanding outlook to your overall space. Usually, the Armstrong ceiling can cost you anywhere between $4-$12/sq. Ft. However,
the cost can even decrease more depending on the purchase of your material and the labor cost. However, if you are willing to do it all by yourself, it's a great way to reduce your cost. Installing the Armstrong ceiling doesn't require too much effort. Although you still need to keep key considerations in your mind during Armstrong ceiling installation. So what are they? Today's blog shares the key considerations that you always need to look for during the installation process. So let's get started. 1. Starts with Measuring Your Ceiling Roof: The size of the ceiling roof varies in almost every part of the world. Therefore, when it comes to installing the Armstrong ceiling, you always need to start by measuring your ceiling length, width, and height. This will help you to know the amount of material you require for completing the installation process. Moreover, the measurement also helps you to know how much space your cover ceiling will take and what will be the impact on your overall room outlook. Therefore, this is the key consideration while installing the Armstrong ceiling in your home or office space. 2. Follow The DIY Safety Tips: When it comes to installing the Armstrong ceiling by yourself, you must need to ensure that you follow all the safety tips to avoid any accident. For instance, you must need to ensure that your ladder is stable with no obstruction in your work area. Moreover, you need to install and store the panels in an area where the temperature and humidity meet the specific warranty requirement. This will help you to keep your DIY products for the long run hassle-free. Also, when planning to install the Armstrong ceiling, you need to remove panels from the cartons 24 hours before installing them. This will enable panels to adjust the interior temperature easily. Moreover, you also need to implement the following points. Never apply loose-fill or batt installation to ensure that joist rest directly on panels.
Avoid installing ceiling panels over the existing ceiling that are exposed to radiant-heat coils. Make sure to clean your hands to avoid smudges. Never use quick hang hardware below dry ceilings. A 4 inches' drop is required to install panels when installing the Armstrong ceiling below an existing drywall ceiling. 3. Pay Attention to The Installation Process: There is no need to be in a hurry while installing the Armstrong ceiling. You need to stay calm and go step by step to complete the installation process. First, gather the tools needed for the installation once you have purchased the complete material. Once you start your project, you need to ensure that you determine the panel layout before finalizing it. To make sure that it carries the best appearance, you need to ensure that the border panels are of the same size on both sides of the room. Also, locate the hidden joists to install wire fasteners. You can use a stud finder to locate the joists or tap on the ceiling to hear the solid thud. These are the key considerations that you need to follow while installing of Armstrong ceiling.