Download

1 / 28
280 likes | 304 Views
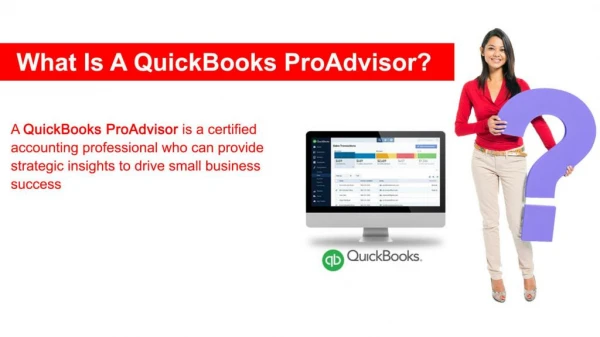
The QuickBooks ProAdvisoru00ae Program was created with the success of accounting professionals in mind. This dynamic program empowers those who seek to expand their offerings and advance their QuickBooksu00ae knowledge. Sign up for free today.<br><br>The ProAdvisor Program is available to any firm or accounting professional who signs up for QuickBooksu00ae Online Accountant (QBOA). If you are confuse you can read our pdf file get more information for QuickBooks proadvisor marketing program. Get more information you can visit here.<br><br>https://www.wizxpert.com/

E N D
QuickBooks Online Payroll Powered by Your setup guide
Welcome toQuickBooks Online Payroll powered by KeyPay Our step-by-step guide will show you how easy it is to manage timesheets, superannuation and payroll alongside your accounts. It’s easy to stay organised when everything’s in QuickBooks Online. 2
Table of Contents Introducing Payroll 4 1. Before you get started 5 2. Setting up 2.1 Set up your company 2.2 Set up your employees 2.3 Add pay history 2.4 Definine pay schedules 2.5 Automated pay runs 2.6 Set up Single Touch Payroll 6 14 3. Superannuation 3.1 Set up superannuation 3.2 Automate superannuation payments 17 4. Running Payroll 4.1 Create pay run 4.2 Finalise the pay run 4.3 Lodging pay events to the ATO 4.4 Lodging update events to the ATO 21 5. The employee portal 22 6. Reports 6.1 Run the Single Touch Payroll report 6.2 Run the Gross to Net report 6.3 Report packs 27 7. Final steps 7.1 Paying your employees 3
Introducing Payroll Packed full of time-saving, stress-reducing features Your one-stop shop Take care of your payroll alongside your business finances and automatically configure your chart of accounts in a seamless experience. There’s no need for additional software. Pain-free superannuation Assess your employees and manage their superannuation. Automatically submit information to a superannuation provider and even trigger Direct Debit payments. Automatic advantages Automatically take care of compliance, STP and superannuation submissions, as well as pay slips. You can even run payroll automatically. Access for employees Save time chasing timesheets, sending out payslips or processing leave requests and expense claims. Individuals can enter their own details through the employee portal and mobile app. 4
1 Before you get started It’s important to get a few details together before you run payroll. You’ll find this information in your own records, from previous payroll providers (if applicable). Make sure you have your: Company information (including ABN). Employee information (including TFN, superannuation and bank details). Pay history (if you have paid anyone in the current year). Bank Details (for setting up ABA files and superannuation payments. 5
2 Setting up 2.1Set up your company 1 Select the Employees tab then select Sign up for KeyPay. 2 Enter your Australian Business Number (ABN), business name and address and then your name and contact details. 3 Under Payroll Details select your standard hours for an ordinary working week, how often you pay your employees and the industry you’re in. 6
2.2Set up your employees 1 Select the Employees tab on the left and click the Add Employee button. 2 Enter your employee’s name, contact details their date of birth and address, then choose if you want this employee to have access to the self-service function. 3 Under Employment Details add their start date, pay information and whether you’d like them to submit time sheets. 4 You’ll then be asked for their bank details and information about their Super Fund. 5 Finally, you’ll need to submit the Tax File declaration for the employee. 7
2.3Add pay history*if you’re moving to payroll mid year If you’re migrating your payroll from another software in the middle of the tax year, you’ll need to set opening balances for leave entitlements and year-to-date payments for your employees. QuickBooks will add these figures to the pay run and work out the PAYG and superannuation on the whole amount. Opening balances are for the current tax year only. To set up the opening balances for an employee, click on their name to open their record and select Opening Balances on the left. 8
On this screen you’ll see seven tabs: Leave Balances – or the amount of holiday remaining. Partial hours are entered as a decimals rather than hours and minutes (e.g: 6.5 hours not 6:30). Earnings – the year-to-date gross values. If you want to use anything other than the default pay category, this will need be added before you enter the opening balances screen. If you want to put the total hours in you can, but this is optional. Deductions – the year-to-date deduction amounts for the financial year specified. Employer Liabilities – the year-to-date ... Super & PAYG – the year-to-date tax withheld and superannuation amounts for the financial year specified. Employment Termination Payments (ETPs) – This only needs to be entered for employees terminated during the specified financial year. STP – This section is only relevant if you have migrated from another payroll software and have copied over the BMS ID to this system. In this instance, you must also copy the employee’s payroll ID created from the previous payroll software to ensure ongoing STP transactions are consolidated. Quick Tip Need to configure or add new leave categories?This article outlines the process. i 9
2.4 Definine pay schedules*if you have more than one You will have been asked to select a pay schedule during the setup process If you’re paying different staff at different frequencies, here’s what you need to do. 1 Go to Payroll Settings and select Pay Schedules. 2 In the top right, click Add, and enter a name for the new pay category. 3 Select a frequency from the drop-down menu. You have the option of adding the employees this schedule applies to here as well as choosing your warnings settings and whether you want to run payroll automatically. Click Save. 4 Next, go to Employees, and select the person that you want to assign the new pay schedule to. 5 Under Pay Run Settings, click Pay Run Defaults. 6 Update the Pay Schedule, then click Save. Quick Tip Employees on any pay category rates can be configured to accrue leave, super and any other type of pay setting? i 10
2.5 Automated pay runs Automating a pay run is a good way to save time for employees who are paid a fixed amount each month (e.g. directors). 1 Go to Payroll Settings > Pay run settings > Pay schedules. Click on the pay schedule you wish to automate, then click the link to configure pay run automation. 2 Enter the start and end date for the automation and click Next. 3 On the Warnings screen, choose the notifications you want to receive. Remember, these queries may stop a payroll running automatically, so it may make sense to switch some off (e.g. work anniversaries). Add contact details if you want notification if the automated pay run fails and click Next. 4 Decide if you want to manually finalise the pay run or do it automatically. You can also choose if you want to automatically export journals. 5 Select a date for publishing your payslips and click Next. 6 Read through the summary and if you’re happy, click Complete. 11
2.6 Set up Single Touch Payroll To access STP settings go to Payroll Settings> ATO Settings. Fill in your: • ABN • Business address • Business contact details and indicate whether you are eligible for FBT under section 57A of the FBTAA 1986. If you’re unsure about either of these, check with ATO. Click Save Save and then select the Electronic Lodgement & STP Electronic Lodgement & STP tab. You’ll then be presented with two options: • Option 1: Log in to your ATO Access Manager using your AUSkey and register the software ID with your account. • Option 2: Contact the ATO on 1300 852 232 and follow the instructions provided to register your software ID. 12
Once you’re completed one of these options click Enable Electronic Lodgement and Enable Single Touch Payroll. 13
3 Superannuation 3.1 Set up superannuation You can easily pay employee super contributions directly to any registered super fund in Australia by taking advantage of the inbuilt integration with the Beam super fund clearing house. To set up, follow these steps: 1 From the business dashboard, go to Payroll Settings > Superannuation.? 2 Click Register with Beam. i If you require additional instructions on setting up superannuation with Beam, click here. 1?
3 Fill in Your Details, Payment Method and Default Fund. 4 Read through and agree to the Terms and Conditions, click Next and then click Backto payroll. i If you require additional instructions on setting up automated superannuationpayments with Beamclick here. 1?
3.2 Automate superannuation payments Once have have registered with Beam you can automate super payments: 1 Select the Reports tab in Payroll, then click Super Payments 2 Click New Super Payment Batch 3 Apply the filters (e.g. Date Range, Pay Schedule) then click Filter and then Create Batch. 4 Click Submit and choose your Payment Method. That’s your superannuation payments taken care of. Now you’re ready to run payroll. i If an employee has more than one super fund you can adjust the allocation % from this page. 1?
4 Running Payroll 4.1 Create pay run 1 From the top right of the dashboard, select New Pay Run. 2 Select the correct Pay Schedule from the drop-down menu. If this is your first pay run you’ll get a prompt asking you to select the date your pay period ends. 3 Enter the date that your employees will be paid. If you need to manually add employees to the pay run you can do that here too. 4 Click Create. 1?
4.2 Finalise the pay run When you’ve created a pay run, you’ll be taken to a screen which shows you the breakdown of the payments. By clicking on the arrow next to an employee’s name, you can see more details, including their rate of pay and leave they’ve taken. You can add notes here too. 1 Before you finalise your payroll, click on the Warnings tab to see any potential issues that need to be resolved. 2 Click on the Actions> Finalise pay run. 3 On the next screen you can submit your STP pay event to ATO, either manually or automatically. 4 You’ll be reminded that you’re about to finalise payroll, with the date that you’re paying your employees and asked to add a date for publishing your pay slips. Click Finalise to export the journal to your QuickBooks Online account. 1?
4.3 Lodging pay events to the ATO When you process a pay run you need to lodge a pay event (STP) to the ATO on or before pay day. Before you lodge your first pay event, you must make sure you’ve correctly set up Single Touch Payroll under the ATO Settings section. Once you’ve set this up, create your pay run as normal, then when you finalise it, you’ll be able to select your pay run lodging options: • Lodge Pay Run now will lodge your pay event to the ATO as soon as you click Finalise. • Lodge Pay Run manually at a later date will suspend the process until you click Lodge Pay Run with ATO run on the Pay Runs screen (under the Actions tab) If you lodge a pay event to the ATO in real time you can go to Reports > Single Touch Payroll to see if your pay event has been lodged successfully or has failed. Quick Tip If you miss a step in the STP setup process you may encounter an error, the following guide will assist in troubleshooting these errors. i ??
4.4 Lodging update events to the ATO If you’re migrating your payroll from another software in the middle of the tax year, you can submit an update event to lodge the year to date information. The process can vary depending on your situation, the following article will cover reach process further. 2?
5 The employee portal Introducing self-setup and the WorkZone mobile app To give an employee access to their employee file on the portal, follow these steps: 1 Go to Payroll Settings > Employee Portal Settings. 2 You will see a screen with a variety of options. Tick the boxes to give the employee the access you want them to have. 3 Choose the level of employee access you want for timesheets so they can: • Not access timesheets so the employee(s) can’t view them in the WorkZone app or the employee portal • View their own timesheets in the employee portal without being able to create or edit them – this feature is not currently available on the WorkZone app • Only edit their own timesheets in the Employee Portal and WorkZone app, without being able to edit kiosk-created timesheet lines • Only edit timesheets created via the kiosk without createing timesheet lines in the Employee Portal -WorkZone timesheets will be disabled when this is set • Create and edit all timesheets created through the Employee Portal, WorkZone and kiosk. 4 Once you have ticked the right option select Access. 5 Select the employees name(s) that you want to apply the previous screen settings to. 6 Once ticked, click Grant Access or Revoke Access for the selected employee(s). 2?
6 Reports 6.1 Run the Single Touch Payroll report The Single Touch Report details all Pay Events and enables you to submit Update Events to the ATO. To see it go to Reports > Single Touch Payroll. The report can filtered by Financial Year and Pay Schedule. Note Unpublished pay runs will not appear in this report. 2?
When the report is generated all the relevant data in summary format: You will see the following headings: • ID: Each pay event/update event has it’s own unique ID. When you click on the ID, you will be directed to another screen that provides more detail of that event. This includes the wages/figures being reported to the ATO, lodgement details and errors (if applicable) as well as the ability to export the data to excel • Event Type: There are only two options here - a Pay Event or an Update Event (descriptions of each event type are detailed below) • Date:The date the event was submitted • Status: This is the date the event was created • Number of Employees: The number of employees included in the event • Pay Schedule: The pay schedule for the event. 2?
What is the difference between a Pay Event & an Update Event? Pay Event: Whenever an employer makes a payment to an employee that is subject to withholding, they are required to lodge a pay event with the ATO on or before the date the payment is made. This includes where the amount of withholding is $0 (for example where an employee’s gross income is below the tax free threshold) or where the employee has no net pay (for example where the employee is repaying an advance or overpayment to the employer, voluntarily foregoing their net pay). A pay event reports employee YTD gross payments, tax withheld, allowances, deductions and superannuation liability information for each individual employee reported. As employee amounts are YTD, once an amount has been reported it should continue to be reported even if it has not changed (for example Employment Termination Payments should continue to be reported in each pay event after they are first reported if the employee is included in any subsequent pay events). Put simply, once a pay run is finalised, a pay event should be lodged with the ATO. Update Event: An update event is used to report changes to employee YTD amounts previously reported to the ATO. Update events are not associated with a pay run and thus can only be created when an employee payment has not been made. Other examples of why an update event would be created include: •Upon transferring YTD payroll data from one payroll system to another to align the latest employer BMS data with the last employee data reported to the ATO. •To assist with EOFY processes, including finalisation and amendments to STP. After 30 June, any changes made to reported employee data for the prior financial year must only be submitted through an update event. 2?
6.2 Run the Gross to Net report This is probably the most commonly used report in payroll. 1 Go to Payroll Settings > Reports > Payroll. 2 Specify your date range, select a pay schedule, location, employee, category and group. Leave as All if no filter is required. 3 Select Run report to see the breakdown for the salary, PAYG withheld, superannuation, and net wages. You can export this to Excel or CSV for customisation. 2?
6.3 Report packs Use payroll’s Report Packs to save time. Select the required reports and a time period and they will be automatically generated on a recurring basis. You can add an email address for them to be automatically sent to. 2?
7 Final steps 7.1 Paying your employees Once you’ve run payroll you’re ready to pay your employee (The payment to your employees happens outside of QuickBooks). You can streamline this process by setting up ABA Files. 2?
Congratulations, you completed the set up process! Want to learn more? quickbooks.com.au/payroll