Download
1 / 30
320 likes | 970 Views
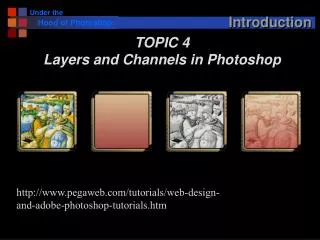
Introduction TOPIC 4 Layers and Channels in Photoshop http://www.pegaweb.com/tutorials/web-design-and-adobe-photoshop-tutorials.htm Layers Cartoon analogy: Layers of acetate Each layer contains a character or other element Image created by layering cels and photographing them

E N D
Introduction TOPIC 4 Layers and Channels in Photoshop http://www.pegaweb.com/tutorials/web-design-and-adobe-photoshop-tutorials.htm
Layers • Cartoon analogy: • Layers of acetate • Each layer contains a character or other element • Image created by layering cels and photographing them • In photoshop, merge or combined layers DEMO 1
Layers • Use layers to: • compositing multiple images, • adding text to an image, or • adding vector graphic shapes • Adjustment layers • holds color or tonal adjustments that affect the layers below it • editing an adjustment layer leaves the underlying pixels unchanged • Add video to an image with a video layer • Layers palette list all • layers, • layer groups, and • layer effects in an image
Layers • Photoshop always creates a locked background layer
Layers • Convert background into a layer • Double click the background layer in the layers palette or • choose Layer > New > Layer From Background • Set layer options • Click OK • Convert a layer into background • Select a layer in the Layers palette. • Choose Layerハ> Newハ> Background From Layer.3 • Any transparent pixels in the layer are converted to the background color, and the layer drops to the bottom of the layer stack.
Layers • Several ways to create a new layer: • Layer>New>Layer from the Main Menu • SHIFT+CTRL (Command) + L • Many operations can be performed on layers • Create new layer • Duplicate a layer • Create a layer from a selection • Rename a layer • Change layer ordering/position • Copy a layer to another document • Link layers
Layers • Many operations can be performed on layers • Create….. • Link layers • Linked layers create sets • Operations affect the set • To Link Layers: • 1.Select the layers or groups in the Layers palette. • 2.Click thelink icon at the bottom of the Layers palette. • 3.To unlink layers. select a linked layer, and click the link icon.
Layers • Many operations can be performed on layers • Create…..Link • Merge layers • Merge creates one layer from two or more layers • Cannot ‘unmerge’ (but can step backwards) • “Flatten Image” merges all layers into one
Fun with Layers • Layer Effects • Added to individual layers • Every object on the layer gets the effect • Objects must be on a layer with a transparent background • Cannot add effects to the background layer • Copy it and it becomes a regular layer • Example: Drop shadows • To clear a layer style
Drop Shadows • Effects are displayed in the layers menu: Double Clicking brings up the blending window Double Clicking brings up the effect window Toggles visibility of the effect on the layers window Toggles visibility of the effect in the image
Step 1: Creating the Mask • Creating the mask from the flame image • Open in photoshop • Go to channels and choose the channel that best isolates the form you want from the background • make a copy of the channel • use levels, other tool to get separation • Leave selected in channels menu
Step 2: Moving the Mask • Moving the mask to the face image • Leave flame image open • Open the face image in photoshop • Postion the two images side by side • Drag mask channel from flame image onto the face image • Channel appears in channel window of face image and flame replaces face image DRAG
Step 3: Edit the Mask • You can close the flame image - we don’t need it any more • Edit the mask using whatever tools you want • Move it around • Scale it • Leave it selected in the channels menu Scaled and Moved
Moving Mask to Layers Channel • Create a layers mask from the channel • Go to the layers window in the face image • Make a copy of the background layer • Go to the Select menu and click on Load Selection • From the popup menu, select the channel • A selection is copied to the original face image
Creating the Layer Mask • Create the layer mask from the selection • Click on the ‘layer mask icon on the layers window • The mask appears in the layers window • Deselect the background layer visibility to see image Mask
Adjusting the Result -1 • Add a white layer between background and masked face • Click on ‘new layer’ • Drag new layer to just above background layer • Select layer and fill with white using paint bucket
Adjusting the Result - 2 • Mask is an image - can be manipulated • Clink on link between mask and image - decouples mask from the image • Click on the mask (lines appear around it) • Now go to the image and select the move tool and move the mask around • e.g position for best effect • Option-click on the mask and the mask image appears • Can manipulate it using all the imaging tools • Can paint on it to control what gets through
Adjusting the Results - 3 • Painting on the mask • Make both image an mask visible • Select a very dark gray foreground color • Select the paintbrush and set mode to ‘overlay’ • Click on the mask to select it • Have fun Demo 2, 3
Group Portrait • Combine Multiple images into a group portrait • Create a single image with two image in the layers palette • Auto-align the layers • Add a layer mask to the top image • Brush onto the layer mask with black (to reveal) the image underneath
Single Image DRAG
Single Image • Drag layer to second image • Change background to layer 0 • Reorder images so layer 0 is on top
Align Images • Select the two new layers, and choose Edit> Auto-Align Layers. • Select Reposition Only, then click OK
After Alignment • Small alignment problem
Creating the Mask • Click on top layer to select it. • Click Add Layer Mask in the Layers palette. • (or Choose Layer> Layer Mask> Reveal All). • Using the brush tool, add to the layer mask by painting over the top layer with black. • Painting with black completely masks out the top layer, while grayscale creates partial transparency to the layer below, and white restores the top layer
Final Result • Some fixing required