Download
1 / 1
0 likes | 28 Views
Discover how to paint a beautiful honeycomb pattern on your wall to stylishly and creatively transform your area. Watch our detailed video lesson for motivation and suggestions!

E N D
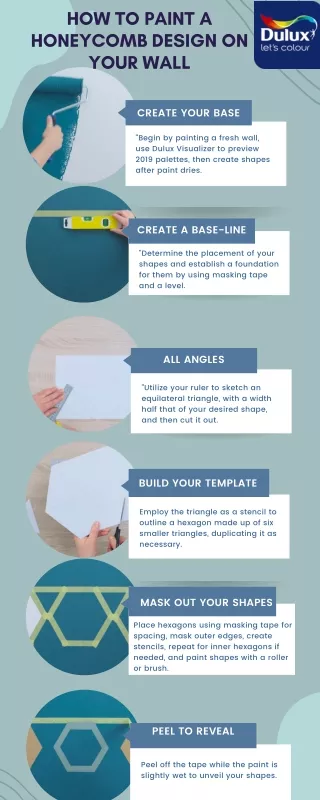
HOW TO PAINT A HONEYCOMB DESIGN ON YOUR WALL CREATE YOUR BASE "Begin by painting a fresh wall, use Dulux Visualizer to preview 2019 palettes, then create shapes after paint dries. CREATE A BASE-LINE "Determine the placement of your shapes and establish a foundation for them by using masking tape and a level. ALL ANGLES "Utilize your ruler to sketch an equilateral triangle, with a width half that of your desired shape, and then cut it out. BUILD YOUR TEMPLATE Employ the triangle as a stencil to outline a hexagon made up of six smaller triangles, duplicating it as necessary. MASK OUT YOUR SHAPES Place hexagons using masking tape for spacing, mask outer edges, create stencils, repeat for inner hexagons if needed, and paint shapes with a roller or brush. PEEL TO REVEAL Peel off the tape while the paint is slightly wet to unveil your shapes.