Download

1 / 35
350 likes | 498 Views
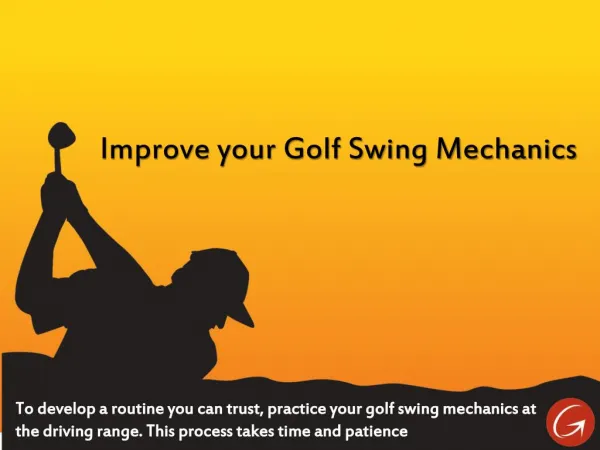
Building Your Swing With Drills. CraftSmith Golf Academy Online Presentation By James F. Smith. Eliminate, Isolate and Concentrate. A drill should eliminate the fear of failure

E N D
Building YourSwing With Drills CraftSmith Golf Academy Online Presentation By James F. Smith
Eliminate, Isolate and Concentrate • A drill should eliminate the fear of failure • Remove the target, the ball, the club and most of the swing, then you can’t fail if there is no standard to measure success against • When you are not worried about where the ball goes, then you can focus your attention • Mimic the true movement while isolating a “mini” (specific) point of performance • Focus your concentration on the specific “feeling” for what you are trying to do right
How Drills Work A drill should be idiot proof The logic of why you doing the drill and what you are learning should be obvious Easier to perform than the normal movement Drills require discipline and must be correctly performed Drills are VERY powerful learning tools … failure to correctly perform a drill replaces one bad habit with another incorrect habit “Dogging” your way through a drill is worse than not doing the drill in the first place
Bow, Squat and Hangle • Bow, Squat and Hangle is a learning and performance technique more than just a drill • This position is the starting position for many drills as well as the normal golf swing • Like the golf swing, all drills must begin from a correct starting position
Execution of Bow, Squat and Hangle • Starting Position • Feet spread shoulder width apart; knees locked • Standing tall, back straight, head erect • Both thumbs are placed on the back shoulder (done with or without a club) • Execution … By-The-Numbers • Bow … from the waist, keeping the back straight and head erect (don’t duck your head into your chest), bow forward from your waist until you feel your heels starting to rise up off the ground
Execution of Bow, Squat and Hangle (cont.) • Execution • Squat … break your knees just enough to regain your balance • Your toe to heel balance must be on the balls of your feet … you will feel the most pressure just behind the big toe joint • Hangle … hang and dangle your arms • Let you arms fall from your shoulder • Don’t “reach” for the ball … your hands will hang inside your necktie • The anterior head of the triceps muscle will be soft and relaxed
Prayer Drill • Purpose • To learn correct use the hands and to initiate the backswing • Starting Position • Standing tall, back straight, head erect, feet spread shoulder width apart • Partially extend your arms (elbows bent about 90°) to your front up to chest level, squeeze your upper arms against the sides of your chest • Place your palms together, fingers extended and joined in the prayer position, then extend/slide your right until the thumb pad is in the palm of the left hand • Bow forward from the waist until your feel your weight balance slightly more towards your toes
Prayer Drill (cont.) • Execution • Push your L hand against the R hand and turn your L hand, L arm and L shoulder as one SOLID unit to initiate the backswing • Keep your nose pointed at a fixed point • Keep your upper arms squeezed against your torso • Keep your hands together, DON’T let them separate … this is a huge point of performance • Push your R hand against the L hand and turn your R hand, R arm and R shoulder as one SOLID unit to initiate the forward swing
Windmill / Hitchhiker Drill • Purpose • To teach correct shoulder rotation in a circle around your nose, develops upper body/torso flexibility • Starting Position • Standing tall, back straight, head erect, feet spread shoulder width apart • Raise your arms to your sides up to shoulder height (like a cross) • Make a fist with each hand and raise both thumbs up into a hitchhiker position
Windmill / Hitchhiker Drill (cont.) • Execution • Point your nose straight ahead and LEAVE IT THERE • Turn your shoulders to the right, then back to the left • Gradually increase your shoulder turn and work your way past a 90° rotation • Step 2 Modification • Raise your arms to your front, grab your thumb and execute in the same manner except noticing that of each side of the turn one elbow MUST fold
Blue on Blue Brick Wall Drill • This drill is a modification of the Windmill /Hitchhiker Drill and the Prayer Drill … with this drill we add a club but still remove the ball and the target so you will focus on learning rather than performance. This is a two step drill Memorize this little poem: Blue on blue, left side back, right side through.
Blue on Blue Brick Wall Drill (cont.) • Starting Position … Step 1 • Standing tall, back straight, head erect (same as for Hitchhiker) • Club is held to your front, slightly lower than shoulder height, thumbs on top of shaft • Shaft points “up and out” at a 45° angle to the arms and the ground
Blue on Blue Brick Wall Drill (cont.) • Execution … Step 1 • Point your nose at an imaginary brick in a wall to your front … fix your nose on this brick and don’t move it (teaches you to look at the ball) • As with the Hitchhiker and Prayer drills, turn your shoulders back and through you nose gradually increasing your range of motion to more than 90° • Key focus … L shoulder back, elbow down; R shoulder through, elbow down
Blue on Blue Brick Wall Drill (cont.) • Starting Position … Step 2 • Similar to the Prayer Drill except with a club … standing tall, back straight, head erect, feet spread shoulder width apart • Bow slightly less than for a normal swing, then squat into a balanced stance • Drop your arms from your shoulders, but deliberately “reach” for the ball, keeping the clubhead 6” off the ground • Squeeze your upper arms against the sides of your chest
Blue on Blue Brick Wall Drill (cont.) • Execution … Step 2 • Again, fix your eyes on a single brick about 6” from the bottom of your imaginary wall • Turn the shoulder back, turn the shoulders through • Gradually increase your range of motion to more than 90° turn • Key thought … L shoulder back, R elbow down, R shoulder through, L elbow down
The Takeaway Drill (1/4 Swing) • Purpose • Teaches correct use of the hands and how to initiate the backswing … this is the same motion for a chip shot • Starting Position • Normal, correct full swing address position • Execution (Like the Prayer Drill) • The club, left arm and shoulder move back (as far as the knee) as a one piece unit • Push the L hand against the shaft while not allowing the wrist to bend or the hands to turn … thumbs on top at all times, movement is then reversed, pushing forward with the R hand • Continuously and slowly “sweep” the club back and forth while keeping the hands and wrists “quiet”
The Elbow Drill (1/2 Swing) • Purposes • To teach correct extension of the takeaway (delayed wrist cock) continuing the correct use of the hands as passive connectors rather than active hitters … thumbs on top into the backswing … this is the same movement as a pitch shot • To teach correct weight transfer onto the back foot • To teach correct correct elbow position to control swing path
The Elbow Drill (1/2 Swing) cont. • Starting Position • Correct, normal, full swing address • Execution • Continue the movement of the Takeaway Drill up to the ½ backswing position (waist high) • The shoulder and left arm are the prime mover of the whole motion, the legs and right side are passive
The Elbow Drill (1/2 Swing) cont. • Execution cont. • Insure that: • The L shoulder has moved back, not down • 75% of your weight transfers onto back foot • The thumbs are still on top of shaft • The shaft points 180° away from target • The toe of the club points to the sky • The wrist have minimum wrist cock • The R elbow folds naturally … it is neither fully extended nor deliberately held close to your body • Slowly and continuously reverse the movement back and forth focusing on each of these checkpoints one at a time
The Shoulder to Shoulder Drill (3/4 Swing) • Purpose • To extend the motion of the Elbow Drill up to the ¾ backswing position • To teach correct weight transfer onto the back foot … to “get behind” the ball • To teach correct elbow position in order to control swing path through the ball • Starting Position • Correct, normal, full swing address
The Shoulder to Shoulder Drill (3/4 Swing) cont. • Execution • Extend the motion of the Takeaway and Elbow Drills up to the ¾ backswing position • The prime mover of the motion is still the L shoulder and arm, the right side is still passive • The same checkpoints of performance for the Elbow Drill continue except …
The Shoulder to Shoulder Drill (3/4 Swing) cont. • Execution • The wrists will break slightly to moderately, depending upon your level of flexibility; the shaft will generally point to the sky indicating there is more swing remaining • The thumbs will still be “on top of the shaft”, the correct elbow will be bent, the front shoulder will have moved behind the ball, your weight will be 90+% on your back foot and your nose will be pointed at the ball • Slowly and continuously move from backswing to forward swing, systematically focusing your attention on your shoulders, elbows, thumbs and nose
The Inverted Hands Drill • Purpose • To increase flexibility and feel for body parts that must be correctly positioned and controlled • Starting Position • Full normal address position • Execution • Reverse your hands, put your top hand on bottom and your bottom hand on top • Slowly and continuously make ½ to ¾ back and forth swings focusing your attention on your nose, shoulders, elbows and thumbs
One Armed Man Drill • Purpose • To develop strength in the prime mover of the backswing and forward swing • Starting Position • Full, normal address position • Remove your bottom hand and softly grasp the wrist of your arm • Execution • Slowly make repeated ¾ length back swings, focusing on correct checkpoints • Reverse your hands and make forward swings
Trading Hands Drill • Purpose • Prevents the wrong hand from “helping”, teaches the correct use of the hand/side that should be the prime mover of the club • To teach the importance of not losing your grip at any point in the swing • To build strength in the prime movers • Starting Position • Full, normal address position • Open the bottom hand and hold it against the thumb of the top hand
Trading Hands Drill cont. • Execution • Make a normal backswing up to the ¾ position • Check for correct execution • Trade hands … close the open hand and open the closed hand • Make a forward swing
Blind Swings Drill Your eyes are the “queen of your senses”. They override your sense of feel and can interfere with learning • Purpose • Teaches “feel” for the correct checkpoints of execution • Starting Position • Full Normal Address • Execution • Close your eyes and make slow, continuous, full swings while systematically isolating your attention to each checkpoint • Make single, full motion, normal speed swings while focusing on a single checkpoint
Stop, Get Some More & Go Drill • Purpose • To ensure a correct backswing has been executed • To isolate the backswing movement from the forward swing movement • To increase an awareness of the transition from back to forward motion • Starting Position • Full, normal address position
Stop, Get Some More & Go Drill cont. • Execution • Make a ¾ backswing in the same manner as you did in the Shoulder to Shoulder Drill • At the ¾ position, STOP and check for errors … correct any errors • GET SOME MORE by cocking your wrist into a full 4/4 backswing • AND GO … initiate the forward swing by reversing the shoulder turn
Short Release Drill • Purpose • Teaches you to use the correct muscles to control the club as it releases into and through the ball • Builds strength and increases awareness of club/shaft position through the release and follow-through areas • Starting Position • From a full normal address position, backswing to a ½ back position and stop
Short Release Drill cont. • Execution • Focus your attention on the R shoulder, R elbow and R thumb … move all these parts as a single unit • From a dead stop at the ½ backswing position, “rip” the club through the forward swing to a high finish • Keep your nose pointed at the ground … “where the ball was”
Staggered Release Drill • Purpose • To teach the feel for a free flowing release of the club through the ball • To eliminate the slice FOREVER • Starting Position • Modified address with feet narrower than normal and rear foot “staggered” back so the toe is even with the heel of the front foot • Separate your hands so the thumb of the bottom hand touches the metal of the shaft • Otherwise, Bow, Squat and Hangle as normal
Staggered Release Release Drill cont. • Execution • Make as slow and as full of a swing as possible … the modified stance and hand position cause you to be aware of every little detail in your swing … weight transfer, balance, elbow and thumb positions • After making a number of dry swings, gradually, work your way out of each modification … first move your hands closer together • When you feel some comfort, add a ball … from this position, you will hook the ball as soon as you have control of your elbows and thumbs
Donuts Drills • Not really a drill but a flexibility, strength and “feel” exercise • Go to your sporting goods store and buy two full circle weight rings (do not buy the split ring kind … aka the AM Bar Assoc. model) • Open the package and actually use them rather than letting them gather dust … use them at home to build strength, flexibility and feel … use them at the golf course to warm up quickly when you don’t have time to hit a few range ball before starting play
Donuts Drills • Put both donuts on the club and do the Prayer, Elbow and Shoulder to Shoulder Drills at the limit of each movement … “pose for a picture” by holding the position until your muscles tell you it is time to move on … don’t over do it … there are no points for killing yourself! • Remove one donut, make a slow, normal backswing up to the top, then “grip it an rip it” • Donuts can be used with the Staggered Release Drill