Download
1 / 10
100 likes | 109 Views
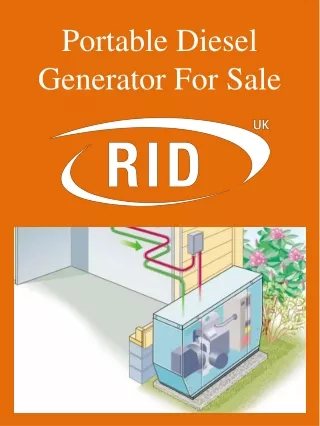
Volvo Penta, Mecc Alte, Deepsea, Sices<br>Volvo Penta's industrial power generation engine range is designed for reliability. These industrial engines offer the prime or backup power needed in critical situations or at job sites that depend on high performance.<br>https://ttttglobal.com/us

E N D
DIESEL ENGINE MAINTENANCE INSTRUCTION FOR GENERATOR HOW TO MAINTAIN THE LUBRICATION SYSTEM OF VOLVO PENTA ENGINE 1) Oil level, checking and topping up- Engine oil, change. - Dipstick is marked signs "Stop" and "Operating", so we can check the oil level both operating and stopping engine. - The oil level is compulsory inside marked area in dipstick. Don't top up oil more than marked area. - Just top up oil when the engine stops. - Just use oil in "Oil Recommendation" on page 90 in Volvo's operator's manual. - Change engine oil after 600 operating hours or twelve months. - Connect the drain hose to the oil drain pump and pump old oil outside and then remove the drain hose and fill up with engine oil. 2) Oil Filter-Pass Filter, Change. 1- Clean the oil filter bracket (2). 2- Remove all oil filters with a suitable oil filter extractor (1).
3- Clean the mating surface of the oil filter bracket. Make sure that no pieces of old oil seal are left behind. Carefully clean round the inside of the protective rim (2) on the oil filter bracket. 4- Put a thin layer of engine oil on the seal rings of the new fuel filters. 5- Install the new oil filters. Tighten the filters ¾–1 turn after they touch. 6- Top up with engine oil, start the engine and let it run for 20-30 seconds. 7- Turn off the engine, check the oil level and top up as required. 8- Check sealing round the oil filters. For more information, visit https://ttttglobal.com/us or email info@ttttglobal.com
HOW TO MAINTAIN THE FUEL SYSTEM OF VOLVO ENGINE 1) Draining condensate, fuel system. 1- Open the drain nipple (1) in the base of the fuel prefilter. 2- Tighten the drain tap (1) when fuel without water starts to run out. 2) Engine Fuel Filter Replacement. 1- Clean round the fuel filter. 2- Remove the filter with a suitable filter remover. Collect any spilled fuel in a collection vessel. 3- Clean the filter mating surface on the filter bracket. 4- Lubricate the seal with diesel fuel and install the new fuel filter. Tighten the fuel filter in accordance with the instructions on the fuel filter. 5- If necessary, vent the fuel system, please refer to 3) Fuel Pre-filter, change. 1- Undo the cable from the water trap sensor. 2- Remove the water trap filter from the filter housing. Collect any spilled fuel in a container. 3- Remove the lower part of the water trap from the filter. 4- Clean the lower part of the water trap with a soft rag. Check that the drain hole in the lower part is not blocked. 5- Install a new seal on the lower part and lubricate the seal with diesel fuel. Re-install the lower part of the filter.
6- Lubricate the seal with diesel fuel. Screw the filter onto the filter bracket by hand until the rubber seal just touches the mating surface. Then tighten a mfurther half turn, no more. 7- Connect the cable to the water trap sensor. 8- If necessary, vent the fuel system, please refer to Bleeding the Fuel System. 4) Fuel System, bleeding 1- Check that there is sufficient fuel in the tank, and that any fuel taps are open. 2- Release the hand pump on the fuel bracket by pushing down and twisting the plastic handle. 3- Vent the fuel system by pumping with the hand pump. Air is vented to the tank via the fuel return pipe. No venting nipples need be opened. 4- Start the engine and allow it to idle fast for about 10 minutes. 5- Perform a leakage and function check. For more information, visit https://ttttglobal.com/us or email info@ttttglobal.com
HOW TO MAINTAIN THE COOLING SYSTEM OF VOLVO GENERATOR ENGINE - Different types of coolant must not be mixed with each other. - Risk of reduced cooling function and performance by clogging and isolation.. - Follow the mixing recommendation on the product. - The coolant should be mixed with distilled, deionized water. For Volvo Penta specified water requirements # NOTICE: Always use “Ready Mixed” coolant if water quality cannot be determined or if it does not fulfill ASTM D4985. Never mix more than 60% concentrated coolant with water. 1) Coolant Level, Checking and Topping up. # NOTICE: - Do not open the coolant filler cap when the engine is hot, except in emergencies as this could cause serious personal injury. Steam or hot fluid could spray out - Only use coolant recommended by Volvo Penta. Fill up with the same type of coolant that is in the system. Different types of coolant must not be mixed with each other - Filling of coolant must be performed with the engine stopped. Fill up slowly, to allow the air to flow out. Check the coolant level daily before start. # Carry out: - TWD16: 1- Open the filler caps (1). 2- Check that the coolant reaches the MAX mark on the sight glass (2). Top up with coolant as required
3- Close the filler caps. - TAD16: 1- Open only the filler cap (1). Do not open the pressure cap (2). 2- Check that the coolant level is between the MIN and MAX marks on the expansion tank (1). Top up with coolant as required 3- Close the filler cap. 2) Filling a completely empty system. - Mix the correct amount of coolant in advance, to ensure that the cooling system is completely filled. Refer to Technical Data, page 91 for the correct coolant volume. - Do not start the engine until the cooling system is completely filled and vented. - If a heating unit is connected to the engine cooling system, the heating control valve should be opened and the installation vented during filling. - Carry out topping up in the cooling system:
1- Kiểm tra xem tất cả drain points đã được đóng lại. 2- TWD16: Open the caps to both the expansion tank (1) and the radiator (2). Fill the expansion tank so that the coolant reaches the MAX mark on the sight glass. Close the filler caps. TAD16 Open only the filler cap (1). Fill the expansion tank so that the coolant level is between the MIN and MAX marks. Close the filler cap. 3- Bleed the system at the bleeding nipple (3). 4- Start the engine when the coolant system completely filled and vented. Open any bleeding nipples a short while after starting, to allow trapped air to escape. 5- Start the engine after approx. one hour and check the coolant level. Top up with coolant as required. 3) Coolant, Draining. - On engines which are to be put in storage, the engine cooling system should not be drained. the coolant contains corrosion inhibiting additives. 1- Stop the engine before draining. 2- TWD16 Open both the pressure caps on the expansion tank (1) and the filler cap to the radiator (2). TAD16 Open the filler cap (1). Do not remove the pressure cap (2).
3- Open all drain points. Drain the coolant from the radiator and engine block, using the drain hose. The drain nipples are situated under the radiator on the right side of the engine block. 4 - Check that all coolant drains out. Deposits may be found inside the drain plug/tap, and need to be cleared away. There is otherwise a risk that the coolant could remain and cause frost damage. Check whether the installation has any further taps or plugs at the lowest points of the cooling water pipes. 5- Close any taps and check that the spring-loaded covers on the nipples close completely. Install the rubber plugs and the filler cap(s). 4) Charge Air Cooler, External Cleaning. - Do not use a high pressure power washer. - Remove guards as necessary, to access the radiator. - Clean with water and a mild detergent. Use a soft brush. - Be careful not to damage the radiator vanes. Reinstall removed parts. 5) Cooling System, Cleaning. 1- Empty the cooling system. Refer to Coolant, Draining, page 75. 2- Put a hose into the expansion tank filling hole and flush with clean water, as specified by Volvo Penta– refer to section Water quality in Technical Data, page 91 until the water draining out is completely clear.
3- If there should still be some contamination left after flushing for a long time, cleaning can be done with coolant. Otherwise, continue as in item 8 below. 4- Fill the cooling system with 15-20 % mixture of concentrated coolant. Use only Volvo Penta recommended concentrated coolant mixed with clean water. 5- Drain the coolant after 1-2 days of operation. Remove the filler cap and possibly the lower radiator hose to increase the speed of emptying. To prevent suspended material from settling back in the system emptying should be done rapidly, within the space of 10 minutes, when the engine has not been standing still for a long time. 6- Flush the system immediately and thoroughly with clean hot water to prevent dirt from settling in the inner areas. Flush until the water that runs out is completely clean. Make sure that any heater controls are set to full heating during emptying. 7- If contamination should still be left after a long period of flushing, cleanout using Volvo Penta radiator cleaner, followed by finishing-off with Volvo Penta neutralizer. Carefully follow the instructions on the package. Otherwise, continue as in item 8 below. 8- When the cooling system is completely free from contamination, close the drain taps and plugs 9- Fill up with Volvo Penta recommended coolant, following the instructions in the chapters entitled Maintenance, page 72 and Coolant Level, Checking and Topping Up, page 73. 6) Cooling air filter. 6.1) Installation 1- Slide one half of the filter over the fan cover (as in fig.1). 2- Turn the half filter until it is able to hang loosely on the fan cover (see fig. 2).
3- Slide on the other filter half and secure the two halves together with self-affixing velcro tape (as in fig. 3a). 4- Fasten the outer velcro tape around the fan cover guard (as in fig. 3b and 3c). 6.2) Removal and cleaning 1- Remove the cooling filter 2- Brush away any heavy dirt with a soft brush. 3- Rinse the filter with water NOTICE: Do not use gasoline, steam, a high-pressure washer or other cleaning agents. 4- Re-install the filter according to instructions. For more information, visit https://ttttglobal.com/us or email info@ttttglobal.com