VT NDT Question and Answer
E N D
Presentation Transcript
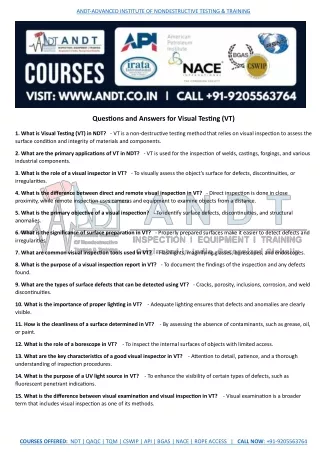
ANDT-ADVANCED INSTITUTE OF NONDESTRUCTIVE TESTING & TRAINING Questions and Answers for Visual Testing (VT) 1. What is Visual Testing (VT) in NDT? - VT is a non-destructive testing method that relies on visual inspection to assess the surface condition and integrity of materials and components. 2. What are the primary applications of VT in NDT? - VT is used for the inspection of welds, castings, forgings, and various industrial components. 3. What is the role of a visual inspector in VT? - To visually assess the object's surface for defects, discontinuities, or irregularities. 4. What is the difference between direct and remote visual inspection in VT? - Direct inspection is done in close proximity, while remote inspection uses cameras and equipment to examine objects from a distance. 5. What is the primary objective of a visual inspection? - To identify surface defects, discontinuities, and structural anomalies. 6. What is the significance of surface preparation in VT? - Properly prepared surfaces make it easier to detect defects and irregularities. 7. What are common visual inspection tools used in VT? - Flashlights, magnifying glasses, borescopes, and endoscopes. 8. What is the purpose of a visual inspection report in VT? - To document the findings of the inspection and any defects found. 9. What are the types of surface defects that can be detected using VT? - Cracks, porosity, inclusions, corrosion, and weld discontinuities. 10. What is the importance of proper lighting in VT? - Adequate lighting ensures that defects and anomalies are clearly visible. 11. How is the cleanliness of a surface determined in VT? - By assessing the absence of contaminants, such as grease, oil, or paint. 12. What is the role of a borescope in VT? - To inspect the internal surfaces of objects with limited access. 13. What are the key characteristics of a good visual inspector in VT? - Attention to detail, patience, and a thorough understanding of inspection procedures. 14. What is the purpose of a UV light source in VT? - To enhance the visibility of certain types of defects, such as fluorescent penetrant indications. 15. What is the difference between visual examination and visual inspection in VT? - Visual examination is a broader term that includes visual inspection as one of its methods. COURSES OFFERED: NDT | QAQC | TQM | CSWIP | API | BGAS | NACE | ROPE ACCESS | CALL NOW: +91-9205563764
ANDT-ADVANCED INSTITUTE OF NONDESTRUCTIVE TESTING & TRAINING 16. What is the role of a template or grid in visual inspection? - To help assess the size and location of defects on the surface. 17. What is the difference between surface condition and surface cleanliness in VT? - Surface condition refers to the physical state of the material, while surface cleanliness pertains to the absence of contaminants. 18. How can a visual inspector assess the depth of a surface crack in VT? - By using techniques like shadow projection or magnification. 19. What is the purpose of a remote-controlled camera system in VT? - To inspect objects in hazardous or hard-to-reach areas. 20. What is the importance of documentation in VT? - Proper documentation provides a historical record of inspections and helps in making informed decisions. 21. What is the role of an inspection checklist in VT? - To ensure that all necessary steps and criteria are followed during an inspection. 22. What is a weld profile gauge, and how is it used in VT? - It is used to measure and assess the geometry and dimensions of welds. 23. What is a pinhole detector, and where is it commonly used in VT? - A pinhole detector is used to identify small holes or breaches in coatings, such as tank linings. 24. What is the significance of edge retention in VT? - It helps to maintain the protective coating along the edges of a substrate. 25. What is the purpose of a scribe or dye penetrant in VT? - To mark defects or cracks for further evaluation or repair. 26. What is a holiday in coatings, and how is it detected in VT? - A holiday is a gap or discontinuity in a protective coating, often detected using holiday detectors. 27. What is the role of a pit gauge in VT? - To measure the depth and size of pits or surface corrosion. 28. What is a visual acuity test in VT, and why is it important? - It assesses the visual sharpness and acuity of inspectors to ensure their ability to detect small defects. 29. How does an inspector assess the quality of a weld in VT? - By examining the weld bead, penetration, and the absence of defects like cracks and porosity. 30. What is the purpose of a high-intensity flashlight in VT? - To enhance visibility in low-light or confined spaces. 31. What is a pull-off adhesion tester, and where is it commonly used in VT? - It measures the adhesion strength of coatings to a substrate, often used in corrosion protection. 32. What are typical defects in welds that visual inspectors look for in VT? - Cracks, undercut, overlap, porosity, and incomplete fusion. 33. What is the significance of contrast paint in VT? - It is used to enhance the visibility of surface defects and irregularities. 34. How is surface roughness measured in VT? - Using instruments like profilometers or roughness comparison specimens. 35. What is the purpose of a visual inspection qualification in VT? - To demonstrate an inspector's competence and understanding of inspection procedures. 36. What is a calibrated reference standard in VT, and why is it used? - It is a known defect or anomaly used to calibrate equipment and verify inspector proficiency. COURSES OFFERED: NDT | QAQC | TQM | CSWIP | API | BGAS | NACE | ROPE ACCESS | CALL NOW: +91-9205563764
ANDT-ADVANCED INSTITUTE OF NONDESTRUCTIVE TESTING & TRAINING 37. What is the role of a video recording system in VT? - To capture and document the inspection process for future reference and analysis. 38. What is the procedure for assessing the cleanliness of a surface in VT? - Cleanliness is often assessed visually by ensuring the absence of contaminants or residue. 39. What are the key safety considerations for visual inspectors in VT? - Using appropriate personal protective equipment (PPE) and following safety procedures. 40. How can an inspector verify the quality of a protective coating on a surface? - By checking for uniformity, adhesion, and the absence of holidays or defects. 41. What is the purpose of a surface replica in VT? - It is used to create a mold of the surface, allowing for detailed inspection and analysis. 42. What is the role of an inspection mirror in VT? - To inspect objects or components in confined spaces or areas with limited access. 43. What is the significance of a grit blasting profile in VT? - It ensures that a proper surface profile is created for effective coating adhesion. 44. What is the difference between a wet film thickness gauge and a dry film thickness gauge in VT? - A wet film thickness gauge measures coating thickness while the coating is wet, and a dry film thickness gauge measures it after drying. 45. What are the advantages of using a remote-controlled vehicle for visual inspection in VT? - It can access hard-to- reach areas, improving safety and efficiency. 46. What is the purpose of a bolt thread gage in VT? - To assess the condition and dimensions of threaded components. 47. What is the role of an adhesion test tape in VT? - It is used to assess the adhesion of coatings by applying and removing it from the surface. 48. How is corrosion assessed in visual inspection? - By examining the extent of pitting, scaling, and surface degradation. 49. What is the significance of a compass or inclinometer in VT? - To determine the alignment and angles of components or structures. 50. What is the procedure for visual inspectors to report and document their findings in VT? - Findings are typically recorded in a report that includes photographs, descriptions of defects, location, and recommended actions. COURSES OFFERED: NDT | QAQC | TQM | CSWIP | API | BGAS | NACE | ROPE ACCESS | CALL NOW: +91-9205563764
ANDT-ADVANCED INSTITUTE OF NONDESTRUCTIVE TESTING & TRAINING ? ? Join ANDT- Originated in India, Recognized Globally ? ? ? ? 100% Job Assistance after the course Scan, Pay & Start Course CLICK BELOW TO KNOW ABOUT COURSES ? ? NDT Level II Course | Fee Structure ? ? NDT Level III Course | Fee Structure ? ? CSWIP Course | Fee Structure ? ? API Course | Fee Structure ? ? Rope Access | Fee Structure ? ? NACE & B.GAS | Fee Structure ? ? CLICK HERE & FILL ENQUIRY FORM BANK ACCOUNT TO PAY & START COURSE Account Name: ANDT TRAINING Account Number: 505001010033790 Bank: Union Bank IFSC:UBIN0550507 Email: training@andt.co.in | inspection@andt.co.in | equipment@andt.co.in Save Number +91-9205563764 in Mobile to Watch Vacancies on WhatsApp Status, & WhatsApp Your Name, Qualification&Location COURSES OFFERED: NDT | QAQC | TQM | CSWIP | API | BGAS | NACE | ROPE ACCESS | CALL NOW: +91-9205563764
