Download
1 / 6
60 likes | 69 Views
If you do not know How to Take a Screenshot on Your Mac then you can read the post and know How to Take a Screenshot with simple method. For More Help on Mac Devices Call Mac Helpline Number 1-800u2013385u20137116 get connected with experts.<br>https://clouddrivehelper.com/how-to-take-a-screenshot-on-your-mac/

E N D
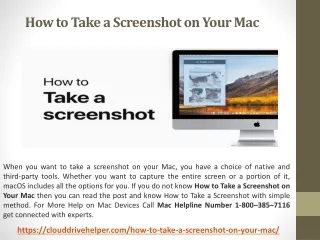
How to Take a Screenshot on Your Mac When you want to take a screenshot on your Mac, you have a choice of native and third-party tools. Whether you want to capture the entire screen or a portion of it, macOS includes all the options for you. If you do not know How to Take a Screenshot on Your Mac then you can read the post and know How to Take a Screenshot with simple method. For More Help on Mac Devices Call Mac Helpline Number 1-800–385–7116 get connected with experts. https://clouddrivehelper.com/how-to-take-a-screenshot-on-your-mac/
How to Take Screenshot on Mac Using Keyboard Shortcuts You can choose from a variety of different keyboard shortcuts to capture your Mac screen. We’ll go through your options one by one, as the best option to use depends on what exactly you want to screenshot. Keep in mind that these screenshot shortcuts work on all Mac models, so you take screenshots this way on a MacBook Pro, MacBook Air, or iMac. If the shortcuts below don’t work, make sure they’re enabled under System Preferences > Keyboard > Shortcuts > Screenshots.) Take a Screenshot of the Entire Screen on Your Mac For this, you have to pressCmd + Shift + 3. When you do this, you will see an image in the lower right corner of your screen. You can click the image to edit it or do nothing and automatically save it to your desktop. The screenshot will be saved as a PNG file. Screen Clip Part of a Mac Window If you want to take a screenshot of a particular part of your Mac screen then you have to press Cmd + Shift + 4. This shortcut turns the cursor into a crosshair; You can then click and drag it to the part of the screen you want to capture. While making a selection, if you want to limit your settings to the X or Y axis, hold down the Shift key. To resize your selection proportionally from the center, hold down the Option key. And if you want to move the selection, hold down the Space key instead.
Changed your mind about screenshots? There is no problem. Press the Esc key to cancel the action. When you are satisfied with the selection, release the mouse. The screenshot is then found on the desktop as a PNG file. As above, if you want to copy the captured image to the clipboard instead of saving it, you’ll need to modify the shortcut a bit. Change the shortcut to Control + Cmd + Shift + 4 to copy what you capture. How to Take Screenshots on Mac with the Built-In App You can film your Mac using the tools already installed in all the latest Mac systems. To access it, open the Screen Capture application from your Utility folder. You can also display applications by using the shortcut Cmd + Shift + 5. If your Mac is running macOS High Sierra or earlier, find the Grab app instead of Screen Capture in the Utility folder. With Screenshot, Apple has simplified the entire screenshot process. The app is useful if you prefer a more point-and-click approach to keyboard shortcuts. The Screenshot toolbar has three buttons that make taking screenshots on macOS quick and painless: Capture Whole Screen, Capture Selected Window, and Capture Selected Part. (The app also has some buttons for screen recording.) For a timely selection, click the Options button on the toolbar. You will find timer options in the menu that appears.
After taking a screenshot using any of the options above, you’ll see a thumbnail preview at the bottom right of the screen. Click on the screenshot to bring up a full-size preview window with tools to edit, annotate and delete it. Here you can add text, sketch, shape, and even your signature. The full-size preview window also has an option to open a screenshot with other Mac apps like Notes, Mail, and Reminders. If you want to disable the thumbnail feature, uncheck the Show floating thumbnail item in the Options menu of the Screenshot toolbar. Now you know how to take a screenshot on your Mac quickly and efficiently. macOS gives you the tools to capture everything you need, whether you need to take a screenshot on a MacBook Pro, iMac or another macOS device.
How to reach us Call us: 1-800–385–7116 Mail us: support@clouddrivehelper.com Website: https://clouddrivehelper.com/ We help in various issues like Email Yahoo, AOL, MAC, ICloud, Google drive, Carbonite and Dropbox, Onedrive, and many more. Visit here or call us at our Toll-Free Number 1-800-385-7116 to get connected with experts.