How To Assemble Pipe Clamps While Cutting_
80 likes | 106 Views
With a streak for writing about industrial tools, the author loves to explore opportunities and make the industry more educated about tools and machinery.

How To Assemble Pipe Clamps While Cutting_
E N D
Presentation Transcript
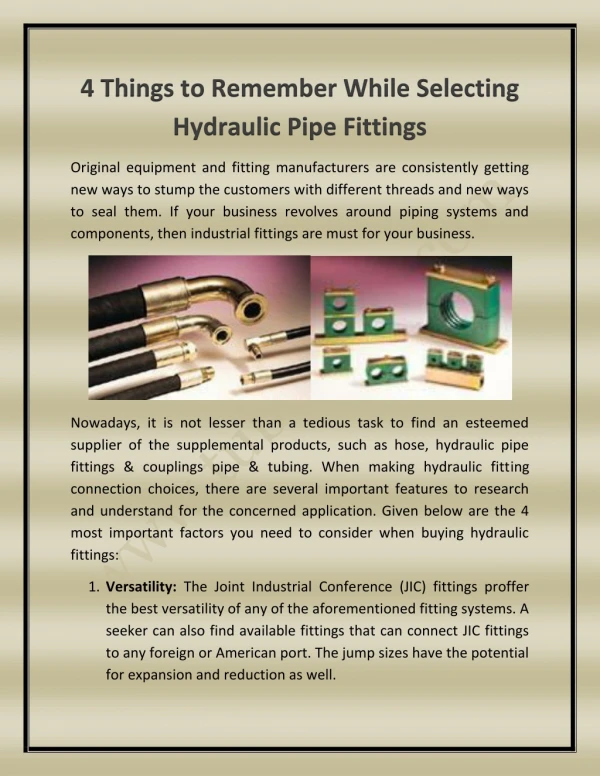
How To Assemble Pipe Clamps While Cutting? Pipe clamps are crucial products for working with pipes. The head and jaws help fix edge to edge and keep the workspace stable at the time of labor. They’re generally available in both grip and non-grip types. The former one i.e., anchor type of clamp doesn't allow any gap between the surface and restricts all the movement for working. On the other hand, a non-grip type of pipe clamp allows some open space for the motion of clipped material in-between the buckles. This post will look upon the assembling procedure of pipe clamps while pipe cutting, which helps to avoid movement while chopping pipes.
Tips for Assembling Pipe Clamps While Pipe Cutting First of all, it is necessary to know that the clamps come with two types of ends - the front end and the back end. The front part is tied with the thread of the pipe and fixed with the help of torque. It is screwed very tightly with the thread to disallow further push of movement. The second part of the clamp is the back part which is allowed to be fixed from the other side of the pipe in the adjacent front-facing side. It is loose to control the fixing of the material inside the buckle. The part can be rotated back and forth to fix the fabric for cutting down into pieces.
Why are Pipe Clamps Essential? Pipes can be cut into perfect sizes if they remain stagnant while slashing. Although it can also be done using a plain old buckle, it won’t give the perfect and smooth cutting edges if they are not fixed properly. Moreover, holding pipes with hands while cutting is not always possible. So, pipe and clamps can help create a tight holding space for any material for the perfect cut. The areas for wielding are adjustable with the help of the clamps.
Steps to assemble the Pipe clamps • Choose the Pipe clamps Keep the front and back pairs of clamps ready with the required diameter pipe. The most common sizes preferred for the clamps are 1/2 and 3/4 inches. • Fix the Feet part Note that the clamps are needed to be steadied by keeping the feet part fixed. Once the bottom part of the clamp is set, movement should not be allowed on the front because it will loosen the thread and may slip if more force is applied while cutting the material. So, prefer to put clamps with feet to cut for primary fixing of the clamps.
Steps to assemble the Pipe clamps • Choose perfect pipe sizes Choose the pipe looking into the hole size of the clamp. Don't go for much smaller sizes with bigger clamps holes. Always prefer the intermediate size, for example, 1/2 or 3/4 inches of steel pipe will be best with clamp lengths of 8 to 10 inches. • Front side clamp fixing guide Fix the front side of the clamp and slide it by facing towards the thread. Putting the pipe clamp in the wrong way may consume a lot more time, and you need to remove the clamp again through the same line.
Steps to assemble the Pipe clamps • Backside clamp fixing guide Now take in the back clamp from another side of the pipe and slide it to the keyhole. Assemble it in the same way as the front clamp but note to fix it so that both the plane parts come adjacent to each other to set the material for pipe cutting. • Screwing the back clamp Now, Screw the clamp and tighten the snug to push forward from the normal force. Don't tighten the back screw very hard as it needs to change. Keep it fixed while cutting different materials. Bottom Line To make sure that you gain smooth cuts, you need to make sure that you use pipe clamps properly. If you’ve read this far, you surely now have a better idea about assembling pipes for cutting. Content Sources :- ABSGroup