Download
1 / 6
60 likes | 72 Views
What_s Behind Quality Results from a Clipping Path Service Provider

E N D
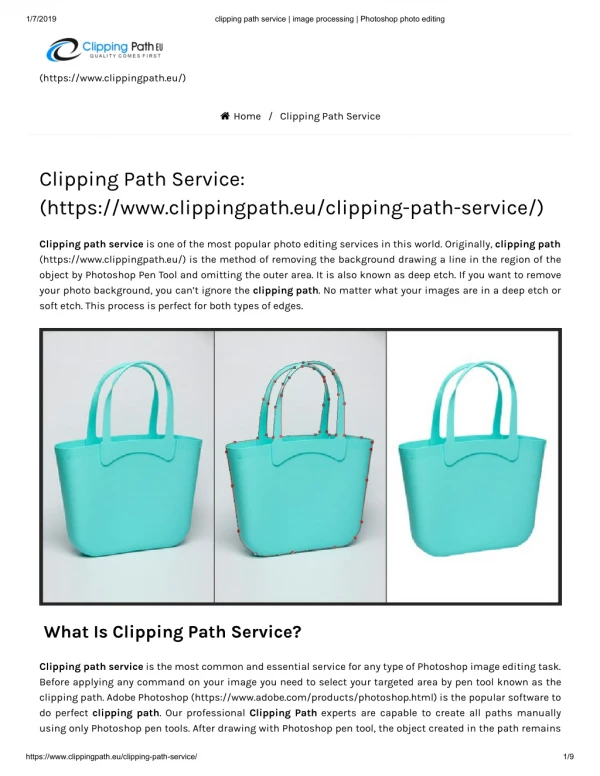
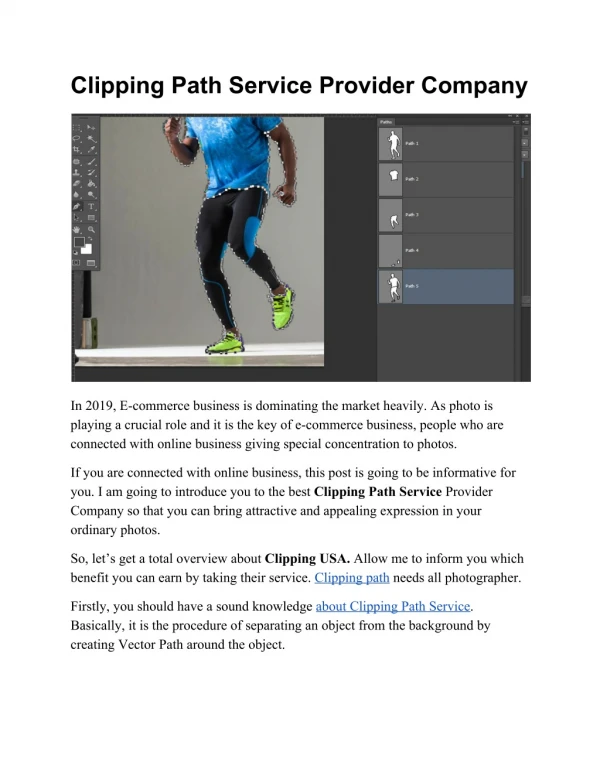
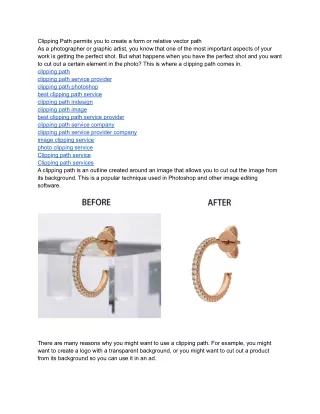
Clipping Path permits you to create a form or relative vector path As a photographer or graphic artist, you know that one of the most important aspects of your work is getting the perfect shot. But what happens when you have the perfect shot and you want to cut out a certain element in the photo? This is where a clipping path comes in. clipping path clipping path service provider clipping path photoshop best clipping path service clipping path indesign clipping path image best clipping path service provider clipping path service company clipping path service provider company image clipping service photo clipping service Clipping path service Clipping path services A clipping path is an outline created around an image that allows you to cut out the image from its background. This is a popular technique used in Photoshop and other image editing software. There are many reasons why you might want to use a clipping path. For example, you might want to create a logo with a transparent background, or you might want to cut out a product from its background so you can use it in an ad.
Whatever the reason, a clipping path can be a helpful tool in your arsenal. But how do you create one? There are a few different ways to create a clipping path. You can use the pen tool in Photoshop, or you can use a vector program like Illustrator. You can also hire a clipping path service provider to do it for you. If you're going to do it yourself, the pen tool is the best way to create a clipping path. It's not difficult to use, but it does take a little practice. If you're not comfortable using the pen tool, you can always hire a clipping path service provider to do it for you. A clipping path service provider will have the experience and knowledge to create a clipping path that's just right for your needs. They'll also be able to provide you with a high-quality result that you can be proud of. When you're looking for a clipping path service provider, be sure to find one that offers a free trial so you can try before you buy. This way, you can be sure that you're getting the best possible value for your money. Also, be sure to read reviews of clipping path service providers before you make your final decision. This way, you can be sure that you're getting the best possible service. Finally, be sure to ask questions. A good clipping path service provider will be happy to answer any questions you have. This way, you can -Reduce a part of a photograph using the Pen Tool A clipping path is an essential tool used in Photoshop to make precise selections within an image, and is commonly used for isolating objects, person, or elements within photographs. The Pen Tool is the most common way to create a clipping path, and is the method we recommend for creating paths with a high degree of accuracy. In this blog post, we'll show you how to use the Pen Tool to create a clipping path around an object in a photograph. The first step is to open your image in Photoshop. Once the image is open, select the Pen Tool from the toolbar on the left side of the screen. Next, zoom in on the area you want to make a selection around. It's important to be as accurate as possible when creating a clipping path, so zooming in will help you to be more precise. Once you're zoomed in, position the Pen Tool over the edge of the object you want to select. Click and hold the mouse button down, then drag the cursor around the edge of the object. As you move the cursor around the edge, you'll see a line being drawn. This line is called a path, and it's what will be used to create the selection.
Continue moving the cursor around the edge of the object until you've gone all the way around. When you get back to the starting point, release the mouse button. Now that you've created the path, it's time to turn it into a selection. To do this, go to the top menu bar and select 'Edit > Define Clipping Path'. A dialog box will appear asking you to name the path. You can name it anything you want, but we recommend something that will help you remember what the path is for. For this example, we'll name it 'hat'. Once you've named the path, click 'OK' and the path will be turned into a selection. You can now use this selection to isolate the object within the image. If you want to learn more about the Pen Tool and how to use it to create selections, we recommend checking out this tutorial from Photoshop Essentials. -What is Clipping Path? The term “clipping path” is used in graphics software applications to refer to a vector path used to clip or mask an image. A clipping path is created in graphics editing software and is composed of a series of points and segments. The software application uses these points and segments to create a closed vector path, or shape, that can be used to clip the image. A clipping path is sometimes also called a “cut out” or a “mask.” It is important to note that a clipping path is not the same thing as a “ selector” in Photoshop. A clipping path is a vector path that is used to clip an image. A “selector” is a raster mask that is used to select pixels in an image. There are many uses for clipping paths. One common use is to remove the background from an image. This can be done manually by using the pen tool to draw a path around the subject of the image, and then using the clipping path to “clip” or remove the background. Another common use for clipping paths is to create masks for images. Masks are used to create isolated areas of an image, and can be used for things like creating drop shadows, or for isolating a particular area of an image. Clipping paths can be created in a number of different ways, depending on the software application being used. In Photoshop, for example, clipping paths can be created using the pen tool, or they can be created using the “Quick Mask” mode. In Illustrator, clipping paths can be created using the pen tool, or they can be created using the “Clipping Path” tool. Creating a clipping path manually can be a very time-consuming process, and it is often difficult to get a perfect result. This is why many people choose to use a clipping path service provider. A clipping path service provider can create a clipping path quickly and easily, and they can often provide a better result than what can be achieved manually.
When choosing a clipping path service provider, it is important to choose one that has a -How to Use the Pen Tool If you're a graphic designer, chances are you're very familiar with the pen tool. For those who aren't, the pen tool is a tool used to create precise paths that can be used to create shapes, graphics, or even text. While the pen tool may seem daunting at first, it's actually quite easy to use once you get the hang of it. In this blog post, we'll show you how to use the pen tool to create a simple shape. To get started, launch your preferred vector editing program. We'll be using Adobe Illustrator for this tutorial, but the steps should be similar in other programs like Inkscape or CorelDRAW. Create a new document and select the pen tool from the toolbar. Alternatively, you can press the letter P on your keyboard to select the pen tool. Now, click somewhere on the canvas to create a new point. Continue clicking to create additional points. As you create each point, you'll see a line connecting it to the previous point. This is called a path. To finish the path, click on the first point you created. You'll see a small circle next to the pen cursor, indicating that the path is complete. Now that you have a basic understanding of how the pen tool works, let's use it to create a simple shape. Start by creating a new document and selecting the pen tool. Click somewhere on the canvas to create the first point of the path. Move the cursor to another location and click again to create the second point. As you move the cursor, you'll see a line connecting the two points. This line is called the path. Continue clicking to create additional points. As you create each point, you'll see the path connecting it to the previous point. To finish the path, click on the first point you created. You'll see a small circle next to the pen cursor, indicating that the path is complete. Now that you have a basic understanding of how the pen tool works, try experimenting with it to create different shapes. With a little practice, you'll be a pro in no time! -Advantages of Clipping Path When it comes to preparing images for print or publishing online, one of the most important steps is making sure the background is removed. This process is called "clipping" and the result is a "clipping path" or "clipping mask." Clipping paths are used to create cutouts of photos or illustrations, removing the background and leaving the subject of the image isolated.
There are many advantages to using clipping paths, especially when working with professional image editing services. Here are just a few of the benefits: Precision: When done manually, clipping paths can be extremely precise, allowing you to remove even the tiniest details from the background of an image. This is essential for product photos and other images where every detail matters. Flexibility: Clipping paths can be created in a variety of shapes, not just simple rectangles or squares. This means you can remove background elements in a way that best highlights the subject of your image. Control: With clipping paths, you have complete control over which elements are removed from the background and which are kept. This is not the case with other background removal methods like "magic wand" tools, which can often result in unwanted areas being removed. Quality: Clipping paths are one of the highest quality background removal methods available. When done correctly, they can create clean, sharp cutouts that look great in print or online. If you're looking for professional image editing services that offer quality clipping path services, look no further than Photolemur. We specialize in background removal and can create beautiful, high-quality clipping paths for any image. Contact us today to learn more. Clipping Way Free Trial | Edit 2 Images Without Any Charge | Clipping Way Contact Us For Any Image Editing Queries | 24/7 Available Get Quote | Receive Estimated Price For Image Editing Clipping Way | Laurel MD | Facebook Clipping Way (@clippingway) / Twitter Clipping Way - YouTube https://www.linkedin.com/company/clipping-way Clipping Way (clippingway) - Profile | Pinterest Clipping Way 15640 Millbrook lane, Laurel, MD 20707 +1(409) 231 0231 Via Portunno no- 97, Inter no- 3, 00054 Fiumicino RM Skype: clippingway
92 Eastern Avenue, Sheffield S2 2GJ +44 744 144 6777