Download
1 / 3
30 likes | 60 Views
<br>MS Forms is enabled for everyone in an organization. But, sometimes a specific person is not able to access the Forms. In this situation, admin should check the license of that person and just enable the feature to his account.<br><br>https://office.com-setup.com/blog/how-to/fix-if-your-account-is-not-enabled-for-microsoft-forms/<br>

E N D
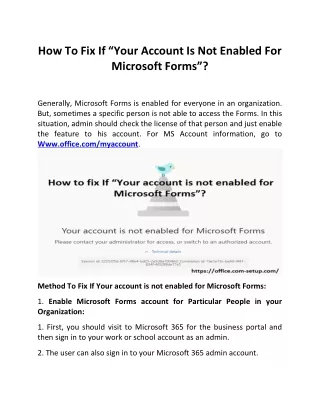
How To Fix If “Your Account Is Not Enabled For Microsoft Forms”? Generally, Microsoft Forms is enabled for everyone in an organization. But, sometimes a specific person is not able to access the Forms. In this situation, admin should check the license of that person and just enable the feature to his account. For MS Account information, go to Www.office.com/myaccount. Method To Fix If Your account is not enabled for Microsoft Forms: 1. Enable Microsoft Forms account for Particular People in your Organization: 1. First, you should visit to Microsoft 365 for the business portal and then sign in to your work or school account as an admin. 2. The user can also sign in to your Microsoft 365 admin account.
3. Then, on Microsoft 365 admin center page, you should expand Users which is on the left side of the screen. 4. After this, you should choose Active Users from the menu. 5. Here, you should visit to the right side and then look for the user. At this point, you should choose the box which is next to the name of the user for whom you wish to enable Microsoft Forms. 6. Now, you should go to the ribbon and then tap on Manage product licenses. 7. Next, you should tap on the Licenses and Apps tab which is in the user account form and then hit on the Apps section. 8. The user should check the box which is next to it, in order to enable Microsoft Forms for particular user. 9. In case, it is enabled, then just uncheck the box and check it again. 2. Enable Microsoft Forms for Everyone: 1. The user should go to Microsoft Azure in your browser and then sign in. 2. After this, you should expand the portal menu which is located on the left side of the pane and then hit on Azure Active Directory. 3. Then again in the left side, you should tap on Enterprise applications. 4. Now, in the right side, you should visit to the Application Type and then hit on it. Here, you will view a drop-down list. 5. Next from the drop-down, you should choose CollabDBService. 6. Here in the search result list, you should select CollabDBService. 7. At this point, from the Application Type drop-down list, you should choose Microsoft Applications.
8. Under the Application Type drop-down list, you should type Microsoft Forms in the search field. 9. Then in the search results list, you should choose Microsoft Forms. 10. For both CollabDBService and Microsoft Applications, you should follow the procedure. 11. The user should visit to the left side and just under Manage, you should tap on Properties. 12. Just on the right side, you should visit to the option – Enabled for users to sign-in? Here, you should move the toggle switch to No. 13. At last, you should press Save button. 3. Deselect and select Microsoft Forms: 1. For this, you should visit to Microsoft Forms and then deselect the box which is next to it. And then press Save changes. 2. After this, you should select it again and then tap on Save changes. 3. At last, wait for some time so that the changes to take place. For more detailed information about Microsoft Account, visit to the site via office.com/myaccount.