Download
1 / 80
820 likes | 1.03k Views
Music Production. Dan Oprea. Begin. Welcome to Music Production Basics. Let’s Get Started. What would you like to do?. Learn About Digital Audio Workstations (DAWs). Learn About Compression. Take Quiz.

E N D
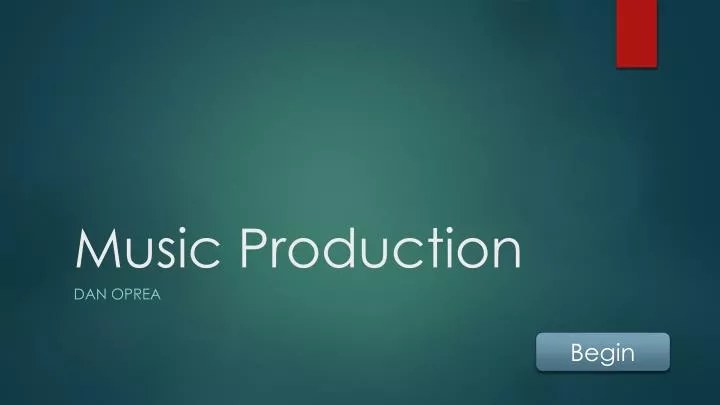
Music Production Dan Oprea Begin
Welcome to Music Production Basics Let’s Get Started
What would you like to do? Learn About Digital Audio Workstations (DAWs) Learn About Compression Take Quiz
Digital Audio Workstations (or DAW for short) are softwares that let you create and record music electronically. The three DAWs we will learn about are: Logic Pro Ableton Live FL Studio Click on a DAW to learn about it then after you are done take the Pre-Quiz Take Pre-Quiz Main Menu
Logic Pro This is Logic Pro X, the latest version of Logic Pro. Logic Pro is only available for Mac. Next
Logic Pro Logic Pro is made up of four components. Logic image Next
Logic Pro First we have the track arrangement. This is where you arrange the parts of your song. Next
Logic Pro Next, we have the explorer. This is a toolbar that lets you search through your samples. Next
Logic Pro Next, we have the mixer. This controls the volume of each track in the track arrangement. Next
Logic Pro Finally, we have the clip editor. This is where you can edit a waveform that’s in the track arrangement. Finish
Ableton Live This is Ableton Live 9, the latest version of Ableton Live. Ableton is available for both Mac and windows DAW. Next
Ableton Live Ableton Live has 4 major components. Next
Ableton Live First, we have the explorer. In Ableton, not only can you search for your samples in the explorer, but you can also search for plugins. Next
Ableton Live Next, we have the track arrangement. This is where you arrange the parts of your songs. Next
Ableton Live Unique to Ableton Live is the session view. This view is a combo of Ableton’s mixer and a layout that allows you to create loops and play them independently. Next
Ableton Live Finally, and also unique to Ableton, is the plugin arrangement viewer. This viewer allows you to drag in and organize plugins that you are using on a track. Finish
FL Studio This is FL Studio 11, the latest version of FL Studio. FL Studio is only available for Windows but there is a Mac version currently in Beta testing. Next
FL Studio FL Studio is made up of 4 components. Next
FL Studio First, we have the explorer. You can use it to browse through both samples and plugins. Next
FL Studio Next, we have the track arrangement. This is where you arrange your song. Next
FL Studio Next, we have the mixer. This is used to control the volume of the tracks in the song. Next
FL Studio Finally, we have the pattern maker, which is unique to FL Studio. You can use the pattern maker to create a basic beat or a midi pattern then drag it into your track arrangement. Finish
Pre-quiz – Question 1 What component of Ableton is circled here? Explorer A Image of ableton with session view circled B Session View C Arrangement View
Pre-quiz – Question 1 Sorry, A is the wrong answer. If you want to go back and review Ableton Click Here or else Try Again
Pre-quiz – Question 1 Sorry, C is the wrong answer. If you want to go back and review Ableton Click Here or else Try Again
Pre-quiz – Question 1 Good Job! B was the right answer! Next Question
Pre-quiz – Question 2 Which DAW is this? Logic Pro A B Ableton Live C FL Studio
Pre-quiz – Question 2 Sorry, B is the wrong answer. If you want to go back and review DAWs Click Here or else Try Again
Pre-quiz – Question 2 Sorry, C is the wrong answer. If you want to go back and review DAWs Click Here or else Try Again
Pre-quiz – Question 2 Good Job! A was the right answer! Next Question
Pre-quiz – Question 3 Which component of FL Studio is circled? Mixer A B Plugin Viewer C Pattern Maker
Pre-quiz – Question 3 Sorry, A is the wrong answer. If you want to go back and review FL Studio Click Here or else Try Again
Pre-quiz – Question 3 Sorry, B is the wrong answer. If you want to go back and review FL Studio Click Here or else Try Again
Pre-quiz – Question 3 Good Job! C was the right answer! Finish
Good Job! Congratulations! You’ve completed the DAW portion of this activity! To go back to the main menu Click Here
Compression In this section you’ll learn about compression including what it is, what it does, and how to use it. Begin
Compression Compression is a plugin that you can use on an audio track to quiet down the loud parts of the audio signal to make it balance better with the rest of the track. Next
Compression Compressors have 7 major components. These components are: Makeup Gain Attack Release Knee Dry/Wet Ratio Threshold Next
Compression Click on a compressor component to learn about it. When you are finished, take the Pre-quiz. NOTE: It is recommended to do ratio last, as it requires knowledge of other components first. Pre-Quiz Main Menu
Threshold Threshold is how loud your audio signal can be before it begins to be compressed. Back
Attack Attack is how fast the compressor will start working after the audio signal goes above the threshold. Back
Release Release is how fast the compressor stops after the audio signal goes below the threshold. Back
Knee Knee sets how hard the compressor will compress the audio. Choose hard knee for a very abrupt compression or soft knee for a gentle compression. Back
Makeup Gain Makeup Gain allows you to boost the compressed audio incase the compression reduces your volume a little more than you would like. Back
Dry/Wet Dry/Wet sets how much of the signal will be compressed. It can range from no compression (0%) to completely compressed (100%). Back
Ratio Ratio sets how much compression is applied. Ratio can be a little hard to comprehend, so we’ll give you an example to help make it easier to grasp. Next
Ratio First, study the waveform on top. Let’s say it peaks at -5db, while the quiet parts play around -13db, so we want to have a more balanced audio signal without drastic peaks. -13db -5db Next
Ratio To do this, we first set the threshold to -15db. Any audio signal above this will be compressed. Next
Ratio Now we have to choose a ratio. Since there is a 10db difference between the peaks and the threshold, we pick something that easily divides 10, in this case we pick a 5:1 Ratio. -5db -5db – (-15db) = 10db Next
Ratio The way the ratio works is we divide the 10db difference by 5, then multiply the result by 1, giving us 2db. We then add this 2db to the -15db threshold giving us a final audio signal that peaks at -13db instead of -5db. That’s how ratio works. 10db/5 = 2db -13db Back