Download

1 / 112
1.13k likes | 1.35k Views
Impressions. Tool Marks. Tool marks are made when a harder object comes in contact with a softer object, leaving marks on it. What is a Tool Mark?. A tool mark is considered to be any impression, cut, scratch , gouge, or abrasion caused by a tool coming into contact with another object.

E N D
Tool Marks Tool marks are made when a harderobject comes in contact with a softer object, leaving marks on it.
What is a Tool Mark? • A tool mark is considered to be any impression, cut, scratch, gouge, or abrasion caused by a tool coming into contact with another object. • For example, if you attempted to pry open a locked window with a screwdriver, the screwdriver would leave a tool mark on the window and windowsill.
Usually Involve Forcible Entry • Most often, tool marks are encountered at burglary scenes that involve forcible entry into a building or safe. • Typically, an indented impression is left on the frame of a door or window as a result of the prying action of a screwdriver or crowbar. • One of the first things an investigator looks for at a suspect’s home is the suspect’s toolbox. • Any tools in the commission o f a crime leave unique scratch marks behind. • These striation marks can be used to match a tool to an object it came into contact with at the crime scene.
A careful examination of these impressions can reveal important class characteristics. . . • That is, the size and shape of the tool. • However, they rarely reveal any significant individual characteristics that could permit the examiner to individualize the mark to a single tool. • Such characteristics, when they do exist, usually take the form of discernible random nicks and breaks that the tool has acquired through wear and use.
Microscopic Irregularities • Just as the machined surfaces of a firearm are impressed with random striations during its manufacture, the edges of a pry bar, chisel, screwdriver, knife, and cutting tool will likewise display a series of microscopic irregularities having the appearance of ridges and valleys.
The Machining Process • Such markings are left as a result of the machining processes used to cut and finish tools. • These markings are called striation marks. • The shape and pattern of such minute imperfections are further modified by damage and wear during the life of the tool. • When a screwdriver is first made, the microscopic imperfections in the blade make it unique. • As it is used, more imperfections are added and the blade becomes more unique.
Imperfections Cause Individuality • Considering the unending variety of patterns that the hills and valleys can assume, it is highly unlikely that any two tools will be identical. • Hence, it is the presence of these minute imperfections that imparts individuality to each tool.
One of the major problems associated with tool mark comparisons is the difficulty in duplicating in the lab the tool mark left at the crime scene.
Striations • If the edge of a tool is scraped against a softer surface, it may cut a series of striated lines that reflect that pattern of the tool’s edge. • Markings left in this manner are compared in the lab through a comparison microscope with test tool marks made from the suspect tool.
Positive Comparisons • Once at the crime lab, a cast is made of the scratch marks left on the window lock from the forced entry. • The result can be a positive comparison, and hence a definitive association of the tool with the evidence mark, when a sufficient quantity of striations match between the evidence and test markings.
Test Marks • A thorough comparison requires the preparation of a series of test marks obtained by applying the suspect tool at various angles and pressures to a soft metal surface (lead is commonly used). • The cast and the lead brick with the scrapings are placed under a comparison microscope to see if the striation marks match. • This approach gives the examiner ample opportunity to duplicate many of the details of the original evidence markings.
Bring the entire object to the crime lab. • Whenever practical, the entire object or part of the object bearing a tool mark should be submitted to the crime lab for examination. • When removal of the tool mark is impractical, the only recourse left, is to photograph the marked area to scale and make a cast of the mark.
Photograph the mark. • However, even under the most optimum conditions, the clarity of many of the tool mark’s minute details will be lost or obscured in a photograph or cast. • Of course, this will reduce the possibility that the criminalist could individualize the mark to a single tool.
Use liquid silicone or dental stone for casting. • Under these circumstances, liquid silicone casting material or dental plaster has been found to be the most satisfactory for reproducing most of the fine details of the mark.
Under no circumstances . . . • Must the crime scene investigator attempt to fit the suspect tool into the tool mark. • Any contact between the tool and the marked surface may alter the mark and will, at the least, raise serious questions about the integrity of the evidence.
In 1932 the infant son of Charles and Ann Lindbergh was kidnapped from his nursery. A handmade wooden ladder used to gain entrance to a second-floor window, a ransom note, some muddy footprints, and a chisel were the only clues left at the crime scene. The Lindbergh Baby Kidnapping
The ransom was paid, but the infant was never returned. • His body was eventually found in the woods near the Lindbergh home. • A suspect, Richard Hauptmann, was eventually arrested. • One of the first things forensic investigator, Arthur Koehler looked for was Richard Hauptmann’s toolbox. . .
In it he found . . . • The hand plane used to construct the homemade ladder. • The imperfections in the plane’s blade caused unique striation marks on any wood it was used on. • Test pieces of wood planed with this tool displayed the same striation marks found on the wooden ladder left at the Lindbergh home. • This proved that Richard Hauptmann’s plane was used to make the ladder used in the kidnapping. • The wood used to make the ladder used in the infants kidnapping was also matched to Richard Hauptmann’s attic.
Packaging • The suspect tool and mark must be packaged in separate containers, with every precaution taken to avoid contact between the tool or mark with another hard surface. • Failure to properly protect the tool or mark from damage could result in the destruction of its individual characteristics.
Furthermore • The investigator must bear in mind that the tool or its impression may contain valuable trace evidence. • Chips of paint adhering to the mark or tool provide perhaps the best example of how the transfer of trace physical evidence can occur as a result of using a tool to gain forcible entry into a building.
Obviously • The presence of trace evidence greatly enhances the evidential value of the tool or its mark and requires that special care be taken in the handling and packaging of the evidence to avoid the loss or destruction of these items.
Impressions can sometimes be discovered in the most unusual places. • A man was found dead in the early morning hours on the side of a road in Binghamton, NY – the responding police officers could tell just from the condition of the body that he had been the victim of a hit and run accident. • There had been a rainstorm that night, so no tire tracks were visible. . .
There was also an absence of any skid marks . . . • Indicating that the driver had not stopped for the pedestrian. • In a search of the crime scene the police noticed a van parked on the side of the road, and on closer inspection, saw that there was a man asleep behind the wheel. . .
The police knocked on the car window and proceeded to question the driver . . . • He explained that he was out driving in the early hours of the morning and was too tired to make it home. • The rain was also a factor in his decision to pull over and rest. • He said that he had almost fallen asleep and lost control of the van.. . .
And when he regained control of the vehicle, he decided to pull over and get some sleep. When the police looked at the other (passenger) side of the van, they were shocked to see the impression of the pedestrian in the side of the van. The driver did not even know that he had struck someone. It had fishtailed in the driving rain . . .
Another Story . . . Of toolmark blunders and the use of forensic impressions. . . .
The steering column of a stolen vehicle had been broken open with some type of tool in order to reach the ignition and disable the steering wheel lock. • A suspect located near the vehicle was found to have a screwdriver in his backpack.
The investigating officer submitted the steering column to the crime lab along with the screwdriver to see if it might have been used in the crime . . . • The steering column was examined, and an area of striated tool marks was found on a small internal part.
A cast of the questioned tool mark was obtained using a dental rubber casting medium so that the tool mark could be examined microscopically – (its tough to put a steering column under a microscope!).
Spacing between teeth in gripping or cutting instruments can play a major role in forensic tool mark examinations.
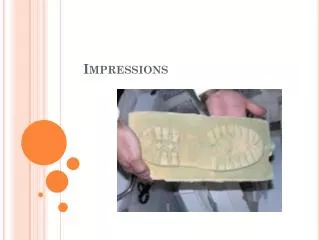
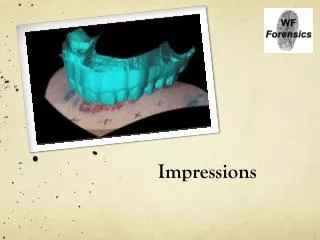
There are three materials commonly used in forensic science to make casts of tool marks and other impressions:
1. Dental Stone A very fine grade of calcium sulfate (known as alginate, gypsum, or Plaster of Paris) that was developed for dentists to take dental impressions. • Dental stone is normally the material of choice when making a cast of bite marks, shoeprints, and tire prints. • Dental stone is prepared by mixing about 2 parts alginate with 1 part water. • The resulting paste is applied to the impression and allowed to set for a few minutes to a few hours depending on size and temperature. • Chromatic dental stone changes color, letting you know when to apply the paste and when it has set. • In snow, a waxy substance called Snow Print Wax is first sprayed over the impression, and then the cast is made.
2. Permlastic3. Polyvinylsiloxan • Are both used to take the impressions of smaller objects like bite marks or scratches left behind on a forced lock. • Both products consist of two tubes (base and a catalyst), which are connected so that equal amounts of each are dispensed. • The two components are mixed, and the paste is applied to the impression. • Both compounds polymerize in about ½ hour to form an elastomeric (rubbery) solid which can then be peeled off the object. • Both take extremely fine impressions.
Footwear can also leave valuable impressions and prints behind at the crime scene. • An electrostatic dust lifter can be used to charge a plastic film that has been placed over a footwear impression. • The charged plastic lifts any dust particles from the impression, and they adhere to the film. • These devices work best in a dry environment. • Work well on paper, wood, carpet, linoleum, and concrete.
If a footprint is in a mud puddle, you may use a turkey baster to drain excess water and use powder to dry the area before casting the print. • Casts must be carefully packaged in a soft resilient material that would prevent breakage, such as cotton or Styrofoam, etc. It is helpful to secure the cast so that it will not move during transport.
There are many Internet sites that provide data for matching footwear prints and tire track impressions to the manufacturer. • http://members.aol.com/varfee/mastssite/index.html
Once the print or impression has been taken, the forensic scientist can develop a great deal of class characteristic evidence. • Measurements of the length and width of footwear can be used to calculate the size of a shoe. • The pattern produced by the sole of the shoe can be used to determine the manufacturer. • A footwear print about 11.5 inches long and about 4.3 inches wide might indicate a size 8 ½ D shoe.
The tread patterns are often specific to different manufacturers. • Many popular sneaker manufacturers actually put the name of the company (Addias, for example) in the tread design or the company symbol (Reebok often includes its two lines with a third intersecting logo).
Once the suspect is apprehended, the forensic investigator is often asked if a positive match can be made between the suspect’s footwear and the print left behind at the crime scene. • All shoes of a certain type are the same when they come off the production line.
However, once a person starts wearing a shoe, random and unique wear patterns begin to appear. • Some people put more pressure on one side of the foot than on the other, and the tread picks up cuts, scrapes, and foreign objects, which can make each footprint unique.
The forensic scientist takes the suspects footwear, inks it on a pad, and presses it against a piece of white paper much as in taking a person’s fingerprint. • The print is compared to any left at the crime scene, and a point-by-point match can be presented to the court just as in the case of a fingerprint