Download

1 / 54
540 likes | 614 Views
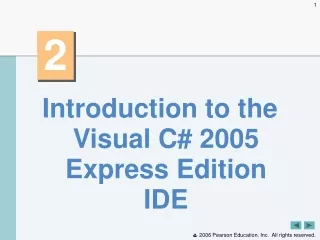
2. Introduction to the Visual C# 2005 Express Edition IDE. Form ever follows function. Louis Henri Sullivan. Seeing is believing. Proverb. Intelligence …is the faculty of making artificial objects, especially tools to make tools. Henri-Louis Bergson. OBJECTIVES.

E N D
2 • Introduction to the Visual C# 2005 Express Edition IDE
Form ever follows function. Louis Henri Sullivan • Seeing is believing. • Proverb • Intelligence …is the faculty of making artificial objects, especially tools to make tools. • Henri-Louis Bergson
OBJECTIVES In this chapter you will learn: • The basics of the Visual Studio Integrated Development Environment (IDE) that assists you in writing, running and debugging your Visual C# programs. • Visual Studio's help features. • Key commands contained in the IDE's menus and toolbars. • The purpose of the various kinds of windows in the Visual Studio 2005 IDE. • What visual programming is and how it simplifies and speeds program development. • To create, compile and execute a simple Visual C# program that displays text and an image using the Visual Studio IDE and the technique of visual programming.
2.1 Introduction • 2.2 Overview of the Visual Studio 2005 IDE • 2.3 Menu Bar and Toolbar • 2.4 Navigating the Visual Studio 2005 IDE • 2.4.1 Solution Explorer • 2.4.2 Toolbox • 2.4.3 Properties Window • 2.5 Using Help • 2.6 Using Visual Programming to Create a Simple Program Displaying Text and an Image • 2.7 Wrap-Up • 2.8 Web Resources
New Project button Start Page tab Start Page links Hidden window Empty Solution Explorer (no projects open) Fig. 2.1 |Start Page in Visual C# 2005 Express Edition.
Selected tab requested Web page Requested Web page (URL in location bar drop-down menu) Fig. 2.2|Displaying a Web page in Visual Studio.
Visual C# Windows Application (selected) Default project name (provided by Visual Studio) Description of selected project template (provided by Visual Studio) Fig. 2.3|New Project dialog.
Solution Explorer window Menu Active tab Tabs Menu bar Properties window Form (Windows application) Fig. 2.4| Design view of the IDE.
Text box (displaying the text Form1), which can be modified. Fig. 2.5|Example of a text box control in the Visual Studio IDE.
OK button Cancel button Fig. 2.6|Examples of buttons in the Visual Studio IDE.
Fig. 2.8|Summary of Visual Studio 2005 IDE menus (Part 1 of 2).
Fig. 2.8|Summary of Visual Studio 2005 IDE menus (Part 2 of 2).
Navigate backwards New project Undo Start Copy Open File Save All a) Add Item Solution Configurations Navigate forwards Redo Save Cut Paste Other Windows b) Solution Platforms Toolbox Window Properties Window Find Solution Explorer Object browser Start Page Find in files Fig. 2.9|Standard toolbar in Visual Studio.
Standard toolbar Build toolbar added to the Standard toolbar Fig. 2.10|Adding the Build toolbar to the IDE.
Down arrow indicates additional commands Toolbar Fig. 2.11|IDE toolbar icon showing additional commands.
Tool tip displayed when the mouse pointer rests over the New Project icon Fig. 2.12|Tool tip demonstration.
Properties window Solution Explorer Toolbox Fig. 2.13|Toolbar icons for three Visual Studio windows.
Tab for hidden window (auto-hide enabled) Fig. 2.14|Auto-hide feature demonstration.
Toolbox title bar Horizontal orientation for pin icon Fig. 2.15|Displaying a hidden window when auto-hide is enabled.
Vertical orientation for pin icon Toolbox “pinned down” Fig. 2.16|Disabling auto-hide (“pinning down” a window).
Show all files icon Toolbar Startup project Fig. 2.17|Solution Explorer with an open project.
Plus box Minus box Fig. 2.18|Solution Explorer showing plus boxes and minus boxes for expanding and collapsing the tree to show or hide project files.
Minus box indicates that the file of folder is expanded (changed from plus box) Fig. 2.19|Solution Explorer expanding the Properties file after clicking its plus box.
Plus boxes indicate that the file or folder is collapsed (changed from minus box) Fig. 2.20|Solution Explorer collapsing all files after clicking any minus boxes.
Group names Controls Fig. 2.21|Toolbox window displaying controls for the Common Controls group.
Component selection drop-down list Toolbar Categorized icon Alphabetical icon Description of the Text property Properties Properties values Fig. 2.22|Properties window displaying the Text property of the Form.
How Do I Selected Item Contents Index Search Dynamic Help window Relevant help articles on the selected item (e.g., the Form) Fig. 2.24|Dynamic Help window.
Help options selected Show Help using: box Show all settings check box Fig. 2.26|Options dialog displaying Help settings.
Label control PictureBox control Fig. 2.27|Simple program executing.
Template types Type in the project name Fig. 2.28|New Project dialog.
Selected Project location Click to set project location Fig. 2.30|Setting the project location in the Project Location dialog.
Name and type of object Selected property Property value Property description Fig. 2.31|Setting the form’s Text property in the Properties window.
Title bar Enabled sizing handles Fig. 2.32|Form with enabled sizing handles.
Current color Down-arrow button Custom palette Light blue Fig. 2.34|Changing the form’s BackColor property.
New background color Fig. 2.35|Form with new BackColor property applied.
Label control Fig. 2.36| Adding a label to the form.
AutoSize property Fig. 2.37|Changing the Label’s AutoSize property to False.
Label centered with updated Text property Sizing handles Fig. 2.38|GUI after the form and Label have been customized.
Ellipsis button Fig. 2.39|Properties window displaying the Label’s properties.
Current font Font sample Fig. 2.40|Font dialog for selecting fonts, styles and sizes.
Text alignment options Middle-center alignment option Fig. 2.41|Centering the Label’s text.
Updated Label PictureBox Fig. 2.42|Inserting and aligning a PictureBox.
Image property value (no image selected) Fig. 2.43|Image property of the PictureBox.
Fig. 2.44|Select Resource dialog to select an image for the PictureBox.
Image file name Fig. 2.45|Select Resource dialog displaying a preview of selected image.