Download

1 / 24
340 likes | 1.05k Views
Drilling, Boring, Reaming, and Tapping. Session 11. To Spot and Drill Work in a Chuck. Spotting ensures drill will start in center of work Spotting tool used to make shallow, V-shaped hole in center of work Provides start for drill to follow

E N D
Drilling, Boring, Reaming, and Tapping Session 11
To Spot and Drill Work in a Chuck • Spotting ensures drill will start in center of work • Spotting tool used to make shallow, V-shaped hole in center of work • Provides start for drill to follow • Most cases hole spotted quickly using center drill • Extreme accuracy use spotting/ chamfering toolbit
Spotting Work in a Chuck • Mount work true in chuck • Set lathe to proper speed for type of material • Check tailstock and make sure in line • Spot hole with center drill or spotting tool
Drilling Work in a Chuck • Mount twist drill in tailstock spindle, drill chuck, or drill holder • Start lathe and set for proper RPM for workpiece and cutting tool • With tailstock spindle handle, move drill tip to end of part. Note reading on tailstock spindle. • Drill to desired depth, applying cutting fluid frequently
Spotting Work in a Chuck • To gage depth of hole, use graduations on tailstock spindle, or measure depth with steel rule • Withdraw drill frequently to break and/or remove chips and measure depth of hole • If hole is through, always ease force on feed as drill breaks through work
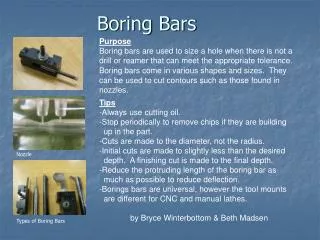
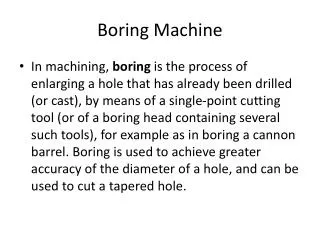
Boring • Operation of enlarging and truing drilled or cored hole with single-point cutting tool • For producing special-diameter holes • May be drilled in lathe, but not accurate • Drill become dull or hit hard spot and wander • Reamer will follow drilled hole and be off • For reamed hole to be straight and true • Drill, bore and then ream
To Bore Work in a Chuck • Mount work in chuck; face, spot, and drill hole approximately .060 in undersize • Select boring bar as large as possible and have it extend beyond holder only enough to clear depth of hole to be bored • Mount boring bar holder in toolpost on left-hand side of compound rest
Boring Work in a Chuck • Set boring toolbit on center • Set lathe to proper speed and select medium feed • Start lathe and bring boring tool into contact with inside diameter of hole • Take light trial cut .250 inch long at right-hand end of work • Stop lathe and measure hole diameter with telescopic gage or inside micrometer
Boring Work in a Chuck • Determine amount of material to be removed from hole • 0.10 to 0.20 in. for a finish cut • Set depth of cut for half amount of metal to be removed • Start lathe and take roughing cut • Slow lathe speed and increase feed if chatter
Boring Work in a Chuck • Stop lathe and bring boring tool out of hole without moving crossfeed handle • Set depth of finish cut and bore hole to size • Fine feed recommended for good surface finish • Check hole diameter
Reaming • Quickly obtain accurately sized hole and produce good surface finish • May be performed after hole drilled and bored
Reaming Work on a Lathe • Mount work in chuck; face, spot, and drill hole to size • Holes under .500 in – drill .015 in. undersize • Holes over .500 in. – drill .030 in. undersize • Holes true – bored .010 in. undersize • Mount reamer in drill chuck or drill holder • Holes .625 in and larger, fasten lathe dog near reamer shank and support tail
Reaming Work on a Lathe • Set lathe to approximately half drilling speed • Bring reamer close to hole and lock tailstock in position • Start lathe, apply cutting fluid to reamer and slowly geed it into drilled or bored hole with tailstock handwheel
Reaming Work on a Lathe • Occasionally remove reamer from hole to clear chips from flutes and apply cutting fluid • Once hole reamed, stop lathe and remove reamer from hole • Caution: Never turn lathe spindle or reamer backward for any reason. This will damage reamer!
Tapping • One method of producing an internal thread on a lathe • Tap aligned by placing point of lathe dead center in chuck end of tap to guide while tap turned by tap wrench • When tapping hole in lathe, lock spindle and turn tap by hand
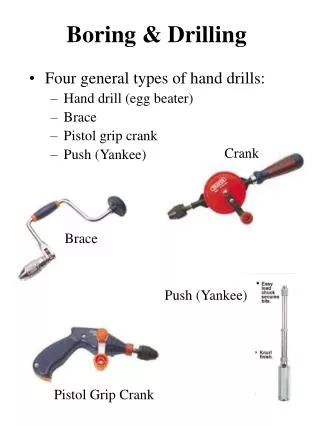
To Tap a Hole in a Lathe • Mount work in chuck; face and center drill • Select proper tap drill for tap to be used • Set lathe to proper speed • Drill with tap drill to required depth • Use cutting fluid if required • Chamfer edge of hole slightly larger than tap diameter
To Tap a Hole in a Lathe • Stop lathe and lock spindle, or put lathe in its lowest speed • Place taper tap in hole and support shank with tailstock center • With suitable wrench, turn tap, keeping dead center snug into shank of tap by turning tailstock handwheel
To Tap a Hole in a Lathe • Apply cutting fluid while tapping hole • Back off tap frequently to break the chip • Remove taper tap and finish tapping hole with plug or bottoming tap
Grinding on a Lathe • May do cylindrical and internal grinding • Toolpost mounted on lathe used for cylindrical and taper grinding • Internal attachment permits grinding of straight and tapered holes • Should be done on lathe only when no other machine available • Work rotates in opposite direction to grinding wheel so lathe must be equipped with reversingswitch
Grinding a Lathe Center • Remove chuck or driveplate from spindle • Mount lathe center in headstock spindle • Set slow spindle speed • Swing compound rest to 30º with centerline • Protect ways of lathe with cloth or canvas and place pan of water below lathe center
Grinding a Lathe Center • Mount toolpost grinder and adjust center of grinding spindle to center height • Mount proper grinding wheel; true and dress • Start lathe, with spindle revolving in reverse • Start grinder and adjust grinding wheel until it sparks lightly against revolving center
Grinding a Lathe Center • Lock carriage in this position • Feed grinding wheel in .001 in. using crossfeed handle • Move grinder along face of center using compound rest feed at a steady pace
Grinding a Lathe Center • Check angle of center using center gage, and adjust compound rest if necessary • Finish-grind center • Polish center with abrasive cloth at high spindle speed if high finish desired