Download

1 / 23
230 likes | 577 Views
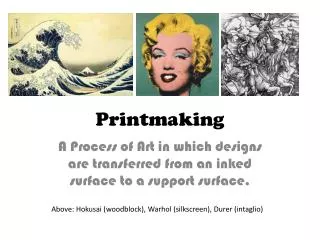
Printmaking. The 6 major types. Types of Printmaking. 1.) Relief 2.) Intaglio 3.) Lithography 4.) Serigraphy 5.) Giclee 6.) Collagraphs. 6.) Serigraphycollagraph:. Collagraph Printmaking Technique

E N D
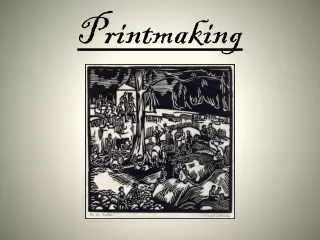
Printmaking The 6 major types
Types of Printmaking 1.) Relief 2.) Intaglio 3.) Lithography 4.) Serigraphy 5.) Giclee 6.) Collagraphs
6.) Serigraphycollagraph: Collagraph Printmaking Technique The Collagraph print is best described as a collage printmaking technique, where the image is composed from a variety of textured materials glued to a substrate and printed either in an intaglio or relief fashion. Collagraphs have been referred to by a variety of names : Collage prints, Collage intaglio, Assemblage prints, and Collagraphs. All in all referring to the same technique. The technique derives its name from the Greek term Collo, meaning glue and the English word graph meaning the activity of drawing; therefore introducing the term collograph. A title which best describes the printmaking technique. A rigid board or material is necessary for the substrate of the Collagraph plate. A wide variety of materials can be used - cardboard, Masonite, wood, aluminum, and plexiglass. All of which are easily accessible through local hardware and art supply stores.
Construction • Materials Used in the Collagraph Plate Construction • The materials used in the construction of the Collagraph plate are easily accessible and inexpensive. A few materials that can be used are : Two and three ply card board, Oak tag and chipboard. 1/8 inch tempered Masonite, 2-ply cardboard, old etching plates (Zinc, Steel, Aluminum, or Copper), plexiglass can all be used as substrates. The material used as a substrate should be determined by how large an edition and plate size desired. A variety of textured and thickness of papers to be used for cutting and composing the image. These maybe heavy weight watercolor papers, tissue paper, wax paper, mylar, acetate and paper doilies. All textures of cloth whether silk or burlap can be used.; including novelty fabrics such as lace, cloth tape, and embroidery fabrics. Other materials are carborundum, soft wire, string, tin foil, sand paper, plastic wrap, metal washers, window screening, rubber gaskets, bottle caps (must be flattened prior to use). All the materials that are needed for the construction of a Collagraph are accessible and can be found in local junk shops, hardware stores, craft and fabric stores.
Conventional art supplies can also be incorporated and used to aid in the construction of the Collagraph plates. These are Gesso, Acrylic medium, Modeling paste, and Elmer's glue. These materials serve two purposes - one they can be used as drawing material, but secondly they serve as adhesives for the materials.
Construction of the Collagraph Plate • The assembling procedure of the Collagraph plate is dictated by those methods most comfortable to the artist. If they are used to working in a free form and intuitive manner, than they will have no hesitation with assembling the materials listed in constructing their plate. If they are more methodical in their working habits than they will want to plan out the image in advance and begin its construction in that manner. Very often it is difficult to pre-determine the how each material will take ink and print. Therefore it is best to keep in mind that with this technique flexablility is the key. It is recommended that prior to executing a Collagraph plate, that a practice plate be prepared utilizing a variety of materials, objects, and approaches to fully understand how each element will print. This will give you a better understanding of the full potential of the medium
1. • First decide on the substrate to be used and cut it to the proper size and shape for the Collagraph. If you are using cardboard, metal, or plexiglass make sure you bevel the edges of the plates. This will avoid damaging both the printing blankets and paper during printing.
2. • Cut or tear the materials to be used in the Collagraph to their desired shape and size. You are not limited to the texture and shapes of the found materials. Linear marks can be achieved with the aid of a razor blade, x-acto knife,6 penny nail, or etching needle . Using any of these tools score or cut a line in to the substrate this activity will make a mark which will hold ink. A gestural mark may be achieved by drawing through a semi-dry coat of acrylic gesso with the aid of a pencil.
3. • Take the substrate Masonite or cardboard and begin adhering a variety of materials to it with the aid of Elmer's glue or gesso. Coat the surface of the plate with an even film of glue where the materials are to be adhered. Also apply an even glue film to the back of the material to be adhered.
4. • Place the desired material on to the surface of the plate, make sure it is secured with no edges or areas lifted. If the material is difficult to manage, use weights to hold it down.
5. • Once the construction of the plate is complete. Apply a thin & even coat of acrylic medium, gesso, or water based shellac to the entire plate surface, including the back with a soft bristled or foam brush. Sealing the front and the back of the plate strengthens it and protects it from damage during clean up after printing..
6. • Allow the plate to dry thoroughly. This may take any where from an hour to the entire day. Once the plate is thoroughly dry it is ready for printing.
Printing the Collagraph Plate The Collagraph plate can be printed in either an intaglio or relief printing fashion. There are a variety of color intaglio printmaking techniques which can be used; expanding on the visual vocabulary of the image. These techniques are chiné collé, stencil printing, surface roll or relief color application , Á la Poupée or single plate multi-color and water-soluble monoprint printing techniques.
a. • Apply ink to the plate surface with a small piece of matboard. • Wipe the plate with a piece of tarlatine. Move the tarlatine bundle in a circular fashion around the plate. Leave a minimum of 60 % ink coverage on the plate. Then using either the palm wiping technique or phone book paper continue wiping the plate. The second wiping application will establish highlights, remove and clean ink from unwanted areas of the plate. • Place the plate on the press. • Cover the plate with a piece of dampened paper (NOT TO WET). Then cover the printing paper with a piece of acid free tissue paper and the printing blankets. • Run the plate through the press and Voila! You have your first print. • Repeat steps 7 - 11 for each printed impression to follow. ( Do keep in mind that the burs of the plate is delicate and after a number of printings it will break down. Resulting in the lines becoming lighter. Therefore it is advisable to periodically re-work the lines of the drawing). • Once you are done printing clean the plate with V.O.C (VEGETABLE OIL CLEANER) and store it for another day (Plate Cleaning Instructions).
Warhead by Stefan Barton
The Original Center (Dark) by Stefan Barton
Chess Piece by Stefan Barton
Galleries: • http://www.collagraphs.com/collagraphs/