Download
1 / 10
100 likes | 220 Views
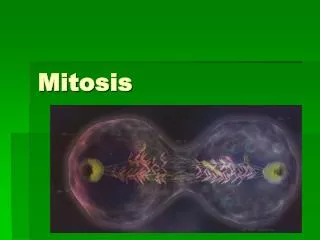
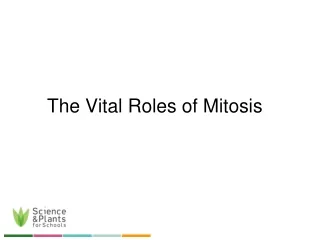
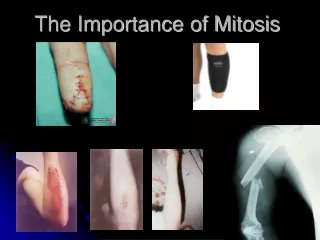
Evaluation of the Normal Mitosis Kit. Presented by Deb Semmler, St. Joseph’s High School (dsemmler@saintjoehigh.com) Kasi Bolden, Washington High School (KBolden@sbcsc.k12.in.us). Root tips Plastic tissue-treating dishes Microscope slides and cover slips

E N D
Evaluation of the Normal Mitosis Kit Presented by Deb Semmler, St. Joseph’s High School (dsemmler@saintjoehigh.com) Kasi Bolden, Washington High School (KBolden@sbcsc.k12.in.us)
Root tips Plastic tissue-treating dishes Microscope slides and cover slips Four bottles of solution A (alcohol and hydrochloric acid) Bottles of solution B (acetic acid, chloroform, alcohol) Tissue-macerating blades Four vials aceto-orcein stain Tissue transfer brushes Student worksheets and guides Fisher Scientific Lab-Aids: Normal Mitosis Kit #S19354$115.00/class of 30
Preparing slides for chromosome observations by using the Lab-Aids Mitosis Kit serves several purposes: • It demonstrates the presence of chromosomes in a cell. • It enables the student to understand that the source of materials on commercially prepared slides is real tissue. • It provides the student with some experience using micro-technique and staining.
Basic Lab Procedure: • Students will empty the root tips into a shallow dish. • The tips will be individually placed in a provided tray to be soaked in solution A (alcohol, hydrochloric acid) for about 5 minutes. • Then they are transferred to the other side of the tray where they will soak in solution B (acetic acid, chloroform, alcohol) for an additional 4-6 minutes. • While waiting, students prepare a slide with a large drop of aceto-orcein stain that the root is added to. A folded piece of paper toweling is placed under the slide. • The soaked root is then added to the stain and minced into tiny pieces using the macerating blade. The root must stain for 10-15 minutes before proceeding. • A cover slip is added and the paper toweling is pressed forcefully on the coverslip without twisting it. • Students will then observe the stained slide under a microscope.
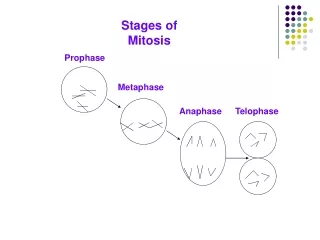
Examining the slide • Students are asked to examine the smear with low power to locate the stained cells and then observe them under high power to study them more closely. • They are to locate and draw as many stages of mitosis as can be found on index cards or drawing paper and arrange the cards in what they think would be a logical order. • They are to attempt to observe the twin chromatids held together by centromeres and attempt to confirm the number of chromosomes for the Allium cepa (onion). • The kit provides a limited worksheet for the students with a few summary questions for them to complete.
Our evaluation The kit • The kit provides ample material for a class of 30 (15 lab groups of 2 student). • The materials are well-marked and the directions are easy to follow. • The worksheets are not very thorough. We would re-work these with spaces provided for student drawings and add quite a few more questions to the summary.
The lab procedure • The directions are easy to understand. • There were a few problems with the execution of the directions, however. • The roots were to be transferred from one place to another using a transfer brush (small paint brush), which proved to be trickier than anticipated. • No directions were given as to how to use the macerating blades (a small strip of metal) nor how finely to mince the root. • We also perceived problems with students keeping the stain off their hands and clothes as they were mincing the roots. • Care should also be taken with pressing down on the coverslip with the paper toweling. This also has the potential for a mess with the stain.
The finished slides • The finished slides were quite a disappointment. It was very hard to locate cells that were undergoing mitosis in the mass of cells smeared on the slide. Students who don’t know what they are looking for would find it impossible. When we were able to locate a few, they weren’t impresses with the visual quality. It would be extremely difficult to try to draw and analyze these, let alone count the chromosomes. • We made several attempts at varying the directions to try for a different result to no avail. The group also attempted the procedure and came to the same conclusions.
Final Conclusions • If the purpose for purchasing the kit was to make slides for mitosis phase identification, buying prepared slides would have been a better use of the money. • If the purpose for purchasing the kit was to give the students experience with making stained slides, there are easier, less expensive ways to demonstrate proper staining techniques.
Additional Comments • I will be adding another lab that may be of interest to you as a follow up to an initial lab on mitosis phase identification. • Once students can identify all the phases of mitosis from a prepared slide, this ‘Time for Mitosis’ lab is great for reinforcing that knowledge as well as tying in the idea that mitosis is only a small part of a cell life cycle. • An added advantage is that this lab not only gives them some experience with circle graphing but it drives them crazy. Deb Semmler