Download
1 / 128
1.29k likes | 1.49k Views
Edline and GradeQuick Training for Techs. Welcome! Please Sign In. 5 minutes Housekeeping Items. 90 minutes GradeQuick Training. Agenda – Tech Training. 55 minutes Edline Training. 60 minutes Superuser Training. 15 minutes Break.

E N D
Edline and GradeQuick Training for Techs Welcome! Please Sign In.
5 minutes Housekeeping Items 90 minutes GradeQuick Training Agenda – Tech Training 55 minutes Edline Training 60 minutes Superuser Training 15 minutes Break 15 minutes Questions & Answers
Demonstrate GradeQuick Features Demonstrate Edline Features Respond to Questions & Concerns Incorporate Hands-on Practice Inservice Objectives
Desired Outcomes Participants will understand the basic management of users in Edline Participants will be comfortable modifying school Web pages within Edline Participants will become familiar with the GradeQuick interface.
Web Based Reports Edline Interface Why GradeQuick?
1 5 Overview and Basics Documents and Folders 2 6 3 4 Table of Contents Activating Accounts Creating a School Page News and Calendar Managing Users
Parent Activation Codes Created Student Activation Codes Created Class Web Pages Set up Before You Begin Teacher Activation Codes & Gradebooks created for each class • From SIS based on school enrollment • Parent access/view determined by student schedule • From Student Information System (SIS) • Each class has a separate page • Web template set up in advance • From SIS based on school enrollment • Student access/view determined by schedule • From SIS based on teacher rosters • Rosters automatically uploaded
My Contents Specific to whomever is logged in. My File Locker is a TEMPORARY storage location for documents useful for the classes of this teacher. Old Class Materials will appear 2nd semester. It is a storage location for materials deleted when class schedules are updated by the District. Private Reports are reports that are specific to whomever is logged in. A parent or student will see reports posted by the teacher. Combined Calendar is a view of the calendar with all School events combined with all Class events.
Public Area Image and text descriptions of your choosing. My Other Groupsis User Specific. It will list other groups to which the user belongs: Sports, Clubs, or other school organizations. Command Center Allows you to: Access your GradeQuick Gradebooks. Get GradeQuick Plugin – a software “bridge” to your gradebooks. This is a “one time” per COMPUTER requirement. GradeQuick Web Help gets online help for your gradebook program. Manage School – Here you can set properties and permissions for the school or district and its members, add a picture and description to the home page, and manage users. Manage Account allows you to update your email address, and security question. Manage Users – This is where you come when you need to create, modify, or delete users in your school, and to print or download their activation codes. Change Password allows you to change your Edline password. Manage Design – Here you can easily edit your Edline site with your school's logo and colors to enhance your school's Web presence.
Contents Contains folders and documents created by the teacher with availability to students and parents at the teacher’s discretion. It is preferred it be populated with folders used to store information intended for students and parents (i.e., Class Syllabus, Homework Answers for Parents, Assignments, Progress Reports, Rubrics for assignments). Links Hyperlinks, created by the teacher for users, to recommended web sites or documents of interest. CalendarEach group in your school (class, club, sport, etc.) can have its own home page. In this home page is a calendar that shows what's happening in that group. This is the Calendar Page for this group. News Class News is editable by the class teacher.
School/Class Pages Nothing on the left side of the class page is editable. My Contents,My Classes*, My Other Groups, Command Center are all created by the system information, permissions granted, and options chosen. *Class names may be edited through Manage Class The Public Area,News, Calendar, Contents, Links are all areas that can be populated and customized by the teacher.
Welcome to Edline Before using either Edline or GradeQuick, your account must be activated. The District has created authorization codes for all users. Contact your school Edline Manager to receive your authorization code. Once your account has been created, logging in is as simple as entering you Screen Name and Password. While setting up your account it is VERY important to select a security question, answer it and include your email address.
Activating an Account DO NOT bookmark or you may get Server Busy! In your web browser type: www.edline.net
Activate Your Account You should have your access code. If not ask one of the trainers. Refer to Page 5 - 7 of the Brevard Teachers Guide
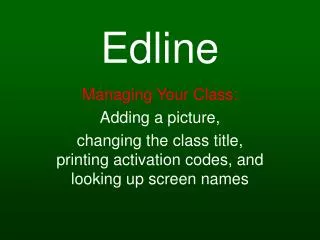
Let’s Create a School Page When you first log on, your school page will look very similar to this. Populating the various areas takes a little thought and a about an hour of work.
The Public Area on the School Home Page The Public Area can be customized by the user. The schoolhouse image is the default image by Edline. It can be replaced but NOT deleted. Any time the custom picture is removed this image will return. While editable, Teachers should NEVER modify the class number. Teachers default picture is a stack of books
Replacing the School Page Image Image <314 pixels wide<75 Kb This is a picture and video of what the teacher would see Instead of Manage Class, techs would see Manage School Refer to Page 12 of the Brevard Teachers Guide
Adding School Description Text This is a picture and video of what the teacher would see Instead of Manage Class, techs would see Manage School Refer to Page 11 of the Brevard Teachers Guide
Practice Replace the School Page Image and School Description Refer to Page 11-12 of the Brevard Teachers Guide
Creating a News Item This is a picture and video of what the teacher would see Refer to Page 13 of the Brevard Teachers Guide
Entering a News Item that: • Also Shows on the Calendar • Applies to My Social Studies Class as well This is a picture and video of what the teacher would see Refer to Page 13 - 15 of the Brevard Teachers Guide
Practice Create at least 2 News Items: One stand alone and one on the Calendar Refer to Page 13 - 15 of the Brevard Teachers Guide
Add 2 Events to the Class Calendar This is a picture and video of what the teacher would see Refer to Page 16 - 19 of the Brevard Teachers Guide
Student View Student View of a Class page
Guest View Guest View of a School page
Practice Create 2 Calendar Events Refer to Page 16 - 19 of the Brevard Teachers Guide
Create Links This is a picture and video of what the teacher would see Refer to Page 20 – 22 of the Brevard Teachers Guide
Practice Create at least 2 Links Refer to Page 20 – 22 of the Brevard Teachers Guide
Creating Folders for the Contents Box This is a picture and video of what the teacher would see Refer to Page 23 of the Brevard Teachers Guide
Creating Documents for the Contents Box This is a picture and video of what the teacher would see Refer to Page 23 of the Brevard Teachers Guide
Creating Documents for a Folder in the Contents Box This is a picture and video of what the teacher would see Refer to Page 24 – 29 of the Brevard Teachers Guide
Practice Create at least 2 Folders and 2 Documents. Put 1 document in a folder. Refer to Page 23-27 of the Brevard Teachers Guide
School Super User • School GradeQuick/Edline Administrator • Manage School, Manage Users • 2 per school: 1 main, 1 backup • GQ/Edline implementation • How are you going to train all your teachers? • Grade Processing (9 week) **Training dates • Must be available until grades have been uploaded free of errors • (Printing of Interims can be delegated) • Daily sign-in to Site Reporter (Installation information at the next Tech training)
Training Dates Planned • Techs Interim – 9/13 • Elementary techs- report cards • 10/4 • 10/5 • Secondary Techs 9-week grades – 10/15 • Site Reporter • 8/29 • 9/6 • 9/18 • 9/27
You are Logged In and this is the School Home page. Now, click on Manage Users
User List TypeT-teacher A-administrator P-parent S-student E-staff member StatusA-activated U-unused Namefrom SIS System IDfrom SIS Screen NameUser created (must be unique to Edline)
Edit button Edit allows you to: • Change user info (screen name, password), • Change security info • Modify permissions • Get activation codes • Link other users • Add/delete users
View button View allows you to: • Gives you that person’s view • View teacher class pages • View reports
Gradebooks button Gradebooks allows you to: • View teacher gradebooks • Read Only • Edit mode (Verify teacher is NOT currently GradeQuick or their changes may be lost.) • **If button is not present, teacher has not signed into GradeQuick and opened their gradebooks
Email button Email allows you to: • Email that person
Manage Users View as Users : • Is the same as clicking the View button above. • Check a user box and then click View As Users
Manage Users Send Email : • Allows you to send an email to multiple people • Check the user boxes of those you wish to send an email (or click Select All) and then click Send Email
Manage Users Create New User : • Allows you to create new user • Add a clerk to assist you with changing passwords or looking up lost activation codes
Manage Users Add Parent to Student : • Allows you add a parent to a student • One parent per student is created by default
Manage Users Change Permissions: • Give someone else permissions to do the school edline page • Give someone else permission to change passwords & view activation codes