Download
1 / 19
200 likes | 333 Views
Kid Pix Self Portraits. Marisa Kenney Project Four: June 10, 2009. Objective. The students will use Kid Pix to create a self portrait that will then be used to design their class shirts for the trip to the Washington Zoo. Day One.

E N D
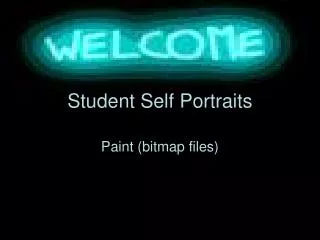
Kid Pix Self Portraits Marisa Kenney Project Four: June 10, 2009
Objective • The students will use Kid Pix to create a self portrait that will then be used to design their class shirts for the trip to the Washington Zoo.
Day One • The teacher will demonstrate how to open Kid Pix and get to the Studio Picker screen.
Teacher will briefly review the projects that are available on the Picker screen. Kid Pix: Is a souped-up drawing program. Wacky TV: Students can watch digital video clips and add special effects with the Electric Mixer. Moopies: Students will use their artistic talents to create their very own animations.
SlideShow: is a multimedia presentation of sights, sounds, and special effects, created by the students. Students can link together as many as 99 “moving vans” loaded with pictures, animation, and digital movies. Digital Puppets: are on screen marionettes that the student controls with keys on their keyboard instead of string. Stampimator: Students create action-packed adventures with animated stamps as actors.
Teacher will model how to open the Kid Pix drawing screen and point out the basics on the screen. Menu Tool Bar Drawing Tools Color Palette Tool Options Tray
The teacher will demonstrate how to create a self portrait using the following tools: Wacky Pencil There are two sets of pencil options. You can draw with either a square-shaped or a circle-shaped pencil. You can also choose the width and pattern for your pencil. Don't forget about color!
Wacky Brush The Wacky Brush allows you to draw spirals, bugs, pyramids, dot to dots, etc. Select the wacky brush and then select the option. Try clicking to paint. Also try clicking and dragging for different effects. Oval Tool The Oval Tool allows you to draw ovals with various patterns. The ovals above show the patterns you can use with the color palette. There are many other patterns that can also be used. Use the arrows next to the option bar to see all the other choices. Use the Shift key to draw perfect circles.
Eraser The Eraser clears what you have drawn. There are two types of erasers. The first works like a regular pencil eraser. Use the first four options (the single squares and circles) to select this eraser. Then click and drag across the area you want erased. The second type of eraser will erase your whole picture with one mouse click.
The Typewriter • Add text to your picture using the Typewriter. When you add text with this tool, you: • Can edit the text without changing your picture • Can select the fonts available on your computer in several different sizes and styles. • Hear the text read out loud. • Move, resize, and reshape your text. • Draw under the text without erasing it. • *This tool will be used to write your first name next to your drawing.
The Undo Guy The Undo Guy erases the last thing you did. Use it when you make a mistake. (Remember to use it immediately after you have made the mistake since it only remembers one thing.) If the Undo Guy doesn't work, try the Eraser Tool. The Line Too When you choose the line tool, you can change the thickness of the line or the pattern of the line. Hold the Shift key down to draw straight lines. The mystery box creates a rainbow effect.
The Rectangle Tool The Rectangle Tool allows you to draw rectangles with various patterns. The rectangles above show the patterns you can use with the color palette. There are many other designs that can also be used. Use the arrows next to the option bar to see all the other choices. Use the Shift key to draw perfect squares.
The Students will use the remainder of the class to practice using the demonstrated tools to create a self portrait. • Students will be given a Kid Pix Tools Cheat Sheet to use for reference. • Students will save final drawing in their personal file.
Day Two • The teacher will quickly review the Kid Pix tools that the students will be using to create their self portraits. • The students will locate their file and begin working. • Teacher will assess final drawing, suggesting corrections if needed. • Students will save final copy to desktop
Evaluation • Teacher observation. • Teacher evaluation of the use of the Kid Pix drawing tools and color palette. • Note: The technology teacher and classroom teacher will work together to upload drawings to a flash drive. The images will then be arranged around the words “St. Mary First Grade 2009”. Final copy will be sent to printer.