Download
1 / 51
4.72k likes | 9.38k Views
Non-Destructive Testing. What is NDT?. Non Destructive Testing is a term used to inspect a part or component in such a way that it will not destroy or make the part unserviceable. . Why do we NDT things?. To ensure the product is safe and fit for flight.

E N D
What is NDT? • Non Destructive Testing is a term used to inspect a part or component in such a way that it will not destroy or make the part unserviceable.
Why do we NDT things? • To ensure the product is safe and fit for flight. • To prevent the possibility of a future fatigue or failure. • To verify that a process has been completed satisfactorily. Ex. Heat Treat, weld, blend, and coatings. • To find the areas that require repair. Ex.Cracks
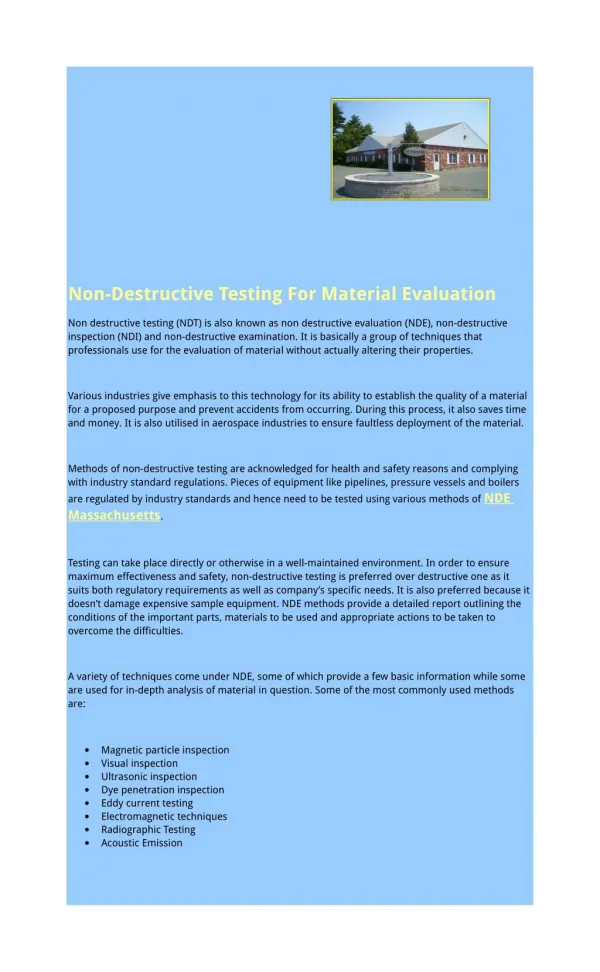
Terms • NDT- Non-Destructive Testing • N.D.I- Non-Destructive Inspection • N.D.E- Non-Destructive Examination • L.P.I- Liquid Penetrant Inspection • F.P.I- Fluorescent Penetrant Inspection • E.C.I- Eddy Current Inspection • M.P.I- Magnetic Particle Inspection • Ultrasonic
Types Of NDT or NDI • Visual • LPI • MPI • Ultrasonic • Eddy Current • Radiography
Visual Inspection • A visual inspection is the most common form of inspection. To visually inspect a part, or examine it by eye using proper lighting and, if necessary, magnifying glasses, borescopes, backlighting, mirrors, or other aides.
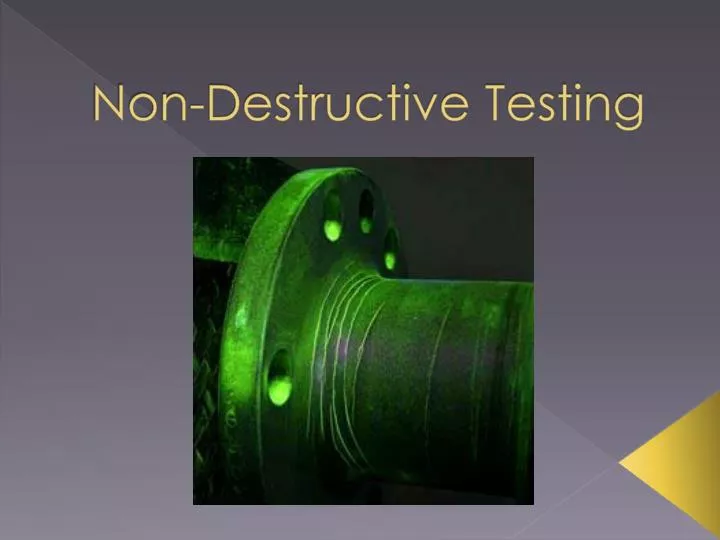
Liquid Penetrant Inspection • Performed by applying a liquid dye that penetrates the surface openings in a part by means of capillary action. The dye is drawn to the surface by the application of a developer. Under black light the dye then glows highlighting the defect. This method can be used to detect small cracks or discontinuities not visible to the naked eye. This type of NDI can be performed on virtually any accessible part.
Water molecules like to stick together in a little tube. Or in the case for L.P.I or F.P.I little pits, cracks or other defects. Just like that small little fibers or tubes in paper towel the water molecules will stick to each other and seem to defy gravity.
Inspection Booth Water Wash Dwell Screen Developer Penetrant Dip
Magnetic Particle Inspection • MPI is carried out by inducing a magnetic field in a part. A dry powder or liquid mix of iron oxide particles is then applied to the part. Magnetic poles formed by the defects attract the iron oxide particles, which can be seen under a black light. This method can indicate faults near the surface in ferro-magnetic parts.
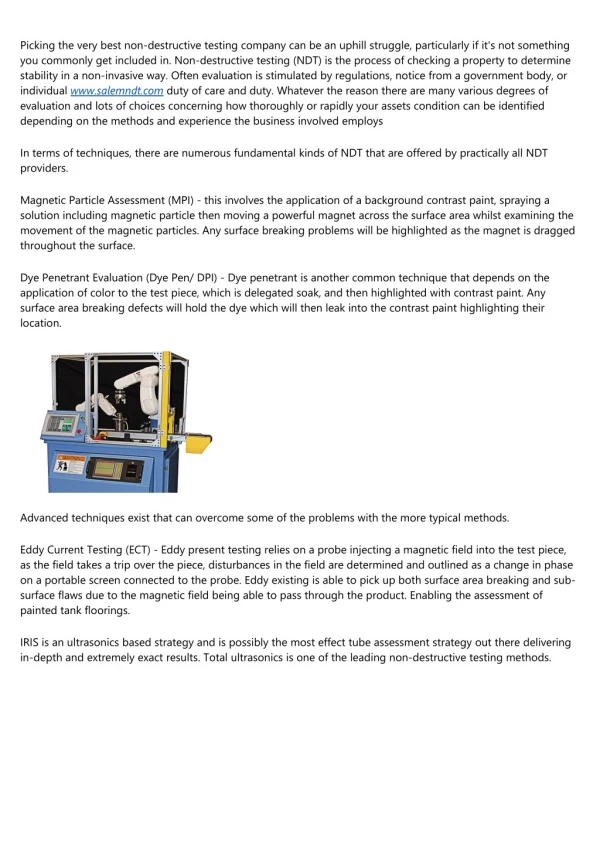
Ultrasonic Inspection • Ultrasonic Inspection is carried out by inducing an ultrasound into a part through a contacting probe, then analyzing the sound after it has travelled through the part. The sound waves are displayed on a oscilloscope and interpreted by the operator. This type of inspection is best used for detecting subsurface defects, but can also detect surface defects.
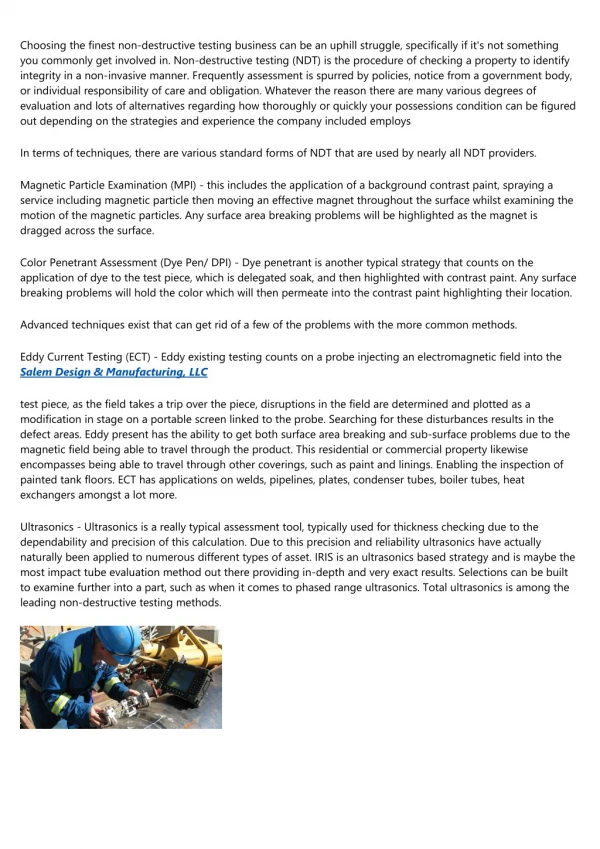
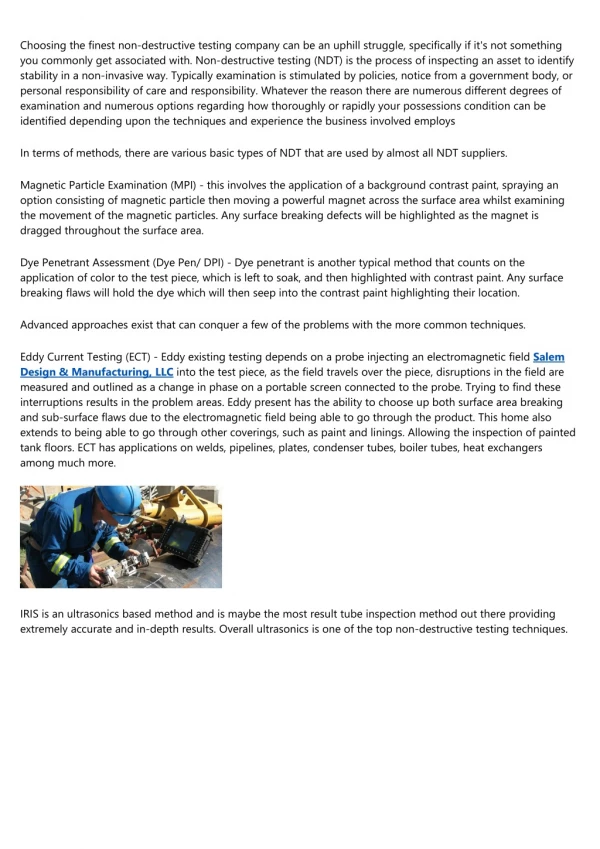
Eddy Current Inspection • ECI is carried out by inducing an eddy current into a part, and then electronically observing any variations in the induced field. ECI can be used on most metals, as long as they conduct electricity. It can be used to determine separations in metals and the condition of their heat-treatment.
Radiography • Radiographic, or X-ray, inspection can be performed on all types of parts and materials that are unsuitable for other inspection methods. An X-ray or gamma ray is passed through the part and exposes a radiographic film. The processed film indicates structural details, including any defects.
Types of L.P.I • Visible Dye • Fluorescent Dye
Visible Dye • Visible dye, or colour contrast, penetrants use a dye to make it easier to see a flaw under white light.
Fluorescent Dye • There are two types of fluorescent penetrant. 1-Water-Washable 2-Post-Emulsification
Water-Washable • Water-Washable penetrants use an emulsifier, which is a material applied over the penetrant film that allows it to be washed off with water.
Post-Emulsification • Post-Emulsification penetrant contains no emulsifier, so before it can be washed off with water, an emulsifier must be applied.
How does L.P.I work? • A liquid is put on the surface of a material, the liquid then penetrates the defects in the surface by capillary action. We then clean away the excess penetrant leaving behind only the penetrant that has been absorbed into the defect. We then use a developer that draws out the penetrant highlighting the area of a defect.
Steps of Penetrant Inspection 1-Cleaning 2-Penetrant Application 3-Dwell Time 4-Removal of Excess Penetrant (Emulsifier Solution, Water Wash, Solvent Remove) 5-Developer Application 6-Visual Inspection
1- Cleaning • Before L.P.I parts must be clean and free of foreign materials. This includes moisture, paint, varnish or other coatings as well as dirt, grease, and corrosion. Always clean the part IAW the OEM manuals or documentation.
2- Penetrant Application • Penetrant is applied by brushing, spraying or flowing the penetrant over the part or by dipping the part into penetrant. • Don’t let the penetrant dry on the part. To prevent drying, you may need to reapply the penetrant periodically.
3- Dwell Time • After the part is coated, the penetrant must be allowed to soak or dwell on the part. The dwell time depends on the type of penetrant used, the type of discontinuity that you are inspecting for, and the material from which the part is constructed.
4- Removal of Excess Penetrant • After sufficient dwell time, excess penetrant must be removed. The method of removal depends on the type of penetrant used.
5- Developer Application • The next step is to apply a wet or dry type of developer. Using a dry developer, usually in powder form, results in improved sensitivity for critical inspection of fine flaws. • If you use a wet developer, dry the part afterward.
6- Inspection • Inspection is carried out under ultraviolet light (black light) or white light, depending on the pentertant used.