Download
1 / 53
530 likes | 653 Views
OPUS Projects Manager Training. Step 1 : Creating a Project. ngs.opus.projects@noaa.gov. I’ve advanced to the second slide and I’m reading it. Can you read this slide and hear me as I read it? Can you access the web ? Is everyone comfortable?

E N D
OPUS Projects Manager Training Step 1 : Creating a Project ngs.opus.projects@noaa.gov Step 1 : Creating a Project
I’ve advanced to the second slide and I’m reading it. • Can you read this slide and hear me as I read it? • Can you access the web? • Is everyone comfortable? • Does anyone have any questions before we begin? Introduction
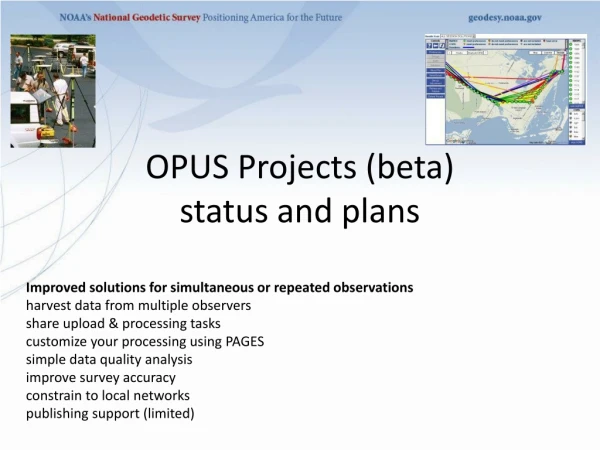
Outline • Introduction • Step 1 : Creating a Project • Step 2 : Uploading Data • Step 3 : Session Processing • Step 4 : Network Adjustment Step 1 : Creating a Project
A few words before beginning. OPUS Projects is a Web-based utility implying that access to the Internet and use of a Web browser are required. JavaScript must be enabled in your browser and pop-up blocking may have to be turned off. If you have difficulty configuring your browser, contact your instructor or the OPUS Projects team. Step 1 : Creating a Project
The OPUS Projects look and feel. The overall layout and appearance of OPUS Projects will be very similar to that shown here regardless of the browser you use. For this reason, the browser window’s frame is not shown in the figures. Step 1 : Creating a Project
What’s in this training? This presentation shows how to create a project and set its preferences in preparation for use. The format is as a series of steps like a cookbook. Like most cookbooks, the justification for and discussion of variations in those steps will be minimal. The intent is to get you started quickly, then leave you free to explore OPUS Projects on your own. Step 1 : Creating a Project
Start at the OPUS Projects gateway page:http://geodesy.noaa.gov/OPUS-Projects/. Step 1 : Creating a Project
Click the “Create” button to start Creating a Project. Step 1 : Creating a Project
You’ll be taken to the “Create Project” page. Here you’ll enter your email address, a title for and brief summary of your project. Let’s work through these steps. Step 1 : Creating a Project
Your email addresses must be less than 54 characters in length. Step 1 : Creating a Project
Mister.Mxyzptlk@fifth.dimension You must be registered to create a project. This will be verified after you enter your email address and move to the next field. Step 1 : Creating a Project
Mister.Mxyzptlk@fifth.dimension OPUS Projects Manager Training is the best way to be registered to create projects. Information upcoming classes can be found at http://geodesy.noaa.gov/corbin/calendar.shtml. Step 1 : Creating a Project
your.name@your.address After entering a registered email address, the “Create” button will be enabled and you can complete the form. Step 1 : Creating a Project
your.name@your.address Next, enter your project title. The project title must be less than 65 characters in length but, otherwise, has few restrictions. However, remember that short and simple are often better. Step 1 : Creating a Project
your.name@your.address my project @ 2006-10-01 Step 1 : Creating a Project
your.name@your.address my project @ 2006-10-01 The project type designates the project as a HtMod (Height Modernization), FAA (Aeronautical Survey Program) or Other type of project. Step 1 : Creating a Project
your.name@your.address my project @ 2006-10-01 HtMod and FAA projects will receive additional scrutiny if published to insure they meet the specifications for those types of projects. Leave the type as Other for now. Step 1 : Creating a Project
your.name@your.address my project @ 2006-10-01 Step 1 : Creating a Project
your.name@your.address my project @ 2006-10-01 You can enter the approximate location by clicking on the map or typing directly into the entry fields. Let’s set the approximate location by clicking on the map. The training data was taken in southern Louisiana. Step 1 : Creating a Project
your.name@your.address my project @ 2006-10-01 N29:34 W90:43 Step 1 : Creating a Project
your.name@your.address your.name@your.address my project @ 2006-10-01 my project @ 2006-10-01 N29:34 W90:43 Similarly, you can enter the anticipated start date manually or use a pop-up calendar feature. Clicking on the entry fields causes a calendar to appear. Step 1 : Creating a Project
your.name@your.address your.name@your.address my project @ 2006-10-01 my project @ 2006-10-01 N29:34 W90:43 If you prefer to enter the start manually, hitting the ESC key while the calendar is visible causes the calendar to disappear, then you can enter the date using a MM/DD/YYYY format. Step 1 : Creating a Project
your.name@your.address your.name@your.address my project @ 2006-10-01 my project @ 2006-10-01 N29:34 W90:43 10/01/2006 You can select the month and year using the controls at the top of the calendar. Clicking on a day number causes it to be entered into the field. This project started October 1, 2006 Step 1 : Creating a Project
your.name@your.address your.name@your.address my project @ 2006-10-01 my project @ 2006-10-01 N29:34 W90:43 10/01/2006 You can type in the fields or click the increment/decrement buttons to complete the approximate size fields. The values are limited to 999 or less. Step 1 : Creating a Project
your.name@your.address your.name@your.address my project @ 2006-10-01 my project @ 2006-10-01 N29:34 W90:43 10/01/2006 6 3 When the form is complete, click Create. Step 1 : Creating a Project
After a moment, an introduction to your newly created project will be shown. It contains information necessary for you to work with your project. You’ll also receive this information in email. Save this email for future reference. Step 1 : Creating a Project
Let’s highlight the most critical information. Step 1 : Creating a Project
The project identifier, and the manager and session keywords are used to access to your project. Step 1 : Creating a Project
Your project identifier can be shared thereby permitting others to upload data to your project. Step 1 : Creating a Project
The project identifier and the manager keyword allow you, the project manager, complete access to all parts of your project. Step 1 : Creating a Project
The project identifier and session keyword offer limited access to your project’s session and mark pages. This is useful if another person is to help with data processing for example. Step 1 : Creating a Project
The project‘s preferences can be accessed from the manager’s page. These should be reviewed at creation so a convenient link to the manager’s page is provided. Let’s go there now by clicking the link. Step 1 : Creating a Project
You’ll be taken to the manager’s page for your empty project. Step 1 : Creating a Project
Before proceeding, let’s take a few moments to familiarize ourselves with the general layout of this page. We’ll discuss the details in later steps of the training. Step 1 : Creating a Project
At the top of the page, you may see notices about OPUS. Very rarely, a message specific to your project may appear here too. In these rare cases, no other project will see those messages. Step 1 : Creating a Project
The manager and session pages are built around a Google Map Services™ interactive map to help orient you in the project and region. As data are uploaded, icons representing the project’s marks and included CORS will appear on the map. Step 1 : Creating a Project
The names of the marks and CORS will also be listed in tables to the right of the map. Step 1 : Creating a Project
Buttons to “pop up” controls are on the other side of the map. Step 1 : Creating a Project
Let’s continue with this lesson now. Click the “Preferences” button to pop up a window with those controls. Step 1 : Creating a Project
A new window containing the preference controls will appear. For ease of viewing, we’ll zoom in and focus on each section of this window individually. Step 1 : Creating a Project
The “Project Title, ID and Keywords” section is used to change those values. Note the rules for the ID and keywords. Some find these randomly generated strings challenging and prefer something more memorable. Changing these will cause an updated copy of the email introducing your project be sent to you. We’ll leave them for now. Step 1 : Creating a Project
Sometimes the project will send emails to the you. You can create a list of addresses using the “CC Manager Email” controls so others also received these emails. Step 1 : Creating a Project
The “Data & Solution Quality Thresholds” cause icons and table entries to be flagged if a mark’s solution results exceed a threshold thereby indicating potential problems. Step 1 : Creating a Project
These thresholds are also applied to the OPUS solutions when project data files are uploaded. If an OPUS solution exceeds a threshold, a separate email describing the condition is sent to the address on the upload form. Step 1 : Creating a Project
It is your responsibility to make your field teams aware of this possibility and that receiving one of these warnings does not mean the data file was omitted from the project. Step 1 : Creating a Project
This is a good time to set these values to your project’s specifications, if any. For training purposes only, let’s change the maximum height uncertainty to 0.060 m; the latitude and longitude uncertainties to 0.030 m. Step 1 : Creating a Project
The “Data Processing Defaults” are just that; default values and selections appearing in the project’s processing forms. Like all defaults, they can be changed at the time of processing. These values are reasonable for most processing tasks, but let’s select NORMAL for the “Constraint Weights”. Step 1 : Creating a Project
The “Session Definition” section gives you some control over how data files are grouped together to form sessions for processing. These values can only be changed before session processing has begun. After processing has begun, this section is disabled and an explanatory message appears. In almost all cases, these values should not be changed; however, if you feel a need to change the definition, consult with the OPUS Projects team prior to making any changes. Step 1 : Creating a Project
The “Mark Co-location Definition” gives you some control over how data files are associated with a mark. You see here that data files whose OPUS solution positions fall within 1 m of one another will be grouped together. However, RINEX and some other format specifications use a mark identifier string as the first four characters of the file name. If you are confident that this will be the case and be correctfor all your project’s data files, select “Mark ID”. Here again, this definition can not be changed after session processing has begun. Step 1 : Creating a Project
Once you’ve reviewed the preferences and made necessary changes, click the “Save Changes and Close” button to apply these preference to your project. Step 1 : Creating a Project