Download
1 / 19
230 likes | 425 Views
Backpacking. Dr. G regor Kay. Overview. Introductions Course overview Paperwork Some notes Itinerary Questions/Concerns Gear issue. Course Overview. REQUIRED READING http://www.nps.gov/grsm/planyourvisit/things2know.htm 2) The Backpacker’s field manual:

E N D
Backpacking Dr. Gregor Kay
Overview • Introductions • Course overview • Paperwork • Some notes • Itinerary • Questions/Concerns • Gear issue
Course Overview REQUIRED READING • http://www.nps.gov/grsm/planyourvisit/things2know.htm 2) The Backpacker’s field manual: (available as a free google book) • Trip Planning • Equipment • Cooking & Nutrition • Fitness • Hygeine & Water purification • Environmental & Social Ethics (Leave No Trace) • Wilderness Travel • Weather & Nature • Safety & Emergency Procedures • 1st Aid & Emergency Care
NOTES Trip Planning • Group size & ability • Activities • Location & Weather • Expecting the unexpected • Equipment • Food • Costs • Skills needed • Pre-trip • During trip • Post-trip • Route Planning • Clothing
Group size & ability Questions needing answers before you go • How many? • Purpose? • Goals of each person? • Experience level? • Age range? • Physical condition? • Health issues?
Activities • Backpacking only? • What gear/skills are needed? • Gear • Backpack • Hiking boots – break these in now! • Shelter • Food • Fist Aid • Skills • Be able to carry a loaded backpack • 20%-25% of your body weight • In mountainous terrain • For several hours at a time
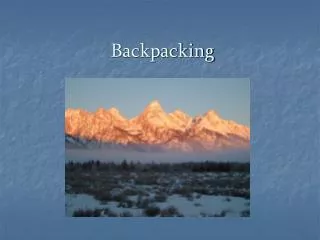
Location & Weather • Great Smoky Mountains National Park • Elevations in the park range from approximately 875 feet to 6,643 feet and that the topography can drastically affect local weather. • Temperatures can easily vary 10-20 degrees Fahrenheit from mountain base to top, and clear skies lower down do not guarantee equally pleasant weather at higher elevations. • Rainfall averages 55 inches per year in the lowlands to 85 inches per year at Clingmans Dome. • Spring • March through May: Spring brings with it unpredictable weather. • Changes occur rapidly - sunny skies can yield to snow flurries in a few hours. • Temperatures in the lower elevations have a mean high of 61ºF. Low temperatures, which are often below freezing, have a mean of 42ºF. • By mid-April the weather is usually milder. Daytime temperatures often reach the 70s and occasionally the 80s. Below freezing temperatures at night are uncommon in the lower elevations but still occur higher up. April averages over four inches of rain, usually in the form of afternoon showers. • http://www.weather.com/
Expecting the unexpected • Prepare! Prepare! Prepare! • Get a plans (like this one) • Get fit • Get gear • Get right mindset (+#%* happens) • Be ready for anything • Be ready to help
Equipment • Backpacking Equipment List • Camping Gear: (MGCCC provides) • Backpack • Sleeping bag • Sleeping pad w/stuff sack • Tent • Stove (1 burner for every 2-3 persons) & fuel • Pots & pans • 3 group meals • Cooking Gear: (You provide) • Spoon,/cup, bowl, • Lighter/matches • Water bottle (1 liter bottle x 3 or 1 gallon) • Water treatment tablets • Your food for ____BF____L____S • Additional Gear: (You provide) • Headlamp (flashlight) with extra batteries • Sunglasses • Sunscreen • Lip balm • Pocket knife • Camera • Toiletries: (You provide) • Toilet paper • Toothbrush/toothpaste • Medicines/Feminine personal hygiene
Equipment (cont’d) • Backpacking Equipment List • Clothing: (You provide) • Hiking boots or shoes appropriate for terrain • Camp Shoes (sandals, etc.) • Socks (2 pair) • Long underwear (in winter or to mountains) • Pants (1) • Shorts (1- quick dry) • Underwear • Short sleeve shirt (1) • Long sleeve shirt (1) • Fleece Jacket (in winter or to mountains) • Rain gear (jacket/pants or poncho) • Light gloves (in winter or to mountains) • Stocking cap (wool or fleece- in winter or to mountains) • Hat or cap
Food • Individual Meals • Cooking Gear: (You provide) • Spoon,/cup, bowl, • Lighter/matches • Water bottle (1 liter bottle x 3 or 1 gallon) • Water treatment tabs • Your food for ____BF____L____S • Group Meals • Cooking Gear: (MGCCC provides) • Stove (1 burner for every 2-3 persons) & fuel • Pots & pans • 3 Group meals (Thurs, Fri, Sat nights)
Costs • What is covered? • Transportation/gas • Permits (where applicable) • Maps • Camping fees • Group meals (previously mentioned) • Group gear (previously mentioned) • What is NOT covered? • Meals en route (Wed, Sun) • Any souvenirs, etc.
Skills needed • Ability to walk long distances in rugged mountain terrain • Good attitude • Awareness • Environment • Hazards • Location • Route • Weather • Equipment • Group • Physical Condition /imitations • Mood • Motivation • Self • Physical Condition /imitations • Mood • Motivation
Pre-trip • Today • Get fitted with pack – instructions at the end of this presentation • Walk with loaded pack on campus trail • Adjust where needed • Over the next few weeks • Training – see syllabus • Let folks know where you are going and when you expect to return
During trip & Post Trip • During the trip - keep a field journal • What happened • What were the conditions • High points & low • Post trip • Debrief trip with classmates • Clean & Return gear • Take EXAM
Route Planning • Have a thorough look at map, guidebook • Note landmarks, water on map • Calculating hiking distance & time • Average speed is 30 min. per mile • Add 1 hour for every 1000 feet of elevation gain • Add 5 mins. Each hour for rest stops • Add 1 min per person in your group.
Clothing The Five Layers You Want to Have When picking your backpacking clothing, you want to address five different layers: your base layer, an inner layer, a mid layer, an insulating layer and an outer layer. If you can get these down right, you’ll be in a great spot for a comfortable wardrobe. The Base Layer - Your base layer will consist of your underwear. Most people generally have cotton underwear. And as we mentioned above, cotton is something to avoid when participating in an outdoor sport like backpacking. Again, cotton retains moisture and this can become very uncomfortable and irritate the skin. Additionally, this base layer will also consist of socks. Some people wear two pair of socks, a moisture wicking liner sock and then an actual hiking sock. The Inner Layer - The inner layer needs to consist of a moisture wicking item. Depending on the extremes of weather you plan to experience, this can be a short sleeve or a long sleeve shirt. This layer allows you to be in the bare minimum of clothing required for the weather conditions you expect to experience. The Mid Layer - The mid layer usually consists of a clothing item that will protect against milder elements such as the wind or sun, but does not add much insulation. For us, this is normally a simple long sleeve shirt. Again, it is best if this item is moisture wicking. The Insulating Layer - The insulating layer’s purpose is to protect you from harsher elements, normally the cold. This could consist of a light jacket or a heavier fleece depending on what conditions you might experience. The Outer Layer - The outer layer can sometimes take the place of the insulating layer if you don’t expect to experience much cold. This layer is designed to protect you from elements like precipitation, wind and cold. This can be a rain jacket, rain pants, a coat in the event of winter backpacking, etc. Pay special attention when picking an outer layer because it can be a somewhat complicated layer to decide on. Do you need it to be water resistant and yet breathable? Or do you need it to be water proof but not breathable? ALWAYS bring an outer layer, even if you don’t expect to need it. It is a layer you will regret not having when you need it. In a sense, your outer layer can be an insurance policy in the event of an emergency or an unexpected change in the weather. Not to sound too dramatic, but it can mean the difference between life and death.
Fitting your pack • Finding your Torso Length • Choosing the Correct Frame Size • As soon as you know the length of your torso, finding the right backpack frame size is no problem. Although the sizes may differ a little, use the following frame size guidelines unless otherwise stated by the manufacturer. Note, however, that each frame size can be adjusted to fit a slightly larger or smaller torso size. • Extra Small: Up to 15-1/2 inches tall (up to 39 cm) • Small: 16 – 17 1/2 inches tall (40 – 45 cm) • Medium/Regular: 18 – 19 1/2 inches tall (46 – 50 cm) • Large/Tall: 20 inches and up (51 cm and up) • Women-specific backpacks are also available, though less common. These packs have narrower shoulder yokes, conically shaped hip belts and shorter torso lengths specifically designed to fit women. Men with narrow frames sometimes find these packs are a better fit for them. • Determining Hip Size • Some backpacks come with the option of interchangeable hip belts. In this case, it’s a good idea to know your hip size. • Wrap a flexible tape measure around the top of your hips, known as your “latitude line,” where you can feel your iliac crest. A properly fit hip belt should straddle your iliac crest, sitting about an inch above and below your “latitude line.” This measurement is your hip size. • Small: 22 – 27 inch hip-line (56 – 69 cm) • Medium: 28 – 34 inch hip-line (70 – 87 cm) • Large: 35 – 39 inch hip-line (88 – 100 cm) • Extra Large: 40 – 45 inch hip-line (101 – 114 cm) • How to Lift a Backpack • Properly lifting the pack onto your back will prevent back injuries – something you don’t want to incur before a backpacking or hiking trip. Before lifting your pack, take a wide stance and bend your knees slightly. Lift the pack onto a bent knee, and slide it onto one shoulder while swinging slowly around your body. Slide your other arm into the opposite strap. Fasten the hip belt and other straps to remove most of the weight from your shoulders. • Adjusting the Backpack • You now know how to fit and size a backpacking. However, it still may not be adjusted properly to your body. The following steps are used to adjust the backpack once it is packed and ready to hit the trail. You may want to practice this procedure prior to heading out in order to achieve the perfect fit. • Before you start, make sure all belts and straps are loosened. Remember, comfort isn’t just a luxury when backpacking. If your pack doesn’t fit correctly, it could result in injury. • Step 1: Hip belt • After you have lifted your pack onto your back using the instructions above, wrap the hip belt around your body so that the belt is cupping your hips. Clip the belt buckle on and tighten the straps evenly. However, you want to keep a 1 inch margin on both sides of the buckle. If it’s still too loose, you may want to try a different backpack or hip belt size. The goal is to have your hips hold 80%-90% of your backpack’s weight. • Step 2: Shoulder straps • Pull back and down on the shoulder straps to tighten them to fit close to your body and wrap around the shoulders. These shoulder straps are to simply hold the backpack against your body, not support its weight. • Step 3: Load lifters • Your pack’s load lifters are located just above your collarbones and attach the top of the pack to your shoulder straps. Gently pull these straps snug in order to take some weight off of your shoulders. • Step 4: Sternum strap • The sternum strap on your backpack, located on your chest, is simply meant to prevent your shoulder straps from slipping off, allowing your arms to move freely. Adjust this to a comfortable height across your chest that pulls the shoulder straps in. • Step 5: Stabilizer straps • If your pack has stabilizer straps, they are likely found on the bottom near the hip belt. Evenly pull the straps forward into your body in order to secure and stabilize your load. Your backpack should now be adjusted properly!
Questions? Comments? Contact Dr. Kay @ • gregor.kay@gmail.com • (601) 879-4529 Concerns?