Download
1 / 52
520 likes | 671 Views
Map Reading IV Determining Direction. GRC JROTC COL(R) Alexander. Outline . Purpose Polar Coordinates & Practical Exercise Intersection & Practical Exercise Resection & Practical Exercise Summary Conclusion. Polar Coordinates. Plot an azimuth from a known point . EG 1290 8018

E N D
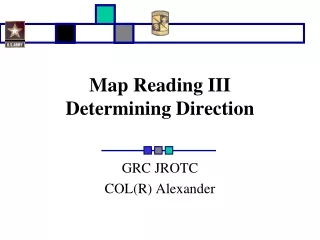
Map Reading IVDetermining Direction GRC JROTC COL(R) Alexander
Outline • Purpose • Polar Coordinates & Practical Exercise • Intersection & Practical Exercise • Resection & Practical Exercise • Summary • Conclusion
Polar Coordinates • Plot an azimuth from a known point. • EG 1290 8018 • Plot the distance from the known point along the azimuth line. • 56 degrees • The Polar Coordinate is at the end of the azimuth/distance line. • 3400 M Tenino Map
STEP 1: PLACE THE INDEX MARK OF THE PROTRACTOR AT THE CENTER OF MASS ON THE POINT FROM WHICH YOU ARE MEASURING. POINT 1 EG 1290 8018 ENSURE your protractor is straight UP & DOWN ! Tenino Map
STEP 2: LOCATE THE DESIRED AZIMUTH ON THE PROTRACTOR SCALE AND PLACE A DOT ON THE MAP AT THIS AZIMUTH. PNT 1 EXAMPLE: 56 DEGREES EXAMPLE: 56 DEGREES 56
STEP 3: REMOVE THE PROTRACTOR AND CONNECT THE POINT AND DOT WITH A STRAIGHT LINE. PNT 1
STEP 3. REMOVE THE PROTRACTOR AND CONNECT THE POINT AND DOT WITH A STRAIGHT LINE. STEP 3: REMOVE THE PROTRACTOR AND CONNECT THE POINT AND DOT WITH A STRAIGHT LINE. PNT 1 PNT 1 56o
STEP 4: SELECT THE APPROPRIATE SCALE MEASUREMENT AND PLACE A PAPER STRAIGHT EDGE ON THE SCALE. EXAMPLE: DISTANCE IN METERS Piece of white paper
STEP 5: DETERMINE THE DESIRED DISTANCE TO MEASURE FROM THE SCALE AND MARK THE PAPER AT THIS DISTANCE USING TICK MARKS. 100 100 100 100 100 100 EXAMPLE: 3400 METERS (3000 + 400) 3400 M Each alternating block is 100 Meters
STEP 6: ALIGN THE STRAIGHT EDGE WITH THE AZIMUTH LINE. ENSURE THE FIRST TICK MARK IS CENTER MAST ON THE KNOWN POINT. 3400 Meters PNT 1
STEP 4: PLACE A DOT ON THE MAP AT THE SECOND TICK MARK FROM THE STRAIGHT EDGE ON THE MAP. PNT 1 THE POSITION OF THE SECOND TICK MARK IS THE POSITON OF THE UNKNOWN POINT.
USE Protractor ! 1 3 5 5 8 8 5 5 _____ _____ _____ _____ _____ _____ _____ _____ GRID SQUARE
REMOVE THE STRAIGHT EDGE AND DETERMINE THE GRID COORDINATE TO THE SECOND POINT. PNT 1 56o Read the Grid: EG 1575 8205 3400 M
Practical Exercise (ANSWERS) • 1. QUESTION: What are the polar coordinates plotted from the center of the Reservoir at EG 04609945 at a grid azimuth of 158 degrees and a distance of 1700 meters?Describe this location? • EG 0525 9790 (road intersection next to a Pit) • QUESTION: What are the polar coordinates plotted from the water tower in grid square EG1185 at a grid azimuth of 30 degrees and a distance of 3500 meters?Describe the terrain feature located here? • EG 1325 8860 (spur) • QUESTION: What are the polar coordinates plotted from the Deschutes fire tower in grid square EG 1795 at a grid azimuth of 303 degrees and a distance of 2600 meters?Describe the terrain feature located here? • EG 1550 9660 (saddle)
Intersection(determining the location of an object/point) • Determine the position (GRID LOCATION) of an unknown point (or object) by occupying at least two (2), but preferably three (3) known locations. • Determine the azimuth (magnetic-compass) to the unknown point from these locations • Plot the azimuths (grid-map) from the positions to locate the to the unknown point by their intersections on the map.
POS 1 STEP 1: SIGHT THE UNKNOWN POINT (or OBJECT) ON THE GROUND. STEP 2: LOCATE YOUR POSITION ON THE GROUND AND MARK IT ON THE MAP. ? You must be able to accurately locate (a GRID) your POSITION !
POS 1 STEP 2. LOCATE YOUR POSITION ON THE GROUND AND MARK IT ON THE MAP. EXAMPLE: ROAD JUCTION AT EG13508009 You must be able to accurately locate your POSITION !
POS 1 STEP 3. DETERMINE THE MAGNETIC AZIMUTH FROM THE ROAD JUNCTION TO THE ENEMY POSITION (with a COMPASS). 59 DEGREES MAGNETIC
POS 1 BUT WAIT !WHAT DO YOU HAVE TO DO WITH THAT COMPASS AZIMUTH BEFORE YOU CAN USE IT ON A MAP? 59 DEGREES MAGNETIC
STEP 4: CONVERT THE MAGNETIC AZIMUTH TO A GRID (map) AZIMUTH. MAGNETIC AZIMUTH: 59 DEGREES EASTERLY G-M ANGLE: +21 DEGREES GRID AZIMUTH: 80 DEGREES Tenino Map
POS 1 STEP 5: DRAW A LINE FROM THE ROAD JUNCTION ALONG THE 80 DEGREE GRID AZIMUTH. 80
POS 1 POS 2 STEP 6: MOVE TO (or contact someone else who can provide a magnetic azimuth) A SECOND POSITION WHERE THE UNKNOWN POINT/OBJECT CAN BE SEEN AND OBTAIN ANOTHER COMPASS AZIMUTH TO THE OBJECT AND MARK THE AZIMUTH ON THE MAP.
POS 1 POS 2 STEP 6: MOVE TO (or contact someone else who can provide a magnetic azimuth) A SECOND POSITION WHERE THE UNKNOWN POINT/OBJECT CAN BE SEEN AND OBTAIN ANOTHER COMPASS AZIMUTH TO THE OBJECT AND MARK THE AZIMUTH ON THE MAP.. EXAMPLE: ROAD JUCTION AT EG13318108
POS 1 POS 2 STEP 7: DETERMINE THE MAGNETIC AZIMUTH FROM THE SECOND ROAD JUNCTION TO THE OBJECT / POSITION. 79 DEGREES MAGNETIC
POS 1 POS 2 BUT WAIT !WHAT DO YOU HAVE TO DO WITH THAT COMPASS AZIMUTH BEFORE YOU CAN USE IT ON A MAP? 79 DEGREES MAGNETIC
STEP 4: CONVERT THE MAGNETIC AZIMUTH TO A GRID AZIMUTH. MAGNETIC AZIMUTH: 79 DEGREES EASTERLY G-M ANGLE: +21 DEGREES GRID AZIMUTH: 100 DEGREES
POS 1 POS 2 STEP 9. DRAW A LINE FROM THE SECOND ROAD JUNCTION ALONG THE 100 DEGREE GRID AZIMUTH. 100
POS 1 POS 2 STEP 10: WHERE THE LINES CROSS IS THE LOCATION OF THE UNKNOWN POINT or OBJECT (enemy tank). EG16208055
POS 1 POS 2 POS 3 IT’S DESIRABLE TO REPEAT THE PROCEDURE FROM A THIRD POINT TO INCREASE THE ACCURACY. EXAMPLE: ROAD JUNCTION AT EG15478180 MAGNETIC AZIMUTH: 128 DEGREES MAGNETIC AZIMUTH: 128 DEGREES EASTERLY G-M ANGLE: +21 DEGREES EASTERLY G-M ANGLE: +21 DEGREES GRID AZIMUTH: 149 DEGREES
POS 1 POS 2 POS 3 NOTICE THAT THE LINES FROM THE FIRST AND SECOND POINT FORM A SHALLOW ANGLE. THIS DECREASES ACCURACY. WHENEVER POSSIBLE, CHOOSE LOCATIONS THAT WILL GIVE YOU A LARGER ANGLE (CLOSER TO 90 DEGREES LIKE POSITION 3.)
NOTE: WHEN TRIANGULATING, THE CENTER OF THE TRIANGLE IS RECORDED AS THE LOCATION. EG16208055
Practical Exercise1 of 2 YOUR SQUAD OCCUPIES 2 OBSERVATION POSTS. THE TEAM AT THE WATER TOWER IN GRID SQUARE EG 0985 SEES THE ENEMY AT A MAGNETIC AZIMUTH OF 351 DEGREES. THE SECOND TEAM, LOCATED AT THE WATER TOWER IN GRID SQUARE EG 1185 SEES THE ENEMY AT A MAGNETIC AZIMUTH OF 300 DEGREES. QUESTION: WHAT IS THE GRID LOCATION OF THE ENEMY? ANSWER: GRID COORDINATE EG 0979 8765
Practical Exercise2 of 2 YOUR SQUAD IS OPERATING AS AN OBSERVATION TEAM & YOU SEE SIX (6) ENEMY HELICOPTERS LAND & THEN DISAPPEAR FROM YOUR SIGHT. PRIOR TO THE HELICOPTERS DISAPPEARING, YOU SHOT A MAGNETIC AZIMUTH TO THE LOCATION WHERE YOU SAW THEM LAND. THIS MAGNETIC AZIMUTH IS 316 1/2 DEGREES. YOUR LOCATION IS THE BRIDGE IN GRID SQUARE EH 1000. YOU CONTACT YOUR OTHER TEAM LOCATED IN THE ZION CHAPEL TOWER AT GRID SQUARE EH 1102. THEY HAVE A SIGHTING OF SIX (6) ENEMY HELICOPTERS AT A MAGNETIC AZIMUTH OF 229 1/2 DEGREES. BOTH YOUR TEAMS PERFORM AN INTERSECTON. QUESTION: WHAT IS THE GRID LOCATION AND THE TYPE OF TERRAIN WHERE THE SIX (6) ENEMY HELICOPTERS LANDED? ANSWER: GRID LOCATION EH 093022, DEPRESSION.
Resection (determining YOUR location using known objects/points) • Determine the position of an unknown point (YOU) by locating at least two (2), but preferably three (3) known locations (points on the ground). • Determine the azimuth to the known points from the unknown point/location. • Plot the back azimuths from the known points to locate the unknown point by their intersections.
STEP 1: LOCATE A FEATURE OR OBJECT THAT IS IDENTIFIABLE ON BOTH THE GROUND AND THE MAP AND MARK THE MAP LOCATION. EXAMPLE: TOWER LOCATED AT EG 1804 8759 “Where in the heck am I???”
KP 1 EXAMPLE: TOWER LOCATED AT EG 1804 8759 STEP 1: LOCATE A FEATURE OR OBJECT THAT IS IDENTIFIABLE ON BOTH THE GROUND AND THE MAP AND MARK THE MAP LOCATION.
STEP 2: MEASURE THE MAGNETIC AZIMUTH (w/ your COMPASS) TO THE KNOWN POSITION (Tower) AND CONVERT THE MAGNETIC AZIMUTH TO A GRID AZIMUTH. 29 DEGREES MAGNETIC
STEP 2: MEASURE THE MAGNETIC AZIMUTH TO THE KNOWN POSITION AND CONVERT THE MAGNETIC AZIMUTH TO A GRID AZIMUTH. MAGNETIC AZIMUTH: 29 DEGREES EASTERLY G-M ANGLE: +21 DEGREES GRID AZIMUTH: 50 DEGREES
STEP 3. CHANGE THE GRID AZIMUTH TO A BACK AZIMUTH & DRAW A LINE FROM THE KNOWN POSITION (Tower) BACKWARD TOWARD YOUR UNKNOWN POSITION. GRID AZIMUTH: 50 DEGREES ADD: +180 DEGREES GRID BACK AZIMUTH: 230 DEGREES
KP 1 230 STEP 3: CHANGE THE GRID AZIMUTH TO A BACK AZIMUTH & DRAW A LINE FROM THE KNOWN POSITION (Tower) BACKWARD TOWARD YOUR UNKNOWN POSITION.
STEP 4: LOCATE A SECOND FEATURE OR OBJECT THAT IS IDENTIFIABLE ON BOTH THE GROUND & THE MAP AND MARK THE MAP LOCATION. EXAMPLE: BRIDGE LOCATED AT EG 1500 8389
KP 1 KP 2 EXAMPLE: BRIDGE LOCATED AT EG 1500 8389 STEP 4: LOCATE A SECOND FEATURE OR OBJECT THAT IS IDENTIFIABLE ON BOTH THE GROUND & THE MAP AND MARK THE MAP LOCATION.
STEP 5: MEASURE THE MAGNETIC AZIMUTH (w/ your Compass) TO THE SECOND KNOWN POSITION & CONVERT THE MAGNETIC AZIMUTH TO A GRID AZIMUTH. 151 DEGREES MAGNETIC
STEP 5: MEASURE THE MAGNETIC AZIMUTH TO THE SECOND KNOWN POSITION & CONVERT THE MAGNETIC AZIMUTH TO A GRID AZIMUTH. MAGNETIC AZIMUTH: 151 DEGREES EASTERLY G-M ANGLE: +21 DEGREES GRID AZIMUTH: 172 DEGREES
STEP 6: CHANGE THE GRID AZIMUTH TO A BACK AZIMUTH & DRAW A LINE FROM THE SECOND KNOWN POSITION BACKWARD TOWARD YOUR UNKNOWN POSITION. GRID AZIMUTH: 172 DEGREES ADD: 180 DEGREES GRID BACK AZIMUTH: 352 DEGREES
KP 1 KP 2 STEP 6. CHANGE THE GRID AZIMUTH TO A BACK AZIMUTH AND DRAW A LINE FROM THE SECOND KNOWN POSITION BACKWARD TOWARD YOUR UNKNOWN POSITION. 352
KP 1 KP 2 STEP 7: THE POINT WHERE THE 2 LINES INTERSECT IS YOUR LOCATION. EG 1485 8494
KP 1 KP 3 KP 2 STEP 8: FOR A CHECK ON ACCURACY, YOU SHOULD CONSTRUCT A THIRD LINE FOLLOWING THE STEPS AS OUTLINED. WHENEVER POSSIBLE, CHOOSE LOCATIONS THAT WILL GIVE YOU A LARGER ANGLE WHERE THE LINES INTERSECT TO INCREASE ACCURACY.
Practical Exercise1 of 2 WHILE ON A RECONNAISSANCE MISSION, AN ENEMY SCOUT PLATOON DETECTS YOUR SQUAD. YOU TAKE UP A DEFENSIVE POSITION & DECIDE TO REQUEST INDIRECT FIRE SUPPORT. YOU ARE NOT SURE OF YOUR LOCTION. FROM YOUR LOCATION, YOU CAN SEE A LOOKOUT TOWER IN GRID EG 1887 AT A MAGNETIC AZIMUTH OF 110 DEGREES & A TV RELAY TOWER IN GRID EG1287 AT A MAGNETIC AZIMUTH OF 215 DEGREES. QUESTION: WHAT IS YOUR LOCATION? ANSWER: EG 155 897 YOU DETERMINE A DISTANCE OF 800 METERS TO THE ENEMY WITH YOUR LASER RANGE FINDER AND A MAGNETIC AZIMUTH OF 290 DEGREES. QUESTION: WHAT IS THE GRID LOCATION OF THE ENEMY SCOUT PLATOON? ANSWER: EG 149 902
Practical Exercise2 of 2 QUESTION: YOU HAVE DETERMINED THAT THE MAGNETIC AZIMUTH FROM YOUR POSITION TO THE TV RELAY TOWER IN GRID SQUARE EG1287 IS 3 DEGREES & THE MAGNETIC AZIMUTH TO THE SPOT ELEVATION 199 IN GRID SQUARE EG 1385 IS 77 DEGREES. WHAT IS THE SIX DIGIT GRID COORDINATE OF YOUR LOCATION? ANSWER: EG 116856 QUESTION: THE MAGNETIC AZIMUTH FROM YOUR LOCATION TO THE WATER TOWER AT EG093853 IS 63 DEGREES AND THE MAGNETIC AZIMUTH TO THE WATER TOWER AT EG097827 IS 104 DEGREES. WHAT IS THE SIX DIGIT COORDINATE TO YOUR LOCATION? ANSWER: EG 063849