Download
1 / 5
50 likes | 133 Views
Steps: Make a rectangle shape using the tool circled in blue to the left Use the curve line tool circled in red to the right to draw numerous lines in the rectangle Use the Fill with Color tool circled in purple to color in the different sections with different colors

E N D
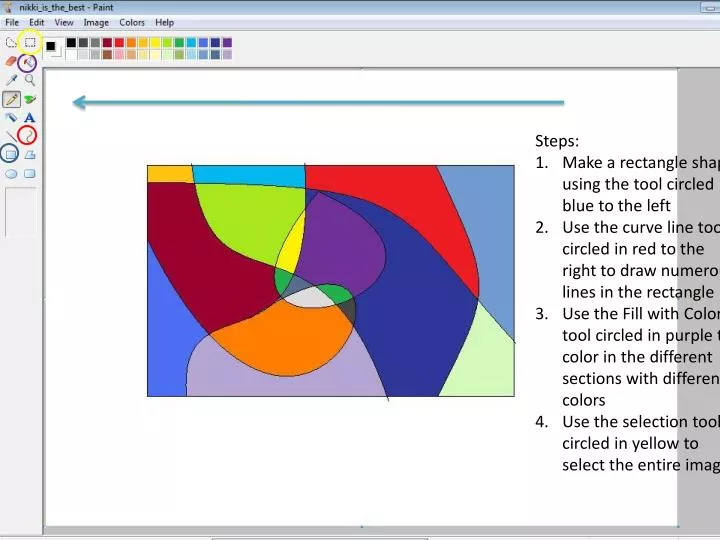
Steps: Make a rectangle shape using the tool circled in blue to the left Use the curve line tool circled in red to the right to draw numerous lines in the rectangle Use the Fill with Color tool circled in purple to color in the different sections with different colors Use the selection tool circled in yellow to select the entire image
Steps: 1. Copy the image made in paint and paste it into a word document
Paste the image again (will most likely appear below first image) Right-click the image, go to text wrapping, and select “behind text” With the image selected, go to format, recolor, set transparent color, and then click any white piece that was copied and surrounds the picture Move the second picture to the right of the first picture so it lies right beside it. Click format and then the rotate button in the “arrange” section and choose “flip horizontally”.
Copy and paste the second picture you made. Make sure the text wrapping is set on “behind text” again Move the third picture below the 2nd one Click Format, Rotate, and “Flip Vertical”
Copy and paste the third image into the document again Make sure the text wrapping is set “behind text” Move the fourth image to the left of the third image Click Format, Rotate, and “Flip Horizontal”