Download
1 / 42
430 likes | 575 Views
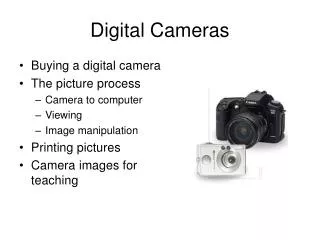
Digital Cameras. Presented by: Melanie Dillard. Types. Considerations. Size Pixels Battery/Charger Accessories Zoom Manual Focus View Finder. Considerations. Stabilization Shutter Speed Weight Movie Clips Usage Storage Types Picture Transfer. Storage Types.

E N D
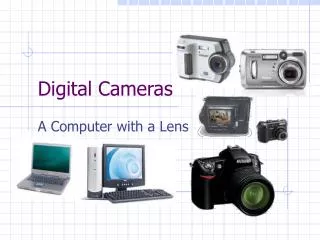
Digital Cameras Presented by: Melanie Dillard
Considerations • Size • Pixels • Battery/Charger • Accessories • Zoom • Manual Focus • View Finder
Considerations • Stabilization • Shutter Speed • Weight • Movie Clips • Usage • Storage Types • Picture Transfer
Demonstration • Importing pictures from Camera • Importing pictures form media storage • Transferring media to different storage media types.
Using Picasahttp://picasa.google.com What is Picasa? Picasa is free photo management software that helps you instantly find, edit and share all the photos on your PC. Picasa automatically locates all your photos (even ones you forgot you had) and sorts them into visual folders organized by name, size, or date. You can drag and drop to arrange your folders and make albums to create new groups. Picasa makes sure your photos are always organized.
Picasa also makes advanced editing simple by putting one-click fixes and powerful effects at your fingertips. Picasa makes it a snap to share your photos - you can email, upload to an online album, print photos at home, make gift CDs, and even post photos to Blogger.You can download Picasa from http://picasa.google.com/download/index.html
Importing Into Picasa • You can import photos into Picasa from many sources, including cameras, CDs, memory cards, scanners, webcams, and more. • From within Picasa, click the Import button and select your device or folder from the dropdown menu (your camera should automatically be detected). Select the specific photos you’d like to import, or choose all. These photos will be saved on your computer and displayed as a new folder in Picasa. Demonstration
Organizing PhotosFolders and Albums While your photos are displayed in Picasa, they aren't actually stored in the application. When you install Picasa, it scans your hard drive and organizes the photos that are already on your computer by placing them into folders. These folders, along with the albums you create, make up the organization of your photos within Picasa.
Folders represent actual folders on your computer's hard drive that contain photos. Changes you make to folders in Picasa will affect the matching folders on your computer’s hard drive. Moving a photo from one folder to another in Picasa will also move the photo in Windows Explorer.
Albums, unlike folders, exist only in Picasa. For example, you might create an album called ‘Pictures with Grandma,’ and include photos featuring Grandma from different folders to be used in a photo collage or to be shared online. Unlike Picasa folders, your albums don't correspond to real folders on your hard drive -- so when you delete or move photos from an album, the original files remain in their original locations on your hard drive.
Quick and Easy Editing • Now that your photos are organized, you can start editing. With Picasa’s advanced photo editing, you can use basic one-click fixes to improve almost any photo, adjust color and lighting, and add effects like black and white or sepia. Add captions to help tell the story. Double-click on any photo to open the ‘Edit Photo’ screen.
It’s important to note that Picasa never overwrites your original file on disk; any edits you make to a photo are only saved inside Picasa until you decide to either export or click the Save Changes button in the album header. Saving changes will overwrite the original file, while retaining a backup in a new ‘Originals’ folder. This means that your original photos will always be safe and sound, accessible at any time.
Movies: Creating a movie • To make a movie from a selection of photos, follow the instructions below:1. Select the photos you'd like for your movie. You can also select multiple photos from different folders using the "Hold" button next to the Photo Tray.2. When you have the desired photos selected, select "Create."3. Select "Movie."4. Select "Delay between pictures" from the drop-down menu and a movie size. 5. Click "OK."6. You'll see the option to compress your movie if you'd like to make the file size smaller.Your movie will now be saved in "My Pictures" and will also appear in Picasa. Please note that it's not possible to add music or audio to movies created in Picasa.
Wallpaper: Set wallpaper • To set any photo as your Windows Desktop Wallpaper using Picasa, please do the following:1. Click the photo you wish to use as wallpaper.2. Click "Create" (next to File, Edit, View, etc.).3. Click "Set as Desktop..."4. Click "Yes" to the promptYour photo will now be your Windows desktop background (wallpaper).
Collages: Creating a collage • You can use Picasa to create one-of-a-kind photo collages. To create a Picasa collage, follow the instructions below: • Select the photos you'd like to include in your collage. Your selected photos appear in the Photo Tray in the lower-left corner of the screen.Press the Ctrl key to select multiple pictures, and press the Hold button when adding photos from multiple albums or collections.
Click Collage.Note: If the 'Collage' button is disabled, you'll need to first select photos for your collage. Choose from the Type and Options drop-down menus to preview your collage. Tip: By clicking directly on the collage preview, you can change the order of your photos. To shift the layout of a Picture Pile collage, press the Shift key while clicking the collage preview.
Choose a folder from the Location drop-down menu. Your collage is saved to this folder. Note: The photos Picasa uses in your collage are actually copies of your original photos. This way, your original photos remain untouched. When you're satisfied with your collage, click Create.
Make a Screensaver • Picasa includes its own screensaver which displays photos using various visual effects while your computer is inactive. You can configure the screensaver to show photos from various sources, including: - Picasa's special Screensaver and/or Starred Photos albums- Specific folders on your computer- Albums in your Google Account for Picasa Web Albums
The screensaver must be activated before it will run. There are two ways to activate the screensaver from within Picasa:1. Go to "Tools" > "Configure Screensaver". 2. Select photos you would like to display in the screensaver and go to "Create" > "Add to Screensaver".
Both methods will launch the "Display Properties" control panel so that you may further configure the screensaver. On the "Screen Saver" tab, the Picasa Screensaver is selected for you automatically. Press the "Settings" button to launch the Picasa Screensaver's configuration dialog. In the dialog, you will see two tabs, one called "Photo Sources" and one called "Visual Presentation."
Even if you've used Picasa previously to create a screensaver, you'll need to create a new one by adding photos to the "Screensaver" album. To do so, go to "Create > "Screen Saver." You can now drag and drop photos to or from other albums or rearrange the order of the photos within the Screensaver album. Please note that you can't delete or rename the Screensaver album.
Screensavers: Changing screensaver display To change your visual display options for the Picasa Screensaver, please follow these steps in Windows:1. Go to "My Computer".2. Select the "Control Panel" and click "Display" > "Screensaver" > "Settings" > "Visual Presentation". (In later versions of Windows XP you may need to select "Appearance and Themes" before "Display")3. Under "Visual Effect" you can set your screensaver options to "Collage", "Wipe", "Crossfade", or "Pan and Zoom".
Creating Gift CD • Select the photos you'd like to copy to the CD/DVD. • Click Gift CD. • Enter a name or title for your CD/DVD. • Optional: Add any additional items from the Gift CD menu (see below for more details). • Insert a blank disk. • Click Burn Disc.
To include an auto-running slideshow, select Include Slideshow. To add more photos, click Add More. Note: If you add many photos, a message that Picasa is "Calculating" will appear in the blue bar above "Burn Disc." Wait until this message disappears before clicking "Burn Disc." To resize the photos, click the Photo Size drop-down menu and choose a new size. If you don't want to resize your photos, choose Original Size. To include a copy of Picasa, select Include Picasa.
Tip: If you want to take the CD to a photo lab to make prints, just deselect Include Slideshow and Include Picasa.
Backing Up • Backing up your photos is a good way to make sure that they're always safe and sound. Picasa makes it easy to do this. Just click on Tools > Backup Pictures, and select New Set to get started.
Back up to External Hard Drive • If you have a large collection of photos, this may be the way to go. Once you’ve initially backed up your entire collection, Picasa will then only back up the recent changes that you’ve made. This saves you time, and ensures that your entire collection will be protected. Using an external drive with Picasa’s backup feature is also a great way to migrate to a new computer.
Backing Up: An alternate drive • You can choose to run a Picasa backup to another drive instead of to a CD or DVD.1. If you are copying your backup to a removable drive, hook it up first.2. Select "Backup Pictures" from the Tools menu.3. Click "New Set."4. Label the New Backup set.5. Select "Disk to Disk Backup."6. Click "Choose."7. Select the Drive or Folder you wish to export the Backup too.8. Make sure all the Folders and/or Albums you wish to include in the Backup are selected.9. Click "Backup."Your backup will be copied to your drive of choice.
Back up to CD or DVD • Burning your photos to CD or DVD is also a convenient option. Should your hard drive ever fail, or should a power surge hit your external drive, you will thank your lucky stars as you recover all of your photos and edits.
How to create a Backup CD • Follow the steps below to create a backup:1. Click the Tools menu and select "Backup Pictures".2. To backup all video files in Picasa, click on "New Set" in the Step 1 section, click on "Select All." in the Step 2 section.3. If you wish to back up select files, click the empty boxes next to the folders you wish to backup (on the left side of the backup screen). Only check-marked folders will be included in the backup.4. The blue bar above the "Burn" button will state how many blank CD or DVDs will be needed to complete the backup. Insert your blank CD or DVD, wait 20 seconds for Windows to read the disk, then click the "Burn" button.5. When you insert this backup into a new computer, you will be prompted to restore your photos. You can choose to have the photos copied back to their original locations or you can select a new location for your photos.The backup does not install Picasa. You will need to download and install Picasa from our site:http://picasa.google.comIt is recommend to reinstall Picasa after running restore from your backup.