Download
1 / 34
340 likes | 465 Views
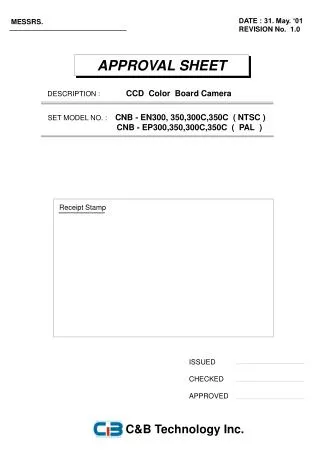
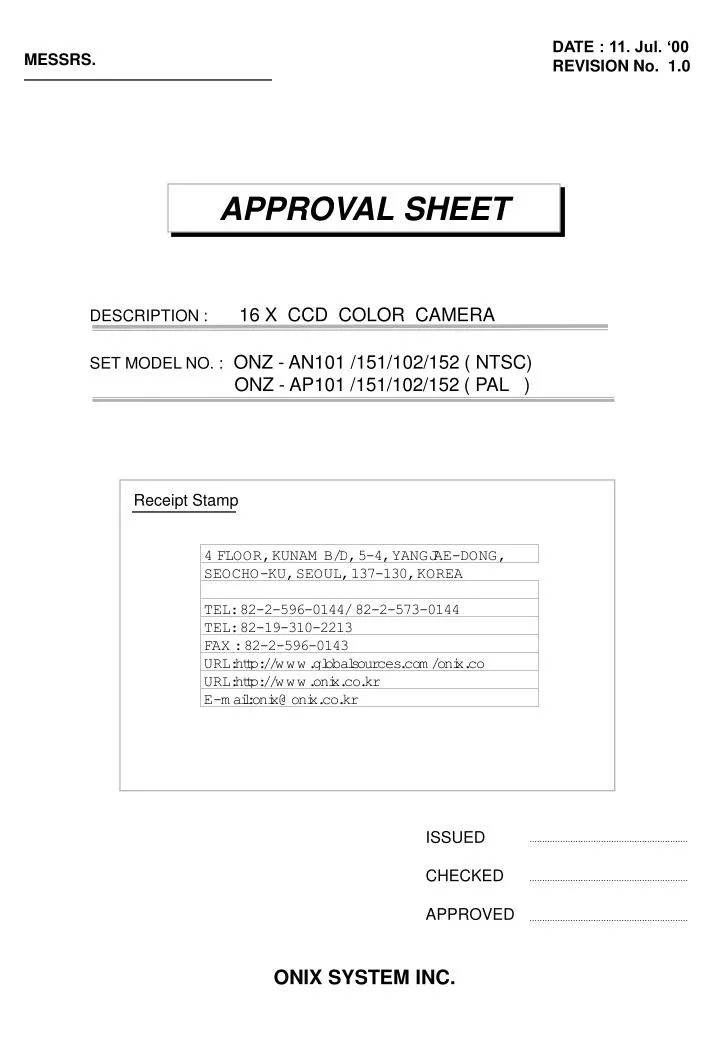
DATE : 11. Jul. ‘00 REVISION No. 1.0. MESSRS. APPROVAL SHEET. DESCRIPTION : 16 X CCD COLOR CAMERA. SET MODEL NO. : ONZ - AN101 /151/102/152 ( NTSC) ONZ - AP101 /151/102/152 ( PAL ). Receipt Stamp. ISSUED CHECKED APPROVED. ONIX SYSTEM INC.

E N D
DATE : 11. Jul. ‘00 REVISION No. 1.0 MESSRS. APPROVAL SHEET DESCRIPTION : 16 X CCD COLOR CAMERA SET MODEL NO. : ONZ - AN101 /151/102/152 ( NTSC) ONZ - AP101 /151/102/152 ( PAL ) Receipt Stamp ISSUED CHECKED APPROVED ONIX SYSTEM INC.
CCD COLOR CAMERA SPECIFICATIONS ONZ - AN101, 151, AP101, 151 : Control through RS-232 Signal ( TTL Level ) ONZ - AN102, 152 AP102, 152 : Control through RS-422/485 Signal CONTENTS PAGE 1. SPECIFICATIONS------------------------------------------------------------ 2 2. MEASUREMENT SPECIFICATIONS------------------------------------ 4 3. EXTERNAL CONTROL SPECIFICATIONS---------------------------- 4 4. ENVIRONMENT CONDITION AND TEST----------------------------- 5 5. LAYOUT OF PLUG --------------------------------------------------------- 5 6. INTERFACE (RS-232C)---------------------------------------------------- 6 7. INTERFACE(RS-422/485) ------------------------------------------------- 7 8. RECOMMENDED CIRCUIT FOR LOCAL CONTROLS ----------- 8 9. LENS TEST CONDITION-------------------------------------------------- 9 9. APPEARANCE--------------------------------------------------------------- 10 10.PACKING METHOD-------------------------------------------------------- 11 1/11
1. SPECIFICATIONS REMARKS Signal System NTSC ( ONZ - AN101/102 ) PAL ( ONZ - AP101/102 ) Scanning System 2 : 1 Interlace Scanning Frequency ( H ) 15.734 KHz 15.625 KHz Scanning Frequency ( V ) 59.94 Hz 50 Hz Image Sensor 1 / 4 Inch Solid State Interline CCD Image Sensor Total Pixels No. 811 (H) X 508 (V) 410K 795 (H) X 596 (V) 470K Effective Pixels No. 768 (H) X 494 (V) 380K 752 (H) X 582 (V) 440K REMARKS Signal System NTSC ( ONZ - AN151/152 ) PAL ( ONZ - AP151/152 ) Scanning System 2 : 1 Interlace Scanning Frequency ( H ) 15.734 KHz 15.625 KHz Scanning Frequency ( V ) 59.94 Hz 50 Hz Image Sensor 1 / 4 Inch Solid State Interline CCD Image Sensor Total Pixels No. 537 (H) X 505 (V) 270K 537 (H) X 597 (V) 320K Effective Pixels No. 510 (H) X 492 (V) 250K 500 (H) X 582 (V) 290K “ Bold : Default Mode ” 1) Lens F1.4 ~ 2.8 , f = 4.0 ~ 64.0 mm , x16 Zoom Video Auto Focus Angle of View H : 47。 (WIDE) , 3。 (TELE) High Durability Zoom Lens a) Zoom Durability More than 500k at Room Temperature ( See Page. 6. ) b) Focus Durability More than 500k at Room Temperature ( See Page. 6. ) c) Iris Durability More than 500k at Room Temperature ( See Page. 6. ) 2) Focus Length ∞ ~ 1.0m (Tele) ~ 0.01m (Wide) 3) Signal Process Digital Signal Process 4) Sync System(Auto) Internal / External sync ( Line Lock) 5) Camera Function Control through RS-232 Signal ( TTL Level ) : CNB-AN101,151,AP101,151 Control through RS-422/485 Signal : CNB-AN102,152,AP102,152 a) Optical Zoom TELE ~ WIDE (Zoom Speed : 3.6 sec / 6 sec ) b) Digital Zoom Off / On ( ~ 8 times ) c) Video Focus Auto / Manual ( NEAR ~ FAR ) / Push Auto (a) Manual Mode Zoom Stop Zoom Start Manual ( AF Action is activated for a moment before focus stops ) Manual 2/11
d) White Balance Auto / Indoor / Outdoor / Push Auto / Manual ( R&B Gain Level UP/Down ) Special ( R or B Gain Level Control ) e) Shutter Speed Auto/ Manual (1/60 ~ 1/ 10000 ( NTSC) / 1/50 ~ 1/10000 (PAL) ) f) Iris Control Auto / Manual ( Manual Iris Level : UP ~ Down) g) Gain Control Auto / Manual ( Auto Gain Control : UP ~ Down) h) Sharpness Manual ( Sharpness UP ~ Down ) i) Brightness Manual ( Brightness UD ~ Down ) j) Negative Off / On ( Negative Level UP ~ DOWN ) k) OSD Function On / Off (See an Annexed Document “ APPENDIX 1 ” ) l) Flickerless Off / On ( 1 / 100 sec Shutter Set (NTSC) / 1 / 120 sec Shutter Set (PAL) ) m) Back Light Off / On/ Auto n) Position Preset 64 Mode Set / Move ( Store with Internal EEPROM ) (a) Zoom Trace Preset Mode : MF Trace * In case of memory ( EX. Memory Point : ) WIDE TELE (Digi.) (Opt.) ×32 ×1 ×16 1 sec 3.6 sec (b) Zoom Trace Preset Mode : MF NO-Trace * In case of preset WIDE TELE (Digi.) (Opt.) ×32 ×1 ×16 Instant 1.6 sec 6) Video Output Level NTSC Video Level 0.714 ± 0.07V ( 100 ± 10 IRE) Sync Level 0.286 ± 0.035V ( 40 ± 10 IRE) Burst Level 0.286 ± 0.035V ( 40 ± 10 IRE) PAL Video Level 700 ± 70 mV Sync Level 300 ± 35 mV Burst Level 300 ± 35 mV 3/11
7) Color Reproduction COLOR RED BLUE YELLOW BURST NTSC Amplitude ( % ) 200 ± 40 % 130 ± 40 % 115 ± 40 % 100 %(Base) Phase ( 。 ) 103 ± 20。 345 ± 20。 170 ± 20。 180。(Base) PAL Amplitude ( % ) 200 ± 40 % 130 ± 40 % 115 ± 40 % 100 %(Base) Phase ( 。 ) 103 ± 20。 345 ± 20。 170 ± 20。 135。(Base) 8) Horizontal Resolution More than 480 Lines ( High Resolution ) More than 380 Lines ( Normal Resolution ) 9) Luminance S/N More than 48 dB 10) Sensitivity Typ. 1Lux ---- At signal Level 30 IRE ( LENS-F : F = 1.4 ( WIDE ) AGC Gain : Max 11) Supplied Voltage 9.0 V ~ 15.0 V ( Recommendation 12.0 V ± 0.5 V ) 12) Supplied Current 210 mA ( Steady-state ) 350 mA ( Max ) ----- Under the zooming and focusing Operation 13) Power consumption 4.3 W (Max) 14) Dimensions 58.0(W) × 59.8 (H) × 101.2(D) mm ( Except Connector ) 15) Weight 330 g ( Approx. ) 16) Appearance / Dimensions See Attached Page 10. 17) Body Color Black 18) Packing Method See Attached Page 11. 19) Optional Accessories 2. MEASUREMENT SPECIFICATIONS * Standard Measurement Condition and Measurement Procedure See an Annexed Document “ APPENDIX 2 ” 3. EXTERNAL CONTROL SPECIFICATIONS * External Control Using RS-232C ( Command List ) See an Annexed Document “ APPENDIX 3 ” 4/11
BLC TELE (+) (SET) VIDEO OUT WIDE MENU (-) + DC 12V - CONTROL POWER IN Class 2 Only 4. ENVIRONMENT CONDITION AND TEST 1) Operating Condition Temperature -10 。C ~ 50。C ( Recommendation : -5 。C ~ 40。C ) Humidity 10 % ∼ 85 % 2) Storage Condition Temperature -20 。C ~ 60。C Humidity 0 % ∼ 90 % 3) High Temperature storage Test Leaving the packed at Temperature of 60。C for 72 Hours, and then after leaving it at Normal Temperature for 8 Hours, there should be no Problem in Performance. 4) Low Temperature storage Test Leaving the packed at Temperature of -20。C for 72 Hours, and then after leaving it at Normal Temperature for 8 Hours, there should be no Problem in Performance. 5. LAYOUT OF PLUG ( REAR PANNEL) 5/11
6. INTERFACE ( RS -232C TTL : ONZ-AN101,151,AP101,151 ) 1) Pin Diagram ( 6 Pin Circle Connector ) : Rear View 6 1 W 2 5 3 4 1-1) Pin Assignment ( 6 Pin Circle Connector ) * is the color of the cable. ( If it offered ) PIN No. I/O Note * Color NAME Input CMOS Level 5V ( Low : Max 0.8V , High : Min 3.7V ) Green 1 RD(For RS-232C) CMOS Level 5V ( Low : Max 0.8V , High : Min 3.7V ) Output White 2 TD(For RS- 232C) Brown 3 Input Key Yellow 4 GND 5 Black GND Red 6 EX. FV ( Negative. 5 Vp-p ) Input Line IN 2) PC Interface 1 NAME 6 2 1. Frame GND 2. RD 3. TD 4. DTR 5. Signal GND 6. DSR 7. RTS 8. CTS 9. RI TD 2 7 3 RD 1 8 4 9 5 A) RS-232C D-Sub Connector 6/11
1 6 2 7 3 8 4 9 5 7. INTERFACE (RS - 422/485 : ONZ-AN102,152,AP102,152 ) 1) Pin Diagram ( 6 Pin Circle Connector ) : Rear View 6 1 W 2 5 3 4 1-1) Pin Assignment ( 6 Pin Circle Connector ) * is the color of the cable. ( If it offered ) PIN No. I/O Note * Color NAME Input ) Green 1 R+ Input White 2 R - Brown 3 Output T+ Yellow 4 Output T - 5 Black GND Red 6 EX. FV ( Negative. 5 Vp-p ) Input Line IN 2) PC Interface ( RS-422 Communication) A) RS-232C TO RS-422 Converter B) RS-232C D-Sub Connector Tx+ R + 1 TD Tx- R - 2 Rx+ RD T + 3 Rx- T - 4 NAME 1. Frame GND 2. RD 3. TD 4. DTR 5. Signal GND 6. DSR 7. RTS 8. CTS 9. RI 7/11
8. RECOMMENDED CIRCUIT FOR LOCAL CONTROLS 1) KEY Function(CNB-AN101/151/AP101/151) 0.01uF 6.8K 8.2K 12K 18K 33K 68K 180K KEY 3 TELE(+) NEAR(+) FAR(-) MENU WIDE(-) NEGA ON/OFF A/M PUSH AUTO POWER ON/OFF : WIRE REMOTE CONTROL KEY FUNCTION 2) Line In Pulse ( EX. FV) 5 V 0 V Min : 200 nsec 50 Hz ± 0.25 Hz ( PAL) 60 Hz ± 0.25 Hz ( NTSC ) A) Pulse- Signal Spec of EX.FV 8/11
9. LENS TEST CONDITION 1) Zoom TELE RESET WIDE 1 sec pause 1 Cycle 2) Focus 1V pause NEAR 1V FAR 1V pause 1 Cycle 3 ) Auto Iris OPEN CLOSE 1.5sec 1.5sec 3 sec 1 Cycle 9/11
10. APPEARANCE 10/11
11. PACKING METHOD 11/11
APPENDIX 1 DATE : 11. Jul. ‘00 REVISION No. 1.0 OSD(On Screen Display) MODEL : ONZ - AN101 /151/102/152 ( NTSC) ONZ - AN101 /151/102/152 ( PAL) ONIX SYSTEM INC.
1. OSD(On Screen Display ) FORMAT 1) OSD DISPLAY POSITION X10000 ID 255 6 2 3 4 5 1 WAIT 7 W T X32 8 <Fig. 1 OSD DISPLAY POSITION> 2) DESCRIPTION FUNCTION OSD Format DESCRIPTION REMARKS Non display Focus Auto Mode 1 Focus Mode Focus Manual Mode Non display Mirror Mode Off Mirror Mode 2 Mirror Mode On Non display Back Light OFF Back Light 3 Back Light ON A Auto Back Light ON White Balance AUTO Non display Push Auto White Balance: In this mode “Push Key” pressed,the white point traced automatically(PWB Auto Mode), “Push key” released, the white point preserved currently (PWB Manual Mode). 4 WBC MODE 1/5
FUNCTION OSD Format DESCRIPTION REMARKS Normal Shutter ( NTSC:1 / 60 PAL:1 / 50 ) Non display 1 / 125 . . . . 1 / 1 0 0 0 0 28 variable steps. (Can be set to 8 steps by manufacture Option) 5 Shutter Speed After input the Identification Number to each camera , Multi-point control is available (PC Control ) ( 000 ∼ 255 ) . 6 CAMERA ID Indicates the camera stand-by mode until the camera power turns ON . 7 WAIT MODE WAIT W T X10 ; In case of 16X Zoom; Optical Zoom only mode ; (Current Zoom :10X) W T X20 ZOOM DISPLAY ; In case of 32X Zoom ; Digital Zoom 2X mode ; (Current Zoom : 20X) W T X100 ; In case of 128X Zoom ;Digital Zoom 8X mode ; (Current Zoom : 100X ) Sharpness Adjustment Mode DISPLAY X10 8 Brightness Adjustment Mode DISPLAY X34 * The OSDs of 1,2,3,4,5,7,8 disappear 5 sec later . But 6 can bedisplayed continuously by ID On/Off Key Action ( controlled by PC command Key). 2/5
2. MENU DESCRIPTIONS ( ENGLISH ) 1) MENU FORMAT MENU 1 IMAGE MIRROR OFF (ON) 2 NEG / POS POS (NEG) 3 COLOR ON (OFF) 4 WB CONTROL AUTO (PUSH AUTO) 5 SHUTTER 1/10000 6 CAMERA ID 123 MENU 7 ZOOM START X1 8 ZOOM STOP X128 9 BRIGHTNESS 24 10 SHARPNESS 10 11 FOCUS AUTO (PUSH AUTO) 12 INIT SET OFF (ON) END <Fig2. MENU FORMAT> BLC TELE (SET) (+) WIDE MENU (-) <Fig3. REAR PANNEL> 3/5
2) Using MENU (1) Menu Mode : In order to display the MENU on the screen , Press the MENUkey . If you keep pressing MENU over 2 seconds, OSD will be off. Menu mode will be displayed again once Menu is pressed. (2) Menu Item selection Mode: Position Hand Mark to each ITEM you want to change by using Wide and Tele Keys . Press the BLC(SET) button. (3) Menu Data Change Mode: Press the TELE and WIDE key .Then the right side of selected ITEM will blink and the values can be changed by using Tele and Wide keys . Press the BLC(SET) button. (4) Press the BLC(SET) key again to return to Mode(2). (5) To escape from Menu Mode, Press Menu key again in Mode(2). Remarks : BLC(SET) Key Switches Menu Item selection Mode(2) and Menu Data change Mode(3). 3 ) MENU DESCRIPTION (1) IMAGE MIRROR When IMAGE MIRROR is ON state , The image displays in the opposite direction. (2) NEG/POS Use to change NEGATIVE and POSITIVE mode . ON : Negative Mode , OFF : Positive Mode . (3) COLOR ON : Color Mode , OFF : B / W (Monochrome Mode). (4) WB CONTROL Use to change White Balance Mode. - AUTO : WB Range 2800 。K ∼ 8000 。K . - PUSH AUTO : In this Mode you can adjust White point by using PUSH AUTO Key. (5) SHUTTER Use to change the Shutter Speed . At this time , AE mode acts automatically ( 28/8 steps control is available ). (6) CAMERA ID Each Identification number can be assigned to each camera. And ID NOs can be displayed on Monitor to confirm each camera. ( 000 ~ 255 : total numbers of ID are 256 ) . (7) ZOOM START Wide Zooming Area Start point allocation (1 ~128). (8) ZOOM STOP Tele Zooming Area End point allocation (1 ~128). (9) BRIGHTNESS Use to change the brightness level of scene ( 0 ~ 48 ). (10) SHARPNESS Use to change the contour of scene ( 0 ~ 15 ) . (11) FOCUS Use to change Focus Mode . - AUTO : Focusing acts Automatically - MANUAL : Focusing is controlled by Far and Near Keys . - PUSH AUTO : Auto Focusing is activated for a moment (when Push Auto Key is pressed) and stops. (12) INIT SET Turn the initial mode ON , the changed data are renewed to manufacturer settings. (The data are initialized to its shipping condition ) 4/5
APPENDIX 2 DATE : 11. Jul. ‘00 REVISION No. 1.0 Measurement Specifications MODEL : ONZ - AN101 /151/102/152 ( NTSC) ONZ - VP101 /151/102/152 ( PAL) ONIX SYSTEM INC.
1. MEASUREMENT CONDITIONS 1) Standard Measurement Conditions Supplied Voltage DC 12V ± 0.5 V Ambient Temperature 23 ℃ Humidity 60 % RH Measurement Fixture Video output , DC input , RS-232C level Convert ( 5Vpp -> 12Vpp) Power Supply 12V ± 0.5 V Color Monitor CMM20 - 11 , Shibasoku or Equivalent Monochrome Monitor More than 800 TV Lines Horizontal Resolution Waveform Monitor / Vector Scope 1720A , Tektronix ( NTSC / EIA ) or Equivalent 1730A , Tektronix ( PAL / CCIR ) or Equivalent S / N ( Signal to Noise )Meter VN31AX , Shibasoku ( NTSC/PAL/EIA/CCIR ) or Equivalent Illumination Meter / Color Temperature Meter XY-1 / CL-100 , Minolta Camera or Equivalent Light Box Dai Nippon Printing Co. - Color Temperature 3200。K ± 100 。K - Illumination More than 2000 Lux Test Charts ( Transparent Chart ) Color Bar Chart , Dai Nippon Printing Co. Gray Scale Chart , Dai Nippon Printing Co. ( Gamma 0.45 ) Resolution Chart , Dai Nippon Printing Co. ( Reflective Chart ) Gray Scale Chart , Murakami Color Research Lab Light Source Halogen Lamp ( with Dimmer Switch ) - Color Temperature 3200。K ± 100 。K - Illumination Variable with Dimmer Color Temperature Filter LB 140 , Hoya or Kenko or Equivalent ( Color Temperature Conversion Filter ) Adjustment PC With Serial Port 1 or 2 RS-232C Cable Each Terminal Connector ( D-Sub 9 Pin ) E Q U I P M E N T S 2. Measuring System 1) System 1. Camera FFC Measurement Fixture Color Monitor Light Box PC with Serial Port Waveform / Vector scope Monochrome Monitor 2) System 2. Light Source Camera Same as above System 1. Reflective Chart 1/5
2. MEASUREMENT PROCEDURE 1. VIDEO OUPUT LEVEL TEST CONDITIONS Refer to “ 1. MEASUREMENT CONDITIONS “ MEASURING SYSTEM System 1. PROCEDURE : 1. Shoot the gray scale chart , and Zoom WIDE or TELE to fit a scene of monitor fully by PC . 2. Measure the video output level on the waveform monitor ( Before the above measurement , Measure the SYNC and BURST level ) A C B ( Fig 1. ) Video Output Waveform SPECIFICATION : NTSC Video Level A 100 ± 10 IRE Sync Level B 40 ± 5 IRE Burst Level C 40 ± 5 IRE PAL Video Level A 700 ± 70 mV Sync Level B 300 ± 35 mV Burst Level C 300 ± 35 mV 2/5
2. COLOR REPRODUCTION TEST CONDITIONS Refer to “ 1. MEASUREMENT CONDITIONS “ MEASURING SYSTEM System 1. PROCEDURE : 1. Shoot the color bar chart , and Zoom WIDE or TELE to fit a scene of monitor fully by PC . 2. Measure the color amplitude and color phase on the vector scope of Red,Blue,Yellow . ( Before the above measurement , Adjust the burst amplitude and phase on the vectorscope so that the burst level becomes 100% and its phase becomes 180 。 (NTSC) (135 。 PAL) ( Fig 2. ) Video Output Waveform ( Fig 3. ) Video Output Color Vector SPECIFICATION : COLOR RED BLUE YELLOW BURST NTSC Amplitude ( % ) 200 ± 40 % 130 ± 40 % 115 ± 40 % 100 % Phase ( 。 ) 103 ± 20。 345 ± 20。 170 ± 20。 180。 PAL Amplitude ( % ) 200 ± 40 % 130 ± 40 % 115 ± 40 % 100 % Phase ( 。 ) 103 ± 20。 345 ± 20。 170 ± 20。 135。 3/5
3. LUMINANCE S / N TEST CONDITIONS Refer to “ 1. MEASUREMENT CONDITIONS “ MEASURING SYSTEM System 1. PROCEDURE : 1. Shoot the light box , and zoom WIDE or TELE to fit a scene of monitor fully by PC . 2. The noise meter settings are ; Input level : Preset High Pass Filter : 100KHz Low Pass Filter : 4.2 MHz Sub-carrier Trap : On Weighting : On Sag & Hue Comp. : Optimum 3. Measure the maximum S/N on the noise meter . SPECIFICATION : NTSC : More than 48 dB PAL : More than 48 dB 4. HORIZONTAL RESOLUTION TEST CONDITIONS Refer to “ 1. MEASUREMENT CONDITIONS “ MEASURING SYSTEM System 1. PROCEDURE : 1. Shoot the resolution chart , and Zoom WIDE or TELE to fit a scene of monitor fully by PC . 2. Adjust the brightness and contrast of the B/W monitor so that each steps of gray scale part can be observed . 3. Change the scan size of monitor to underscan. 4. The reference arrows on the resolution chart are positioned at the edge of the underscanned picture . 5. Change the scan size of monitor from underscan to overscan . 6. Measure the maximum horizontal resolution on the picture . SPECIFICATION : More than 480 TV Lines ( High Resolution) More than 380 TV Lines ( Normal Resolution) 4/5
5. LOW LUMINANCE SENSITIVITY TEST CONDITIONS Refer to “ 1. MEASUREMENT CONDITIONS “ MEASURING SYSTEM System 2. PROCEDUTE : 1. Shoot the gray scale chart ( reflective ), and zoom WIDE fully by PC . 2. Adjust the brightness of the light source using the dimmer switch so that the white peak level of the chart becomes 30 IRE ( NTSC ) ( 210 mV ,PAL ) on the waveform monitor . 3. Measure the level of illumination using the illumination meter . SPECIFICATION : NTSC (HI) : 1 Lux ( 30 IRE ) PAL (HI) : 1 Lux ( 210 mV ) NTSC (Normal) : 0.5 Lux ( 30 IRE ) PAL (Normal) : 0.5 Lux ( 210 mV ) 5/5
APPENDIX 2 DATE : 14 . JULY. ‘00 REVISION No. 1.1 RS - 232C Communication Protocol MODEL : ONZ - VN100 /150 ( NTSC ) ONZ - VN101 /151 ( NTSC ) ONZ - VN102 /152 ( NTSC ) ONZ - VP100 /150 ( PAL ) ONZ - VP101 /151 ( PAL ) ONZ - VP102 /152 ( PAL ) ONIX SYSTEM INC.
* IDH IDL CH CL D4 D3 D2 D1 C.SH C.SL * IDH IDL CH CL D4 D3 D2 D1 C.SH C.SL 1. Communication Format Communication between the microcomputer of the camera and the PC is available by using the RS - 232C. The microcomputer receives each control command given by the PC through RXD INPUT TERMINAL and it echoes back to the PC through TXD OUTPUT TERMINAL 1) Connection Conditions ; Data Length 1 Byte = 1code ( 8 Bit ) Stop Bit 1 Bit Parity Bit None Baud rate 9,600 bps 2) The communication data format from PC to Camera 1 command consists of 11 codes and The data of total 11 bytes are transmitted from PC to camera. TOTAL 11 ASCII CODES. First last (a) Format ; (b) Description ; 1’ST CODE : START CODE 2’ND CODE : THE HIGH CHARACTER OF CAMERA ID 3’RD CODE : THE LOW CHARACTER OF CAMERAI ID 4’TH CODE : COMMAND High 5’TH CODE : COMMAND Low 6’TH CODE : DATA 4 7’TH CODE : DATA 3 8’TH CODE : DATA 2 9’TH CODE : DATA 1 10’TH CODE : Check Sum High 11’TH CODE : Check Sum Low 3) The communication data format from Camera to PC (Echo back data format ) ; The data of total 11 bytes are transmitted from Camera to PC. * TOTAL 11 ASCII last First (a) Format ; (b) Description ; 1’ST CODE : START CODE 2’ND CODE : DATA 8 ( ID Code does not affect communication now) 3’RD CODE : DATA 7 ( ID Code does not affect communication now) 4’TH CODE : DATA 6 5’TH CODE : DATA 5 6’TH CODE : DATA 4 7’TH CODE : DATA 3 8’TH CODE : DATA 2 9’TH CODE : DATA 1 10’TH CODE : Check Sum High 11’TH CODE : Check Sum Low * Check Sum Method: ADD data1 to data 9 without carry. * If it becomes 3A as result of checksum data, It needs to be changed to ASCⅡ code [ ‘3’ ‘A’] 1/10
4) Communication Flow start Send command (11codes) Are echo back data transmitted from camera ? NO Delay 20 ms YES Command transmission is ok ! Camera returns echo back data after execution of command from PC, So , in case of “Internal Zoom Tracking PRESET Moving control command “ Echo back data can be delayed to several seconds . The minimum delay time between command and echo back data is 1 Milli- second. Send next command END 4) Miscellaneous for Communication * When transmitting 11 code of command, keep 2 Milli-seconds of waiting time between codes. * If command transmission is stopped after 3 code only , camera waits for the remain 8 codes continuously. At that moment, If new command ,starting from ‘*’ (Start code ) is transmitted to camera, the previous 3 codes are ignored ! * IF echo back codes are error , there can be some troubles in communication line or data receiving timing . On software, you can send command again ! * About echo back : After 1 command , you need to wait for echo back data from camera for Transmission confirmation and next command transmission . But 1 more command transmission is possible before echo back data 20 milli second after first transmission. 2/10
2. RS - 232C Communication Commands : ‘X’ indicates don’t care code and “YY” indicates checksum 1) Camera RESET Reset the micro controller ( u-COM ) of Camera. *XX71XXXXYY 2) Camera ID Display ON/OFF control Switch the display of camera ID (ON/OFF). ; ID ON *XX7201XXYY *XX7200XXYY ; ID OFF 3) CAM ID READ . ZZ : Camera ID *XX73XXXXYY *XXZZXXXXYY :Return data *XX74ZZXXYY ZZ : NEW ID CODE 4) CAM ID CHANGE ; Change the data of CAM_ID to “ NEW_C_ID “ . 5) Key Action ; See Page 10 Key action can be activated by this command. *XX75ZZXXYY ZZ : Key CODE Caution ; When you want to stop key action, send this command again by using “KC_STOP “ . KEY CODE : Refer to 10-3.( Key Code Table ) for desired key action selection. 6) Camera Power ON/Off Turn on the power of Camera. *XX760ZXXYY Z(1) : Power On Z(0) : Power Off 7) Function OSD Display Mode RD *XX79XXXXYY Read the Function OSD Display Mode of the camera *0ZXXXXXXYY ;return data Return Data : Z(0) : “ Function OSD ON” mode. : All osd display is enabled Z(1) : “ Function OSD OFF” mode : Excluding Menu osd display ,All osd display is disabled. 8) Function OSD Display Mode Change *XX7A0ZXXYY Change the Function OSD Display Mode of the camera Z(0) : The Function OSD Display Mode is changed to “ Function OSD ON” mode. Z(1) : The Function OSD Display Mode is changed to “ Function OSD OFF” mode. 3/10
9) CAMERA status Read Command *XX7C0ZXXYY Read the current status of the Camera. *0RXXXXXXYY(RETURN DATA) Z(0) : Focus Mode READ --> R (0) : Focus Auto R(1) :Focus Manual Z(1) : Camera ID Display ON mode, --> R (0) : Camera ID Display OFF R(1) :DISPLAY ON Z(3) : BACKLIGHT ON state, --> R (0) : BACKLIGHT OFF R(1): Backlight On Z(4) : FLICKERLESS ON state, --> R (0) : FLICKERLESS OFF R(1): Flickerless on Z(8) : Auto BLC Mode, --> R (0) : Auto BLC Off Mode R(1): Auto BLC On Mode 10) Camera Read Command of Digital Effect status *XX7EXXXXYY Read the current Digital Effect status of the Camera. The return data is “DEFT_Status”. · Construction of DEFT_Status data *0ZXXXXXXYY ;RETURN DATA Z(0) : NO DIGITAL EFFECT IS ACTIVATED Z(1) : WIDE(Cinema effect) ON Z(2) : ART ON Z(3) : Mirror ON , Z(4) : Nega effect on. Z(5) : COLOR OFF. Z(6) : MOSAIC ON . 11) Read the Exposure Mode *XX80XXXXYY Read the current Exposure Mode of the Camera. The return data is “AE MODE”. *0ZXXXXXXYY ;return data Z(0) : AUTO Exposure mode Z(1) : SHUTTER Manual mode. Z(2) : IRIS Manual mode. Z(3) : AGC Manual mode Z(4) : SHUTTER / IRIS / AGC All Manual mode 12) Exposure Mode Set Command *XX810ZXXYY Set the mode of Exposure according to “AE Mode” Z(0) : AUTO Exposure mode Z(1) : SHUTTER Manual mode. Z(2) : IRIS Manual mode. Z(3) : AGC Manual mode Z(4) : SHUTTER / IRIS / AGC All Manual mode 4/10
13) BACKLIGHT Level Read *XX83XXXXYY Read the current BACKLIGHT level of Camera . *XXZZXXXXYY ;return Data ZZ : BACKLIGHT level. (data range 00 ~FF hex) 14) BACKLIGHT Level Adjust *XX84ZZXXYY Adjust the current BACKLIGHT level of Camera . ZZ: BACKLIGHT level. (data range 00 ~FF hex) 15) SHUTTER Speed counter read *XX850000YY Set the shutter speed with the “shutter counter” . *XX85ZZ00YY ;return data ZZ : shutter counter 00 : 1/60 01:1/125 02:1/250 03:1/200 04 : 1/250 05:1/300 06:1/350 07:1/400 08 : 1/450 09:1/500 10:1/600 11:1/700 12 : 1/800 13:1/900 14:1/1000 15:1/1100 16 : 1/1200 17:1/1300 18:1/1500 19:1/1600 20 : 1/1800 21:1/2000 22:1/2500 23:1/3000 24 : 1/3500 25:1/4000 26:1/6000 27:1/10000 16) SHUTTER Speed Setting *XX86ZZXXYY Set the shutter speed with the “shutter counter” . ZZ :shutter counter 17) AGC Level Setting *XX87ZZXXYY Set the AGC Level with the AGC data . ZZ: AGC data 00(Minimum AGC Level) ~ FF Hex (Maximum AGC Level) 18) Read the current BRIGHTNESS data *XX88XXXXYY Read the current BRIGHTNESS data of the Camera. *XXZZXXXXYY ;return data The return data is “Brightness”. ZZ : 00(Minimum Brightness level) ~ 60 Hex (Maximum Brightness Level) 19) Read the IRIS control data *XX89XXXXYY *XXZZXXXXYY ;return data ZZ : IRIS Control Level (data range 00 ~FF hex) 5/10
20) IRIS Level Setting *XX8AZZXXYY Set the IRIS OPEN Level ZZ : IRIS control level (data range 00 ~FF hex) 21) Read the AGC control data *XX8B0000YY *XXZZ0000YY ;return data ZZ : Current AGC Control level (data range 00 ~FF hex) 22) IRIS Area Weighting Value Read *XX8EXXXXYY Read the current weighting value of Iris area. *XXABXXXXYY ;return data A:Region 1 weight data B:Region 2 weight data R1 R2 23) IRIS Area Weighting Value Write *XX8FXXXXYY Read the current weighting value of Iris area. A:Region 1 weight data B:Region 2 weight data 24) FLICKERLESS Mode ON/OFF Setting *XX900ZXXYY Z(1) : Flickerless Mode Active Z(0) : Flickerless Mode inactive 25) BRIGHTNESS Data Setting *XX91ZZXXYY ZZ : Brightness level desired (data range 00 ~ 60 hex) 26) Read the White Balance Mode *XXB1XXXXYY Read the current White Balance Mode of the Camera. *XX0ZXXXXYY ;return data Z(0) : Auto Mode Z(1) : Special Z(2) : indoor Z(3) : outdoor Z(4) : Manual Z(5) : Push Auto 27) White Balance Mode Set Command *XXB20ZXXYY Set the mode of White Balance of the camera. Z(0) : Auto Mode Z(1) : Special Z(2) : indoor Z(3) : outdoor Z(4) : Manual Z(5) : Push Auto 28) Read the current MANUAL White Balance Mode data *XXB3XXXXYY *XXB3ZZXXYY ;return data ZZ : (data range 00 ~60 hex) 6/10
29) MANUAL White Balance Mode MWB_CTL data Setting *XXB4ZZXXYY ZZ : (data range 00 ~60 hex) 30) Read the current SHARPNESS data *XXB5XXXXYY *XXB50ZXXYY ;return data Z : “Sharpness Data” Data value range 0 ~ F 31) SHARPNESS data adjust *XXB60ZXXYY Z : “Sharpness Data” Data value range 0 ~ F 32) Read the RED Adjust data at the SPECIAL White Balance Mode *XXB7XXXXYY *XXZZXXXXYY ;return data ZZ : Red adjust data (data range 00 ~ FF hex) 33) Read the BLUE Adjust data at the SPECIAL White Balance Mode data *XXB8XXXXYY *XXB8ZZXXYY ;return data ZZ : Blue adjust data. (data range 00 ~ FF hex) 34) SPECIAL White Balance Mode RED adjust data Setting *XXB9ZZXXYY ZZ : Red adjust data (data range 00 ~FF hex) 35) SPECIAL White Balance Mode BLUE adjust data Setting *XXBAZZXXYY ZZ : Blue adjust data (data range 00 ~FF hex) 36) Zoom Lens Position Read *XXC0XXXXYY *XX0ABCDEYY ;return data A : ZOOM POSITION HIGH BC : ZOOM POSITION LOW DE : DIGITAL ZOOM POSITION * zoom position range ( 00 ~ 42F Hex) * Digital zoom position range ( 00 ~ E0 Hex ) * : This command is used For Zoom Position setting In external PRESET mode . ABCDE is expressed in Hex data 37) Focus Lens Position Read *XXC1XXXXYY *XX0ABCXXYY A : FOCUS POSITION HIGH BC : FOCUS POSITION LOW * focus position range ( 3F ~ 315 Hex) * : This command is used For Zoom Position setting In external PRESET mode . ABC is expressed in Hex data 7/10
38) Memorize Internal PRESET Position for Internal PRESET control *XXC7ZZXXYY Memorize the current zoom, focus, and digital zoom position value into the internal nonvolatile memory of the CAMERA for controlling the Internal PRESET Move. The memory position to store is indicated by the “INDEX” value. ZZ : (data range 00 ~ 3F hex) : Index counter 39) Internal Non Zoom Tracking PRESET Moving control *XXC8ZZXXYY Perform the Internal PRESET Moving action. ZZ : (data range 00 ~ 3F hex) : Index counter 40) Slow Speed Internal Zoom Tracking PRESET Moving control :XXCFZZXXYY Perform the Zoom Tracking PRESET action to the target zoom position slowly. The target zoom position value is memorized in the internal nonvolatile memory. ZZ : (data range 00 ~ 3F hex) : Index counter 41) Quick Speed Internal Zoom Tracking PRESET Moving control :XXD0ZZXXYY Perform the Zoom Tracking PRESET action to the target zoom position Quickly. The target zoom position value is memorized in the internal nonvolatile memory. ZZ : (data range 00 ~ 3F hex) : Index counter CF) Internal Preset Mode usage 1. Using “Memorize Internal PRESET Position“ Command , Memorize each position To camera 2. Using “Preset Moving control “ Command , Move Zoom and Focus Lens to each Memorized position every position is accessed by index counter 8/10
Appendix: Key Code Table 1/2 KC_STOP 09 ; After the other key commands below this command must be followed after. If continuous key service is needed send this command several seconds after the before command. In other words , when you want a certain function you can send below key codes when you want to stop the function send this command again. KC_POWER 0A ; Toggles power on/off status KC_TELE 01 ; Slow zoom tele action KC_WIDE 03 ; Slow zoom wide action KC_QTELE 02 ;Fast zoom tele action KC_QWIDE 04 ; Fast zoom wide action KC_FAR 05 ;Focus lens move action to far direction ( in manual focus mode) KC_NEAR 06 ;Focus lens move action to near direction ( in manual focus mode) KC_FAM 0B ;Toggles focus Auto/Manual Modes KC_F_PUSH 0C ; Activates Focus auto action on time KC_SET 0D ; In menu mode , toggles item selection mode/ item adjust mode KC_Default 0E ; by this code all conditions in camera returns to manufacturer’s conditions KC_OSD 0F ; Toggles function osd off/on modes KC_MENU 10 ; Toggles menu on/off modes KC_BL 13 ; Toggles backlight mode KC_FLICKER 14 ; Toggles flicker mode KC_SSC Up 15 ; Shutter speed counter up KC_SSC Down 16 ; Shutter speed counter down KC_DEFT 17 ;Switches digital effect modes WIDE→ART → MIRROR → NEGA80 MONO → MOSAIC KC_MIRROR Con. 18 ;Toggles Mirror mode KC_NEGA 19 ;Toggles nega mode KC_MONO 1A ;Toggles mono mode KC_WIDE 38 ; Toggles wide mode KC_MOSAIC 39 ;Toggles mosaic mode KC_ART 3A ; Toggles art mode 9/10
Appendix: Key Code Table 2/2 KC_SRPUP 1C ;sharpness data up KC_SRPDN 1D ;sharpness data down KC_BRTUP 1E ;Brightness data up KC_BRTDN 1F ;Brightness data down KC_ZoomSup 20 ;Zoom Start up KC_ZoomSdn 21 ;Zoom Start down KC_ZoomEup 22 ;Zoom End up KC_ZoomEdn 23 ;Zoom End down KC_WB_PUSH 24 ;In white balance push auto mode (manual mode ) ,initiates “push action” KC_AWBup 25 ;Switches awb modes auto → special → Indoor → outdoor → hue control → puah auto KC_AWBdn 26 ;Switches awb modes in reverse sequence to KC_AWBup KC_RadjUP 27 ;In Special WB mode ,R gain goes up KC_RadjDN 28 ;In Special WB mode ,R gain goes down KC_BadjUP 29 ;In Special WB mode ,B gain goes up KC_BadjDN 2A ;In Special WB mode ,B gain goes down KC_HUEUP 2B ;In HUE adjust WB Mode the picture become Reddish KC_HUEDN 2C ;In HUE adjust WB Mode the picture become Bluish KC_AE_Man 2D ;Turns AE mode to Manual mode KC_IrisUp 2E ;Increase IRIS Level KC_IrisDn 2F ;Decrease IRIS Level KC_AGCup 30 ;Increase AGC Gain KC_AGCdn 31 :Decrease AGC gain END Example of Key action transfer # Zoom Lens moving example Send commands following this sequence! 1 → 2 → 3 Every codes are transferred and received in ASCII codes 1. *XX75ZZXXYY ( move to tele ) XX=don’t care ZZ = 01 (KC_TELE) YY=Check Sum Data =>assume XX to be 00 ,then the check sum becomes Y Y 2A(‘*’) + 30(‘0’)+ 30(‘0’)+37(‘7’)+35(‘5’)+ 30(‘0’)+ 31(‘1’)+30(‘0’)+ 30(‘0’) = ‘B’ ‘7’ 2. Software delay ( The time you desired to move ) 3. *XX75ZZXXYY (stop action ) ZZ:09 (KC_STOP) 10/10