Download
1 / 53
530 likes | 643 Views
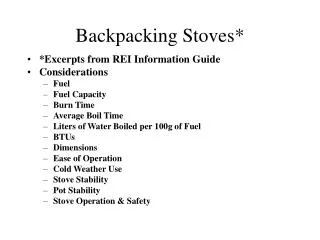
Skills Instruction Backpacking Stoves. [your name here] Troop Guide N7–388–11–2. Skills Instruction Backpacking Stoves. Promote note taking Handout at the end. 1A. Learning Objectives. Upon completion of this presentation you will be able to:

E N D
Skills InstructionBackpacking Stoves [your name here] Troop Guide N7–388–11–2
Skills InstructionBackpacking Stoves • Promote note taking • Handout at the end 1A N7–388–11–2
Learning Objectives Upon completion of this presentation you will be able to: • Explain why and when we use effective skills instruction in BSA. • Explain the steps in effective skills instruction. 2 N7–388–11–2
Learning Objectives Upon completion of this presentation you will be able to: • Explain why and when we use effective skills instruction in BSA. • Explain the steps in effective skills instruction. A portion of every troop meeting is set aside for “skills instruction”. Set the stage: Young scouts going on 1st backpacking trip and need to know how to use the stoves safely or the troop just bought new stoves and we are learning how to use them safely. 2A N7–388–11–2
Backpacking Stoves Troop Guide 3
Backpacking Stoves Troop Guide 3A
Learning Objectives Upon completion of this presentation you will be able to: • Explain the differences between the basic types of backpacking stoves. • Explain the differences between the different types of backpacking stove fuels. • Explain the safety rules for backpacking stove. • Safely use a backpacking stove. 4 N7–388–11–2
Learning Objectives Upon completion of this presentation you will be able to: • Explain the differences between the basic types of backpacking stoves. • Explain the differences between the different types of backpacking stove fuels. • Explain the safety rules for backpacking stove. • Safely use a backpacking stove. 4A N7–388–11–2
Types of Stoves • Integral Fuel Container • fuel container connected directly to the stove • External Fuel Container • fuel container is separate and connected by a fuel line 5 N7–388–11–2
Integral Fuel Container - This type of stove has the fuel container connected directly to the stove. • External Fuel Container - The fuel container is separate from this type of stove and connected by a fuel line. • There are many types of backpacking stoves that range from the basic to the exotic. The stove you choose will depend upon your requirements, such as ease of handling, weight, bulk, and type of fuel. • Backpacking Spring issue evaluates backpacking stoves • Pass around Campmor catalogue with stoves highlighted Types of Stoves 5A N7–388–11–2
Types of Fuels Liquid white gas, refined kerosene and alcohol Compressed Gas propane, isobutane and propane/butane mix 6
Types of Fuels There are two types of fuels available for backpacking stoves. • Liquid – white gas, refined kerosene, and alcohol. Liquid fuels require being transferred into an external or internal fuel cylinder depending upon the stove. • Compressed Gas – propane, isobutane and propane/butane mix come in one time use cylinders. 6A N7–388–11–2
Stove Safety BSA Stove Safety Resources • Scoutmaster Handbook • Guide to Safe Scouting • BSA Adult Basic Backpacking Course • Any other backpacking courses 7 N7–388–11–2
Stove Safety BSA Stove Safety Resources • Scoutmaster Handbook • Guide to Safe Scouting • BSA Adult Basic Backpacking Course • Any other backpacking courses Ask what are some dos and don’ts of stove / gas safety Then follow up with the schooled answers. 7A N7–388–11–2
Stove Safety Continued • Liquid fuels and compressed gas can be dangerous, use extreme caution when using them. • Always check the stove manual to ensure you are using the correct type of fuel. • Never pour fuel into or near a hot stove. • Allow sufficient time for fuel vapors to disperse before attempting to light a stove after pouring fuel. 8 N7–388–11–2
Stove Safety Continued • Liquid fuels and compressed gas can be dangerous, use extreme caution when using them. • Always check the stove manual to ensure you are using the correct type of fuel. • Never pour fuel into or near a hot stove. • Allow sufficient time for fuel vapors to disperse before attempting to light a stove after pouring fuel. 8A N7–388–11–2
Stove Safety Continued • Use the heat shield between the stove and the fuel cylinder. • Hand tighten pumps and cylinders. • When removing a fuel bottle, pressure must be released slowly to avoid spraying or spilling fuel. • Be careful not to cross-thread gas fittings when connecting them to a stove or fuel line. • Never store any fuel, either compressed gas or liquid, inside a tent or sleeping area. 9 N7–388–11–2
Stove Safety Continued • Use the heat shield between the stove and the fuel cylinder. • Hand tighten pumps and cylinders. • When removing a fuel bottle, pressure must be released slowly to avoid spraying or spilling fuel. • Be careful not to cross-thread gas fittings when connecting them to a stove or fuel line. • Never store any fuel, either compressed gas or liquid, inside a tent or sleeping area. 9A N7–388–11–2
Stove Safety Continued • Always operate stoves on a flat stable surface that is free from burnable material. • If the stove is designed to burn multiple types of fuel, pick one and stick with it. DON’T MIX! • Fuel bottles should be treated the same way. • Always follow manufacturers instructions. • The most important safety feature of any stove is a trained operator. 10 N7–388–11–2
Stove Safety Continued • Always operate stoves on a flat stable surface that is free from burnable material. • If the stove is designed to burn multiple types of fuel, pick one and stick with it. DON’T MIX! • Fuel bottles should be treated the same way. • Always follow manufacturers instructions. • The most important safety feature of any stove is a trained operator. 10A N7–388–11–2
Stove Preparation For today’s demonstration, we will use a MSR WhisperLite Internationale stove. To operate this stove we need the following materials: • One MSR WhisperLite Internationale stove • One Fuel Bottle (filled with liquid fuel) • Matches or lighter • Repair kit N7–388–11–2 11
Stove Preparation* (Ask for a volunteer. Explain: I am going to demonstrate how to instruct someone on how to safely operate a backpacking stove). For today’s demonstration, we will use a MSR WhisperLite Internationale stove. To operate this stove we need the following materials: • One MSR WhisperLite Internationale Jet Stove • One Fuel Bottle (filled with liquid fuel) • Matches or lighter • Repair kit *Tailor to the type of Stove you will be using N7–388–11–2 11A
Assembling the Stove • Remove stove from carrying case. • Unscrew the fuel bottle cap and fill the bottle to the fill line. Be sure to keep the bottle away from your face and others. (demonstrate) • Screw the pump snugly into the fuel bottle. • Pump the plunger 25-35 strokes. If bottle is half full pump 40-55 strokes or until firm resistance is felt when pushing the plunger down. (The less fuel, the more pumps) • Rotate the legs into the slots in the frame N7–388–11–2 12
Assembling the Stove • Remove stove from carrying case. • Unscrew the fuel bottle cap and fill the bottle to the fill line. Be sure to keep the bottle away from your face and others. (demonstrate) • Screw the pump snugly into the fuel bottle. • Pump the plunger 25-35 strokes. If bottle is half full pump 40-55 strokes or until firm resistance is felt when pushing the plunger down. (The less fuel, the more pumps) • Rotate the legs into the slots in the frame N7–388–11–2 12A
Assembling the Stove • Lubricate the end of the fuel line lightly with MSR Pump Cup Oil (saliva or other mineral-base lubricant), then insert it into the fuel tank bushing on the pump. • Snap the catch are securely into the slot on the pump body. • Put the heat reflector under the stove. • Bend fuel line to allow stove to sit squarely on the ground. N7–388–11–2 13
Assemblingthe Stove • Lubricate the end of the fuel line lightly with MSR Pump Cup Oil (saliva or other mineral-base lubricant), then insert it into the fuel tank bushing on the pump. • Snap the catch are securely into the slot on the pump body. • Put the heat reflector under the stove. • Bend fuel line to allow stove to sit squarely on the ground. N7–388–11–2 13A
Operating the Stove Before lighting the stove check that: • Stove assembly has no fuel leaks. • Area is clear of flammable materials • Catch arm is locked and stove is properly assembled. N7–388–11–2 14
Operating the Stove Before lighting the stove check that: • Stove assembly has no fuel leaks. • Area is clear of flammable materials • Catch arm is locked and stove is properly assembled. N7–388–11–2 14A
Operating the Stove • Priming instructions for white gas: • Priming pre-heats the stove to turn the liquid fuel into vapor. To pre-heat properly, the priming flame must contact the generator tube. Insufficient priming may result in flare-up. N7–388–11–2 15
Operating the Stove • Priming instructions for white gas: • Priming pre-heats the stove to turn the liquid fuel into vapor. To pre-heat properly, the priming flame must contact the generator tube. Insufficient priming may result in flare-up. N7–388–11–2 15A
Operating the Stove Priming • Open control valve 1-2 turns until fuel flows through the Jet and fills the priming cup ½ full • Turn the control valve off . • Check for leaks at the control valve, pump, jet and fuel line. If leaks are found, do not use stove and see troubleshooting. • Light the priming fuel. • Place the windshield around the stove, then fold the ends together to keep it securely in place N7–388–11–2 16
Operating the Stove Priming • Open control valve 1-2 turns until fuel flows through the Jet and fills the priming cup ½ full • Turn the control valve off . • Check for leaks at the control valve, pump, jet and fuel line. If leaks are found, do not use stove and see troubleshooting. • Light the priming fuel. • Place the windshield around the stove, then fold the ends together to keep it securely in place N7–388–11–2 16A
Operating the Stove Turning the Stove on: • When the priming flame is down to a small flame (about 30-60 seconds), slowly open the valve . • If the stove : • Goes out, turn the control valve off . • Burns with erratic yellow flames, but the priming cup is still burning, turn the control valve off and pre-heat longer. • Burns with a blue flame, wait a minute then adjust to desired setting. There is a delay between turning the control valve and changes in flame. N7–388–11–2 17
Operating the Stove Turning the Stove on: • When the priming flame is down to a small flame (about 30-60 seconds), slowly open the valve . • If the stove : • Goes out, turn the control valve off . • Burns with erratic yellow flames, but the priming cup is still burning, turn the control valve off and pre-heat longer. • Burns with a blue flame, wait a minute then adjust to desired setting. There is a delay between turning the control valve and changes in flame. N7–388–11–2 17A
Operating the Stove Turning the Stove on: • To maintain stove performance, pump the plunger 3-5 strokes as needed to keep enough pressure in the fuel tank. You should feel firm resistance when you pump down on the plunger. The less fuel in the bottle , the more pumps needed to keep pressure. DO NOT over pressurize. Fuel bottle pressure that is to high causes erratic flames. Low pressure causes low flames and very slow burn times. N7–388–11–2 18
Operating the Stove Turning the Stove on: • To maintain stove performance, pump the plunger 3-5 strokes as needed to keep enough pressure in the fuel tank. You should feel firm resistance when you pump down on the plunger. The less fuel in the bottle , the more pumps needed to keep pressure. DO NOT over pressurize. Fuel bottle pressure that is to high causes erratic flames. Low pressure causes low flames and very slow burn times. N7–388–11–2 18A
Operating the Stove Turning the Stove on: • To simmer, operate the stove at low fuel pressure. Turn the control valve down until the flame becomes unsteady, then open the control valve until the flame stabilizes N7–388–11–2 19
Operating the Stove Turning the Stove on: • To simmer, operate the stove at low fuel pressure. Turn the control valve down until the flame becomes unsteady, then open the control valve until the flame stabilizes N7–388–11–2 19A
Operating the Stove Turning the Stove off: • Turn the control valve off . The flame will take a minute or so to die out. • WAIT for the stove to cool before disassembling!! • Depressurize the fuel tank by unlocking the catch arm and pulling the fuel line out of the pump assembly. Away away from heat, sparks, or flame, hold the fuel bottle upright, turn the pump assembly away from you, and unscrew the pump to release pressure. N7–388–11–2 20
Operating the Stove Turning the Stove off: • Turn the control valve off . The flame will take a minute or so to die out. • WAIT for the stove to cool before disassembling!! • Depressurize the fuel tank by unlocking the catch arm and pulling the fuel line out of the pump assembly. Away away from heat, sparks, or flame, hold the fuel bottle upright, turn the pump assembly away from you, and unscrew the pump to release pressure. N7–388–11–2 20A
Operating the Stove Turning the Stove off: • For transporting or storing: leave the pump assembly in the fuel bottle or, to be sure the control valve does not open by mistake, unscrew the pump and replace it with the fuel bottle cap. N7–388–11–2 21
Operating the Stove Turning the Stove off: • For transporting or storing: leave the pump assembly in the fuel bottle or, to be sure the control valve does not open by mistake, unscrew the pump and replace it with the fuel bottle cap. N7–388–11–2 21A
Learning Objectives Upon completion of this presentation you will be able to: • Explain the differences between the basic types of backpacking stoves. • Explain the differences between the different types of backpacking stove fuels. • Explain the safety rules for backpacking stove. • Safely use a backpacking stove. 22 N7–388–11–2
Learning Objectives Upon completion of this presentation you will be able to: • Explain the differences between the basic types of backpacking stoves. • Explain the differences between the different types of backpacking stove fuels. • Explain the safety rules for backpacking stove. • Safely use a backpacking stove. 22A N7–388–11–2
Thank You! N7–388–11–2 23
Thank You! N7–388–11–2 23A
Skills Instruction • Skills Instruction is an integral part of Cub Scouting, Boy Scouting and Venturing. • Scouting’s approach to skills instruction is EDGE: Explain Demonstrate Guide Enable • Another way to put it is this: Tell the scout how to do it… Show the scout how to do it… Help the scout do it… Have the scout do it on their own. N7–388–11–2 24
Skills Instruction • Skills Instruction is an integral part of Cub Scouting, Boy Scouting and Venturing. It is how Scouts learn most of their skills. • Scouting’s approach to skills instruction is EDGE: Explain Demonstrate Guide Enable • Another way to put it is this: Tell the scout how to do it… Show the scout how to do it… Help the scout do it… Have the scout do it on their own. N7–388–11–2 24A
Great LeadersareGreat Teachers N7–388–11–2 26
Great leaders are Great Teachers • I would like to encourage all patrol members to watch the teaching techniques of the presenters throughout the Wood Badge Course. • What can be learned about teaching methods by studying good instructors can be every bit as valuable as the material they are presenting. N7–388–11–2 26A