Download

1 / 14
140 likes | 240 Views
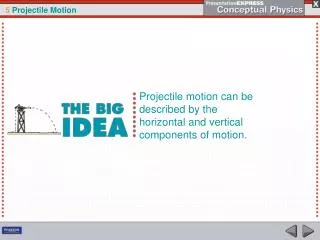
Lab 7: Projectile Effects 2. CS 282. Review from last week. Last week we dealt with projectile physics Examined the gravity-only model Coded drag affecting projectiles Used Runge-Kutta for approximating integration Coded wind effect This week we will add the last effect…. SPIN!.

E N D
Lab 7: Projectile Effects 2 CS 282
Review from last week • Last week we dealt with projectile physics • Examined the gravity-only model • Coded drag affecting projectiles • Used Runge-Kutta for approximating integration • Coded wind effect • This week we will add the last effect…
Exercise: Setting Up • First of all, open up a completed version of last week’s lab • If neither you nor your partner have it, you will have to code it again. Refer to last week’s instructions. • So that we have a common starting ground, set the parameters for the following… • Initial position: (0.0, 0.0, 0.0) • Initial Velocity: (15.0, 20.0, 1.0) • Drag Coefficient: 0.05 Mass: 10.0 Radius: 1.2 • Wind Velocity: (5.0, 2.0, 0.0)
Exercise: Setting Up • Compile it and run the following scenarios • IMPORTANT: Limit your simulations by either time (i.e. 5 seconds) or by position (when y position is at 0) • Gravity-only model • Gravity and Drag Model • Gravity, Drag, and Wind Model • Start outputting the magnitude of the velocity to the screen for each model • sqrt (vx2 + vy2 + vz2) • Capture these outputs in separate files • Use > on the command-line
Spin effects • Spin is a very common occurrence when dealing with projectile physics. • A bullet leaving a gun will have spin • A golf ball will also have spin when hit by the club • Spinning objects generate force
How does spin affect projectiles? • First of all, a spinning object generates lift • This is called the Magnus effect (also known as Robin’s effect) • The direction of the force will be perpendicular to the velocity and spin direction • If the object has backspin… • Then the Magnus force will be positive in the vertical direction, propelling the object upwards • On the other hand, if the object has topspin… • The resulting force will be in the opposite direction, thus pushing the object down
Example of the forces • Here we can see all the forces interacting with our ball (minus the wind) • Glossary: • CL (lift coefficient) • p (fluid density) • Greek letter rho • v (velocity magnitude) • A (characteristic area) • R (spin axis vector) • w (rotation velocity) • Greek letter omega
Exercise: Adding Spin • We need to create some variables in our class • We will need the following doubles… • Spin axis components: X-axis rotation, Y-axis rotation, Z-axis rotation • Angular/Rotational velocity (omega) • And some way of setting/initializing them • You can either have them be public and manually set them, or create get/set functions (better) • Create a spin_wind_drag function • It will need to take delta time as a parameter • HINT: We will be using Runge-Kutta
Exercise: Adding Spin • For a sphere, the force FM is defined as… • FM = ½ CL* p * v2 * A • For p and A, you can just use the values calculated in the main driver function • CL = (radius * rotational velocity) / v • Solve the following in terms of acceleration (remember F = ma) and add them to their corresponding acceleration components. • FMx = - (vy/v) * Ry * FM • FMy = - (vx/v) * Rz * FM • FMz = 0 • Because we will rotate the sphere along the Z-axis, this component will be 0 (e.g. 0,0,1 for the spin axis vector)
Exercise: Adding Spin • Hopefully, you have now added the acceleration components to each step of Runge-Kutta. • Be sure to add your k’s appropriately to the new accelerations you added. • Let’s set the spin axis to 0,0,1 • Add the appropriate line of code to the driver • Compile and run
Exercise: General Spin Axes • What if our spin axis is on a multiple axes? • Let’s get the general form of the Magnus force • FMx = ((vz / v) * Ry– (vy / v) *Rz)* FM • FMy = ((vx / v) * Rz– (vz / v) *Rx)* FM • FMz = - ((vx / v) * Ry– (vy / v) *Rx)* FM • Use these forces to get your acceleration now instead of the old forces. • Compile and run the with a spin axis of • (0.5 ,0.5, 0.0)
Exercise: Comparison • Use a spin axis of (0.75, 1.0, 0.0) • Default values on the rest • If you have completed the first exercise, you already have your data for the first three models. • Collect the data for the drag_wind_spin
Due next week • Plot a graph showing the differences velocity magnitude vs. time of all four models. • Bonus point(s) for the models not explicitly mentioned • If you wish to use a constant delta time (instead of a timer), you may do so by replacing the measure_reset call with a flat value (i.e. 0.5)