Download

1 / 9
170 likes | 408 Views
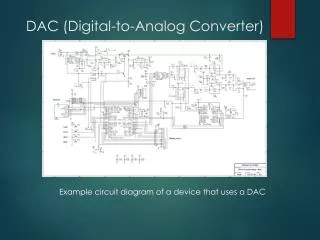
Analog to digital converter. ADC features. The converter generates a 10-bit binary result using the method of successive approximation and stores the conversion results into the ADC registers (ADRESL and ADRESH). There are 14 separate analog inputs.

E N D
ADC features • The converter generates a 10-bit binary result using the method of successive approximation and stores the conversion results into the ADC registers (ADRESL and ADRESH). • There are 14 separate analog inputs. • The A/D converter allows conversion of an analog input signal to a 10-bit binary representation of that signal and • By selecting voltage references Vref- and Vref+, the minimal resolution or quality of conversion may be adjusted to various needs.
REGISTERS • ADRESH - Contains high byte of conversion result. • ADRESL - Contains low byte of conversion result. • ADCON0 - Control register 0 and • ADCON1 Control register 1.
ADCON0 **ADCS1, ADCS0 - A/D Conversion Clock Select bits select clock frequency used for internal synchronization of A/D converter. It also affects duration of conversion. **CHS3-CHS0 - Analog Channel Select bits select a pin or an analog channel for conversion, i.e. voltage measurement **GO/DONE - A/D Conversion Status bit determines current status of conversion: 1 - A/D conversion is in progress; and 0 - A/D conversion is complete. This bit is automatically cleared by hardware when the A/D conversion is completed. **ADON - A/D On bit enables A/D converter. 1 - A/D converter is enabled; and 0 - A/D converter is disabled.
ADCON1 • **ADFM - A/D Result Format Select bit • 1 - Conversion result right justified. Six most significant bits of the ADRESLH are not used; and • 0 - Conversion result left justified. Six least significant bits of the ADRESL are not used. • **VCFG1 - Voltage Reference bit selects negative voltage reference source needed for A/D converter operating. • 1 - Negative voltage reference is applied on the Vref- pin; and • 0 - Voltage power supply Vss is used as negative voltage reference source. • **VCFG0 - Voltage Reference bit selects positive voltage reference source needed for A/D converter operating. • 1 - Positive voltage reference is applied on the Vref+ pin; and • 0 - Voltage power supply Vdd is used as positive voltage reference source.
USING ADC • Step 1 - Configuring port: Write logic one (1) to the corresponding bit of the TRIS register to configure it as input; and Write logic one (1) to the corresponding bit of the ANSEL register to configure it as analog input. • Step 2 - Configuring ADC module: Configure voltage reference in the ADCON1 register; Select ADC conversion clock in the ADCON0 register; Select one of input channels CH0-CH13 of the ADCON0 register; Select data format using the ADFM bit of the ADCON1 register; and Enable A/D converter by setting the ADON bit of the ADCON0 register.
USING ADC CONTI.. • Step 3 - Configuring ADC interrupt (optionally): Clear the ADIF bit; and Set the ADIE, PEIE and GIE bits. • Step 4 - Wait for the required acquisition time (approximately 20uS) to pass. • Step 5 - Start conversion by setting the GO/DONE bit of the ADCON0 register. • Step 6 - Wait for ADC conversion to complete. It is necessary to check in program loop whether the GO/DONE pin is cleared or wait for an A/D interrupt (must be previously enabled). • Step 7 - Read ADC results: Read the ADRESH and ADRESL registers.