Download
1 / 29
290 likes | 389 Views
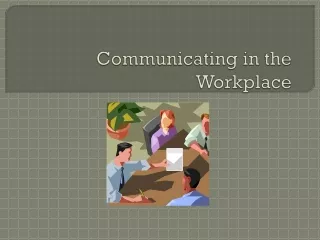
Communicating in the Electronic Age. Andrea Adkins 4-H Volunteer & Librarian Washington County. Find this and more online at tips4hvols.wordpress.com. Create a Club Calendar. Club Roster. Use a Phone Tree.

E N D
Communicating in the Electronic Age Andrea Adkins 4-H Volunteer & Librarian Washington County Find this and more online at tips4hvols.wordpress.com
Use a Phone Tree • Advisors call all club officers (P, VP, S, T) then each officer calls a set number of other members. Good for emergencies. • You can also use a calling committee: each person is responsible for calling a set amount of other members. Good for reminders about meetings & other club/county events.
ALWAYS GET YOUR EXTENSION EDUCATOR’S PERMISSION BEFORE CREATING A FACEBOOK GROUP
How to create and a "Secret Group" on Facebook Sign into your Facebook account. If you do not have a Facebook account, create one and learn how to use it. To learn how, look at the handout“Jump into Facebook".
Create a Group First, click on "Create Group..."
Create a Group cont. Enter the name of a club member/parent/advisor/extension educator. Type in your club’s name Click “Create” For privacy, always choose a “secret” group
Create a Group cont. Then click “Okay” Choose an icon
Create a Group cont. Success! You have created a group. Now, who and how do you add people to your group?
Who Do I Add and How? Click “Add People” Type their name in the box Click “Add” Click on the settings button and choose “Make Admin” Click “Make Admin” First add your 4-H Extension Educator and make them an administrator. You must be “friends” with them first.
Who Do I Add and How? Cont. Next add advisors, parents, and members over age 13. You can do this by typing their name in the box.
Group Settings Click on the “Settings” icon and choose “Edit Group Settings”
Group Settings cont. “Secret” Group This allows others to add appropriate people to the group without you being friends with them, but you have to approve before they are added. Allows members to post to group. Gives administrators total control over what is posted. These are the best settings for creating a group for your club. Make sure to click “Save” before leaving the page.
Approving Posts This shows that you have posts that need approved. Click on it to see posts.
Approving Posts cont. Here are three pending posts. Choose the checkmark to approve. The X to delete or the minus to delete and ban. Hopefully there is never a need to delete and ban but if there is, confer with your Extension Educator first. See the slide “Tips for Moderating Posts”.
Approving Posts cont. This is what is looks like after you approve a post. Your Extension Educator is already an administrator whose posts do not need approved. I would also have another advisor be an administrator as well.
Using Group Features There are five sections to a group page: Wall, About, Events, Photos, and Files.
Using Group Features cont. Besides writing posts you can add photos, files, and ask questions. The question/poll tool is a good way to brainstorm and get feedback from the club after an speaker or activity.
Using Group Features cont. When you click on the “About” tab you can see all members of a “Secret” Group. Click on “Add a Description” to provide more information about the group. From here you can adjust the setting for each person in the group. The message feature will send a private message to everyone in the group. You can also add people to the group from this screen.
Using Group Features cont. • Click here to change event settings. • Click here to create an event. • Change calendar settings for events here. • Remember to click “Save”.
Using Group Features cont. Click to upload photos or videos. Make sure to follow rules on photography & video as laid out in Ohio 4-H Guidelines for Social Media.
Using Group Features cont. The “Files” feature is a great tool to use to create or upload documents for your club. For example, you could upload your county’s Jr. Fair Guide, Camp Registration form, club contacts list, meeting minutes, etc.
Using Group Features cont. Upload files here. Remember to “Save”. You can create a document here. Type first,then click “Create Doc”.
Tips for Moderating Posts • From a social media moderator’s point of view it would be better to delete the post and then remove the person from the group if it continues. Fortunately, making it so all posts must be approved before being posted will help this. If there is a repeat offender, please talk to them and explain why their post was not approved so they will hopefully not repeat it in the future. • Go with your gut, if you feel something should not be posted, error on the side of caution and do not approve the post. • If you have questions or problems always contact your 4-H Extension Educator.
Tips for Communication • Create a calendar for the club year and a roster with contact information for each member. Give these to your 4-H Club families as early in the year as possible. • One advisor in the club should be responsible for sending out electronic reminders and other communications to the 4-H Club families. • Do not make facebook or another form of Social Media the only way you contact your 4-H club families. • Create a group in your email account to make it easy to communicate. Ask for email addresses for both parents and children for this group. If anyone does not use email, contact them by phone. • If you live in an area without high speed Internet or have many families who do not use technology regularly, make phone calls. • It’s helpful to type up an email and send it then copy the email and post it on Facebook. • Texting reminders is also a good way to send reminders to specific people. It is possible to send group texts as well.
Resources Ohio Guidelines for Social Networking and Web Sites http://www.ohio4h.org/sites/drupal-ohio4h.web/files/Ohio%204-H%20Guidelines%20for%20Social%20Networking.pdf National 4-H Social Media Guidelines http://www.ohio4h.org/sites/drupal-ohio4h.web/files/4-H%20Social%20Media%20Best%20Practices%20Guide.pdf These are helpful but have not been updated in a year or two and in some ways are out of date. For example, the “secret” group instead of a “closed” group gets rid of many of the safety and privacy issues in using a facebook group for your club. Twitter is the same, the settings are now there to make all posts invisible and your name unsearchable unless you have been added as a follower by an administrator. Social Media Training - Webinar Series http://www.4-h.org/get-involved/social-media/training/ This is more for Extension Educators but you may glean some useful information. Remember, this might not be updated as soon as things change on the social media sites, so you must keep up for yourself.
Contact Information Andrea Adkins 4-H Volunteer, Washington County OLC Certified Public Librarian Email: abradkins@yahoo.com Facebook: Andrea Beth Twitter: @abradkins LinkedIn: Andrea Adkins Find PowerPoint and other resources here: tips4hvols.wordpress.com