Download
1 / 57
570 likes | 762 Views
GridNexus UNCW GUI for Workflow Management www.gridnexus.org Clayton Ferner cferner@uncw.edu. Examples Prog Cond Defun Recursion Iteration Services Web Services Grid Services. Outline. Basics Getting Started Simple workflows A little bit about JXPL Libraries Composites Ports

E N D
GridNexus UNCW GUI for Workflow Management www.gridnexus.org Clayton Ferner cferner@uncw.edu
Examples Prog Cond Defun Recursion Iteration Services Web Services Grid Services Outline • Basics • Getting Started • Simple workflows • A little bit about JXPL • Libraries • Composites • Ports • User Library • Splitting Relations
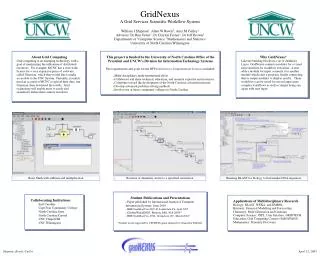
What is GridNexus • GridNexus is a GUI that allows the user to create/edit/run workflows • Based on Ptolemy II http://ptolemy.eecs.berkeley.edu/ptolemyII. Ptolemy provides the GUI and workflow features. We have extended it to provide the functionality we want (JXPL and GridServices) • Release 1.0.0 download available www.gridnexus.org
Getting Started • Download either tar/gzip or zip file from www.gridnexus.org • Follow instructions for installation • Run GridNexus • Choose File->New ->GridNexus
Getting Started • The main frame on the right is the palette for building workflows • The upper left frame provides the library of modules • The lower left frame is a thumbnail of the entire workflow
The Basics • Sources produce data without needing input • Sinks consume data but may have side effects (such as displaying results) • All workflows must start with sources and end with sinks
Simple Example 1 • Click and drag the “Const” source to the workflow. • Click and drag the “JxplDisplay” sink to the workflow
Simple Example 1 • Double-click on the Const module • Change its value to 10 • Click commit • The new value is shown on the icon
Simple Example 1 • Input ports are on the left-hand side and output ports are on the right-hand side of each module • Click and drag from the output port of the Const module to the JxplDisplay
Simple Example 1 • A link (or relation) is created between the two modules • The output of Const is consumed by the JxplDisplay
Simple Example 1 • Click on the run button ( ) • The JxplDisplay evaluates the input and produces a display window to show the results. • Notice the output is in XML (actually JXPL)
Simple Example 2 • Transformers are modules that take input, transform it, and produce new output • This example computes the express: (23 + 6) * -2
Simple Example 2 • The Multiplication module takes the result of the addition (its first input) and multiplies that by -2 (its second input) • The result is consumed by JxplDisplay
What's Going On? • The workflow is not actually performing the operations. Instead it is creating a script (JXPL) that, when executed, produces the result • The JxplDisplay is evaluating the script and displaying the results
What's Going On? • Double-click on the JxplDisplay and deselect the “Evaluate Jxpl” parameter • This parameter tells JxplDisplay whether or not to evaluate the script that is generated
What's Going On? • Now when we run it, we see the actual script that is produced by the workflow • The script is written in XML using a language developed at UNCW called JXPL
A Little Bit about JXPL • JXPL is based on LISP • The corresponding LISP to the JXPL on the right looks like: (* (+ (23 6) -2)
A Little Bit about JXPL • Why? • XML is used to transport data between web/grid services • XML opening/closing tags <-> LISP opening/closing parens • Everything is either an atom or a list (functions, Data Structures)
A Little Bit about JXPL • The transformer library is LISP-centric • More on JXPL later (Dr. Brown) • See www.gridnexus.org
Sources • Const – Integers and Decimals • Decimal – Integers and Decimals • Symbol – Variables (use quotes1) • Rational – Factions (use quotes1) 1 Quotes are needed to prevent Ptolemy from evaluating the expressions before the JXPL evaluator gets a chance to see them.
Examples • Choose File->Open and select the Examples folder • There are many examples that don't need explanation. Just give 'em a try! • Others will be discussed later
Composites • A composite is a means to abstract a workflow into a single module • From the “utilities” folder, drag the “Composite actor” to the workflow • Right-click->Look Inside
Composites • This opens a new window in which we create the workflow that defines the new module • First we need ports • Single ports take or produce single values • Multi ports take or produce multiple values
Composites • Toolbar icons • Single input port • Single output port • Multi input port • Multi output port • Notice how the ports show up on the composite actor module
Composites • Right-click on a port and choose “Customize Name” • Enter name for the Icon • Selecting “Show name” causes the label to show up on the composite module
Composites • To make a relation from a port, hold down the shift key and click and drag • Since a multiport can produce more than one value, we need to specify a width for the relation involving a multiport
Composites • For a multiport, double-click on the relation and choose Add • The name should be “width” with a default of zero
Composites • Close the composite window • We can name the composite by right-clicking and choosing “Customize Name” • Now we are ready to use it
User Library • To save a module in the user library, right-click on it and choose Save Actor in Library • The user library is stored in .GridNexus/user\ library.xmlin your home directory
User Library • Actually, it isn't saved. It opens the user library with the new module • You still have to choose File->Save to save the user library.
User Library • Alternatively, you can save an entire workflow in the library • Choose Graph->Save in Library. • The workflow is saved in the library as a new composite named with the filename
Splitting Relations • Sometime, you want the results of a module to be used as input to more than one other modules • SetQ module assigns a value to a symbol • The symbol X is input to both SetQ and Addition modules file: examples/setq.xml
Splitting Relations • To create a new splitter, click the button • Link the output of Symbol to the splitter • Hold down the shift key and click and drag the splitter to the input port of SetQ. file: examples/setq.xml
Splitting Relations • Repeat for Addition • (Sometimes, the use of a splitter can complicate the workflow due to crossing relations. It is not necessary to split the output from Symbol “x”. Alternatively, we can simply make a duplicate Symbol “x”.) file: examples/setq.xml
The Prog • The Prog (short for Program) module allows one to execute separate workflows where it is not desirable to have a relationship between them file: examples/prog.xml
The Prog • The Prog primitive evaluates each of its inputs in turn • It returns the results of the last one evaluated (in this case this case it returns 2x). file: examples/prog.xml
Multi Ports • One difficulty with multi ports is the order in which its inputs are evaluated is not evident from the GUI • Which of the sub-workflows is executed first? Are you sure? file: examples/prog.xml
Multi Ports • If one deletes the SetQ -> Prog relation, then puts it back, the result is that Prog will evaluation the Multiplication before the SetQ – Not good! • Multi Ports are best for commutative operations like Addition, but not like Prog. • However, the alternative to using a multi port for Prog is to have a fixed number of single ports. • When it doubt, delete all relations to a multi port and redo them
Cond • Cond is the branching mechanism in LISP • A Cond List Element takes a boolean expression and the results if the boolean is true file: examples/cond.xml
Cond • The Cond finds the first Cond List Element whose boolean is true and returns its result • Be careful of the order in which the Elements are linked to the multi-input port file: examples/cond.xml
Cond • An “else” clause should the last List Element with a boolean of “true” • The last List Element will be returned if all others are false file: examples/cond.xml
Defun • Defun defines a new primitive (function) • It takes a symbol as the function name, a set of symbols as parameters, and a workflow as the body file: examples/defun.xml
Defun • Once it is defined, we can call it using the Primitive module file: examples/defun.xml
Recursion • Of course, we have to do factorial! • This workflow first defines factorial (using a composite to keep the workflow clean) then uses it to compute 10!. file: examples/factorial.xml
Recursion • Inside Factorial: • If N <= 1 return 1 • Else return N(N-1)! file: examples/factorial.xml
Recursion • Inside N(N-1)!: • Notice the recursive call to factorial • Remember that this generates a script that will be executed later file: examples/factorial.xml
Iteration • Arguments: • loop variable • initial value • step size (loop variable += step size) • termination boolean (true => terminate) • loop body file: examples/do.xml
Web Services • The WSClient module can serve as a general purpose client for a Web Service given the WSDL • Double-click on the module and enter the URL of the WSDL
Web Services • The icon is set with the method names of the service • The ports do not always align with the test, but the order is the same (e.g. 2nd port = 2nd method name) file: examples/wsclient1.xml