Download
1 / 65
650 likes | 804 Views
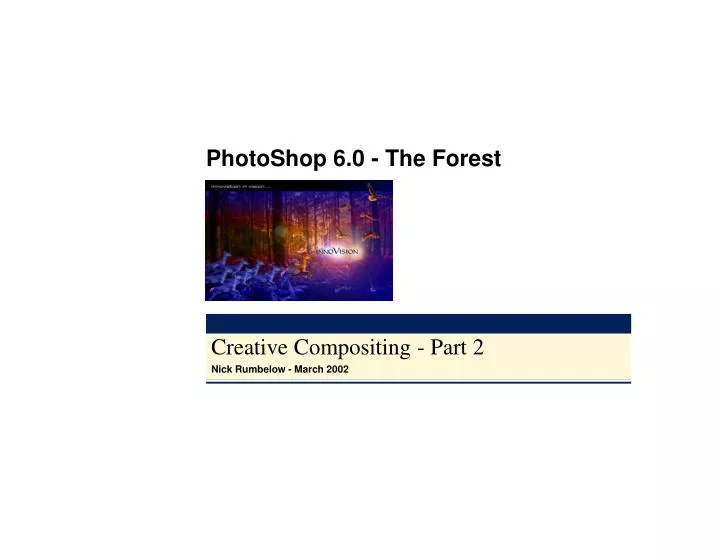
PhotoShop 6.0 - The Forest. Creative Compositing - Part 2. Nick Rumbelow - March 2002. PhotoShop 6.0 - The Forest. Table of Contents. Section 1. Introduction. Section 2. Setting the Scene. Section 3. The Gradients. Section 4. The Logo. Section 5. The Lens Flares. Section 6.

E N D
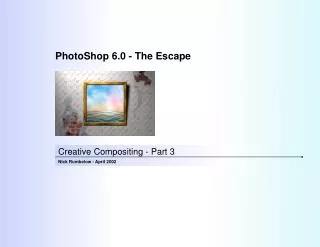
PhotoShop 6.0 - The Forest Creative Compositing - Part 2 Nick Rumbelow - March 2002
PhotoShop 6.0 - The Forest Table of Contents Section 1 Introduction Section 2 Setting the Scene Section 3 The Gradients Section 4 The Logo Section 5 The Lens Flares Section 6 The Stampede Section 7 The Birds Section 8 The Text Section 9 Save for Web Section 10 Feedback
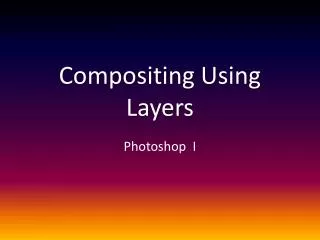
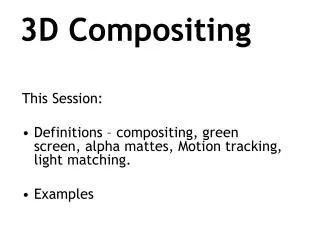
Fig 1. The Finished Composition PhotoShop 6.0 - The Forest The Final Result 1
PhotoShop 6.0 - The Forest Section 1 Introduction
PhotoShop 6.0 - The Forest Introduction Objectives Understanding Adobe PhotoShop 6.0 • Continuing from the previous tutorial “Creative Compositing Part 1 - Argos”, this work-through aims to help you understand how PhotoShop can be used to create convincing compositions, using colour, lighting and focal effects. By immersing you in a real project, you should be able to absorb the theory and practise by example, helping to boost your confidence • Although thorough explanations are given throughout, a basic level of experienced is presumed, so to better understand this work it would be helpful to be familiar with the following topics; • Quick Masks • Levels • Layer blends • Layer Styles • Arranging layers • Compression and file formats • Resolution 2
PhotoShop 6.0 - The Forest Introduction Objectives (cont’d) Topics Covered • Lighting Effects • Creating and editing gradients • Blending layers • Transparency • Hue and Saturation • Layer Sets • Lens Flares • Motion Blur • Despeckle • Quick Masks • Defringe • Preserve Transparency • Layer via Copy • Text • Character Palettes • Save for Web 3
PhotoShop 6.0 - The Forest Introduction A Wild Brief Getting Creative(1) • To make the most of this work-through, it is advisable to first complete “Creative Compositing Part 1 - Argos” “Well, it’s like this; I want the old technologies to be stampeding through the forest floor - but they don’t damage the undergrowth because the undergrowth is good - and then they jump into the light and come out the other side as the new, advanced technologies! Can you come up with something?” This was the unusual brief for a picture required by an Analyst for a presentation promoting new advances made by a telecom company. At first sight, it seems too daunting to promise a finished product straight from the brief within six hours, but don’t be held up by initially having no ideas. Being creative is often about being aware of the resources available. In downtime, it would be useful to take time to look through some of the library collections, and familiarise yourself with some of the excellent images. Sometimes you might not have a clear objective when starting a project, but with the brief in mind, as you collect related items together, ideas might start to present themselves. Every journey needs that first step to at least get things moving, and once you involve yourself, you might be surprised how things develop. The Post-Modernist premise is that nothing is truly original anymore, everything “new” has its roots in the old. You don’t need to be an “artist” to be creative, just arranging things in a pleasing way is art. Always have a plan, even if your plan is to at least gather images together - and be inspired, allow yourself to be influenced. As you gather, several ideas might develop. Then, as you start putting it together, you’ll soon be able to tell what will and what won’t work. This project took several incarnations that night before it took its final shape. • Note • Samples of the author’s PhotoShop work can be viewed at www.implicateform.co.uk 4
PhotoShop 6.0 - The Forest Section 2 Setting the Scene
Fig. 2 Foreground/Background Colours 1: Record the Dimensions • As always, when starting a PhotoShop project, plan the end at the beginning. The first thing you need to know is the dimensions of the final, relative to the placeholder • The picture is to fit a PH1 placeholder with a header. When it is ungrouped from its header, a blue Graphic Background for a PH1 measures 18.42 x 12.20 cm, therefore, allowing a 0.5 cm gap on all sides, our final needs to be 17.42 x 11.20 cm Swap Foregroundand Background Colours Foreground Colour 2: Setting-Up • In PhotoShop, before creating a new image; • Set the foreground colour to white, and the background colour to black (Fig.2) • Open a new document using the following settings; (Fig. 3) • Width: 17.42 cm • Height: 11.20 cm • Resolution: 300 dpi • Mode: RGB Colour • Contents: Background Colour Reset to PureBlack & White Background Colour PhotoShop 6.0 - The Forest Setting the Scene Start at the End How Big Should the Image Be? • Save yourself some time and headaches by planning ahead 5
Fig. 3 New Image 3: Drag the Trees Into the Composition • Open the file S:\Training Department\Staff Personal Training\PS Training – The Forest\Forest Files\Trees.jpg • Select Window > Tile to view both documents together • Drag the Trees.jpg background layer from the Layers palette, and drop it into the Forest composition • Close Trees.jpg, and maximise the workspace • The Trees.jpg is a low-resolution image, it is only 96dpi, so when it is dragged into the 300dpi Forest composition, it looks small. This is because in the composition, more dots are required to fill an inch. • For example; if a 100 dpi image is 10 inches across, its width would be 1,000 pixels • If this image was then dropped as a layer into a 500dpi composition, each inch would take 500 of the dots • Its new width would only be 2 inches, even though it is still made from 1,000 pixels PhotoShop 6.0 - The Forest Setting the Scene Working Between Documents View and Drag • Resolution is measured in dots-per-inch (dpi) • Low resolution images use less pixels than high resolution images • Less pixels means less information, which means smaller file sizes, and vice-versa 6
Fig. 4 The Move Tool Move Tool 4: Stretch the Trees 5: Flip the Layer Horizontally • Select the Move Tool (Fig. 4) • In the Move Tool Options at the top of the screen, select Show Bounding Box. This makes it easier to change the scale or rotation of the layer contents • Stretch the trees to fit the width of the composition, but leave a gap of black at the top (Fig. 5) • The trees do not need to be in perfect focus for the final, so in this case, stretching the layer will not effectively lessen the quality. • Press Return to confirm the scaling • The tree scene is busy enough to fit the brief - there’s plenty of undergrowth and the background is quite dense. This photo was also chosen for the clearing in the foreground on the left, which allows space for the main action. But we want the action to come-in from the left so that the focus will be to the right, where there are two large tree trunks currently in the way. • The layer needs to be flipped horizontally; • Select Edit > Transform > Flip Horizontal PhotoShop 6.0 - The Forest Setting the Scene Transforming the Trees Stretch and Flip • In PhotoShop, adjustments such as scale, skew, rotate and flip, etc are referred to as Transformations 7
Fig. 5 Trees Layer Stretched Leaving a Gap at the Top PhotoShop 6.0 - The Forest Setting the Scene A Sunny Day • Leave a black bar at the top for the text 8
6: Render Lighting Effects Fig. 6 Lighting Effects Filter • This photo was taken on a bright sunny day, but we want to create a dark, mysterious and magical atmosphere; • Select Filter > Render > Lighting Effects • Keep the centre of the light in the centre of the preview image, and use the following settings (Fig. 6); • Light Type: Omni • On: Checked • Intensity: 25 • Gloss: -100 (Matte) • Material: -100 (Plastic) • Exposure: 0 • Ambience: 0 • Texture Channel: None • Click OK PhotoShop 6.0 - The Forest Setting the Scene Turning Down the Lights Create the Mood • More on lighting effects in the following tutorial, “Creative Compositing Part 3 - The Escape” 9
PhotoShop 6.0 - The Forest Section 3 The Gradients
7: Set the Colours Fig. 7 New Layer • To create the blue and gold effect, you will create a layer containing a gradient and blend it with the Trees layer; • Set the Foreground colour to dark blue by clicking on its swatch in the toolbar (Fig. 2) and setting the RGB values to; • R: 0 • G: 3 • B: 121 • Click the Background colour swatch (don’t swap the foreground and background over), and set it to orange using the following RGB values; • R: 255 • G: 124 • B: 0 PhotoShop 6.0 - The Forest The Gradients Preparing the Gradient • Keeping the gradient in its own layer makes it more versatile Blending Mode New Layer 10
8: Set the Gradient Options Fig. 8 The Gradient Tool • Create a new layer and name it “Gradient”, by right-clicking it and selecting Properties (Fig. 7) • Select the Gradient Tool (Fig. 8) • Make sure Transparency and Reverse are not checked in the Gradient Options at the top of the screen (Fig. 9) • To set the end and middle colours, click inside the Edit/Create Gradient sample (Fig. 9) • In the Name field (Fig. 10), type “Blue-Orange-Blue” • Choose Solid as the Gradient Type, and set the Smoothness to 100% PhotoShop 6.0 - The Forest The Gradients The Gradient Tool • If the correct tool is not being displayed in its group (such as the Paint Bucket and Gradient Tool), left-click and hold the wrong tool until the group is displayed • You can then select the correct tool 11
Fig. 9 Gradient Options 9: Opacity Stops 10: Colour Stops • The sample gradient in the middle of the Gradient Editor has little squares around it called Stops (Fig. 10). The controls for each stop are displayed at the bottom of the Gradient Editor. • The stops above the sample control the opacity at that point in the gradient, and can be edited by clicking on them, or moved by dragging. They can be removed by dragging them up or down instead of sideways, or by selecting one and clicking Delete. • Make sure there are only two Opacity Stops, one at the beginning and one at the end, and that they are both set to 100% (click on each one to display its properties) • The stops below the sample control the colour; • Click the left Colour Stop and make sure the Location is set at 0% • From the Colour drop-down list, select Foreground so that the gradient begins with the dark blue • Click the right Colour Stop and set the Location to 100% and set this also with the Foreground colour PhotoShop 6.0 - The Forest The Gradients Gradient Options Gradient Picker Blending Mode Reverse Direction Allow Transparency Diamond Reflected Conical Radial Linear Edit/Create Gradient Dither Gradient (Smoother) Opacity 12
PhotoShop 6.0 - The Forest The Gradients Editing the Gradient • Stops above the sample gradient control the opacity, while the stops below the sample control the colour Fig. 10 Gradient Editor Preset Gradients Gradient Name Transparency Stops Colour Stops Midpoint Stop Controls 13
11: Middle Colour 12: Midpoint Controllers • To create the middle colour, click below the gradient, anywhere between the end colours, and a new stop appears • Don’t click the diamond - more on this later • Set the Location for the middle stop to 50%, and select the Background colour so that the gradient now goes from dark blue – orange – dark blue. (You may need to click the stop again to apply the change) • The small diamond between each stop controls the midpoints (Fig. 10). At the moment, the colours gradually fade in a wide band from the Foreground, to the Background, and back to the Foreground again, but we need the gradient to be narrower for our image. • Select the Midpoint controller between the left and middle Colour Stops, and set the Location to 75% • Select the middle Colour Stop to display the other midpoint controller, and then set its Location to 25% • Now the gradient accelerates into and out of the orange, creating a narrower band of colour. 13: Click and Drag 14: Layer Blending Mode • If you wanted to save this gradient as a preset to be used in later PhotoShop sessions, click New, or to save all the Presets, click Save • Otherwise click OK • A sample of the gradient now appears in the Gradient Options • With the Gradient Layer still selected, click at the very top of the image, in the black bar, and drag down holding the Shift key to constrain the direction to vertical • The image fills with the gradient (Fig. 11) • In the Layers palette, select Colour as the blending mode (Fig. 7) • This colourises by allowing the greyscale data of the lower layers to pass through unaltered, but all the colour data is replaced by the colours in the layer that has been set to blend. The advantage of creating the gradient in its own layer is that it can be altered independently; • The colours can be brightened even more by selecting Image > Adjust > Hue/Saturation (Ctrl+U), and then increase the Saturation to +15. More on Hue/Saturation later • Your image should now look like Fig. 12 PhotoShop 6.0 - The Forest The Gradients Applying the Gradient • To apply a gradient, left-click where you want it to begin, then drag to the end 14
Fig. 11 Gradient Applied PhotoShop 6.0 - The Forest The Gradients The Gradient Layer • With the layer blend set to Normal, the gradient obscures the rest of the composition 15
Fig. 12 Layer Blend Set to Colour PhotoShop 6.0 - The Forest The Gradients The Gradient Layer Blended by Colour • With the layer blend set to Colour, the greyscale information of the lower layers is allowed to pass through, colourised by the gradient layer 16
15: In the Blue Corner Fig. 13 Transparent-Blue Gradient • At the moment the bottom right corner fades into darkness, but we want this side of the composition to represent qualities of freedom and air, unbound and transformed, and dark shadows are not conducive to this. Instead, you will create another gradient so that the busy undergrowth fades into a peaceful deep blue sky. • Create a new layer and name it “Blue Corner” • Select the Gradient tool and click the sample in the Gradient Options to edit it • Name the gradient “Transparent-Blue”, keep the Gradient Type as Solid, and the Smoothness at 100% • Remove any extra colour stops from underneath the gradient by clicking on them and either dragging down or by clicking Delete, so that only the start and end stops are left • Set both colour stops to the foreground dark blue • Click the left Transparency Stop to select it, and set the Opacity and Location to 0%. Leave the midpoint controller at 50% (Fig. 13) • Click OK • In the Gradient Options, make sure Transparency is ticked, Linear is selected as the style, and the Mode is set to Normal (Fig. 9) • To apply the gradient, click in the middle of the tree trunk in the foreground of the scene, and drag down to the bottom-right corner (Fig. 14) 16: Adjust the Layer Blend • This has covered the corner, but it has dulled the middle of the right side • To allow the golden light to shine through more, set the Blue Corner layer blending mode to Lighten • Your composition should now look like Fig. 15 • Save your work PhotoShop 6.0 - The Forest The Gradients Gradient With Transparency • Make sure Transparency is checked in the Gradient Tool Options (Fig. 9) 17
Fig. 14 Corner Gradient Being Applied PhotoShop 6.0 - The Forest The Gradients Applying the Second Gradient • The cross-hairs at the beginning of the line indicate where the gradient’s start colour will be 18
Fig. 15 Corner Gradient Applied PhotoShop 6.0 - The Forest The Gradients The Composite Background • The Lighten blend lets the lighter colours of the lower layers to pass through, but darker colours are replaced by the layer being blended 19
PhotoShop 6.0 - The Forest Section 4 The Logo
Fig. 16 innoVision.psd 17: Get the Logo • The logo has been replaced with an original one, which you will create from scratch; • Open the file S:\Training Department\Staff Personal Training\PS Training – The Forest\Forest Files\innoVision.psd (Fig. 16). • The text in this file has already been rendered in its layer, which means it has been converted to a bitmap and is no longer editable as text. This is because the font, Carleton.ttf, might not be available on your system. • Drag the innoVision layer into the composition, and close innoVision.psd without saving • Select the Move tool, and place the logo in position • Zoom-in until the logo fills the screen 18: Layer Sets • To create the logo effects, you will work on several copies of the innoVision layer. When you are working with multiple layers, to keep things organised, related layers can be grouped into a named Set. • Click the Create New Set icon at the bottom of the Layers palette (Fig. 17), and name the Set “Logo” by right-clicking it and selecting Layer Set Properties • Drag the innoVision layer onto the folder icon representing the Logo Set • Notice the layer is now indented to indicate that it is part of a set PhotoShop 6.0 - The Forest The Logo Layer Sets • Layer Sets help to keep the Layers Palette organised 20
19: Duplicate the Layer Fig. 17 Logo Layer Set • Create two copies of the innoVision layer by dragging it onto the Copy/New Layer icon twice (Fig. 17) • Invert the bottom copy by selecting Image > Adjust > Invert (Ctrl+I). The logo copy turns white • Copy this white layer another three times and arrange them as in Fig. 17. The original layer should be on top, then the black copy, followed by the four white copies Collapse/Expand Set Layer Set 20: Motion Blur • Select the bottom layer, then blur it by selecting Filter > Blur > Motion Blur, setting the Angle to 90o and the Distance to 100 pixels (Fig. 18) • Select the next layer above, and apply another Motion Blur, this time changing the Angle to 0o, keeping the Distance at 100 pixels • When you select the filter menu, the last filter applied appears at the top of the list (Fig. 19), but selecting this will apply it with exactly the same settings again, not allowing you to change anything. So instead; • Select Filter > Blur > Motion Blur again, or Ctrl+Alt+F Link Layers Copy/New Layer Create New Set PhotoShop 6.0 - The Forest The Logo Duplicate and Blur • Inverting an image replaces each colour with its opposite colour 21
21: Last Filter Applied Ctrl+Alt+F Fig. 19 Filters Menu • In the next layer up, apply another Motion Blur, this time setting the Angle back to 90o, and the Distance to 50 pixels • Apply another Motion Blur to the next layer up, changing the Angle back to 0o, keeping the Distance at 50 pixels • Select the next layer, which should be the black copy under the top layer, and apply a Motion Blur at -45o with a Distance of 25. This helps to give the logo some depth against the brightness of the rest of the effects to follow Fig. 18 Motion Blur Filter PhotoShop 6.0 - The Forest The Logo Last Filter Shortcut • To re-open the dialog box for the last filter applied, press Crtl+Alt+F Last FilterApplied Repeats last filter without allowing changes to the settings. Try Ctrl+Alt+F instead. 22
22: Bevel & Emboss Fig. 20 innoVision Motion Blurred • The top layer looks a little flat. Emboss to give it some depth by applying a Layer Style; • Select the top layer and then select Layer > Layer Style > Bevel and Emboss • Use the settings as given in Fig. 21 23: Link Logo Layers 24: Collapse the Set • Link all the logo layers to the active layer by clicking the blank square on the left of each layer in the palette (Fig. 17) • Now the layers will act as one, as though they are grouped, allowing you to move them together if you need to • Collapse the Logo Set by clicking the little triangle at the side of the set folder icon (Fig. 17) to keep the palette tidy • The logo should now look like Fig. 20 PhotoShop 6.0 - The Forest The Logo Applying a Layer Style 23
Fig. 21 Bevel and Emboss PhotoShop 6.0 - The Forest The Logo Bevel and Emboss 24
PhotoShop 6.0 - The Forest Section 5 The Lens Flares
Fig. 22 Lenses Set 25: New Layer Set • Lens flares are easy to produce, but taking a precise aim takes a little extra time. Just using the Lens Flare filter by itself offers no way of knowing exactly where it will appear, the preview window is too small you just have to guess. But there is an alternative way which keeps you in control; • Create a new Layer Set, and name it Lenses • Arrange the Set so that it is under the Logo Set(Fig. 22) • Create a new layer within the Lenses Set, and name it “Lens 1” 26: Fill Using Black • Fill the whole layer with black by selecting Edit > Fill (Shift+F5) using the following settings (Fig. 23) • Use: Black • Mode: Normal • Opacity: 100% • Preserve Transparency: Off PhotoShop 6.0 - The Forest The Lens Flares Creative Flare • Create the flare in its own layer 25
Fig. 24 The N Dot 27: Paint a Dot Fig. 23 Black Fill • Set the foreground colour to white, and select the Paintbrush tool • Using a 10-15 pixel diameter brush, paint a single dot behind the top-left corner of the second N (Fig. 24). This will be the target point for the lens flare • To edit a brush, right-click the sample brush in the Options at the top of the screen Paint the dot here 28: Toggle the Layer On/Off • As the layer is hidden by the layers above it, turn the Logo Set off and back on again, just to be sure the dot has been painted • With the Lens 1 layer still active, select Filter > Render > Lens Flare (Fig. 25) • Set the Brightness to 100%, and use the 50-300 mm Zoom lens • Don’t press OK yet PhotoShop 6.0 - The Forest The Lens Flares Dot Marks the Spot • Paint a dot as a target for the Lens Flare preview 26
Fig. 25 Lens Flare Dialog Box 29: The Dot That Doesn’t Move • The Flare Centre window allows you to position it. You can see a small preview of the flare, with several points of light working with it. One of these points is your dot and indicates the centre for the flare. • To find out which one it is, click all around inside the preview window. As you move around, all the points change and move relative to where you click, apart from one; your dot • If you can’t see it, cancel the flare and paint the dot again to make it just a little bigger 30: Centre the Flare • Click on your dot and select OK • Zoom out so that you can see the full flare • Set the Lens 1 layer blending mode to Screen • Screen makes black transparent, leaving just the flare in the correct position (Fig. 26) PhotoShop 6.0 - The Forest The Lens Flares Taking Aim • Blending layers using Screen makes black transparent 27
Fig. 26 First Lens Flare Rendered and Screened PhotoShop 6.0 - The Forest The Lens Flares The Rendered Flare 28
31: Adjust the Levels • The flare is a bit big and too bright, we want it to be more like a specular highlight; • Select Edit > Transform > Scale and use the settings in the Options bar at the top of the window to reduce the Width and Height to 50% • Press Enter to confirm the transformation • Use the Move tool to reposition the flare over the N again • Open the Levels dialog box by either pressing Ctrl+L, or selecting Image > Adjust > Levels • In the Input Levels set the shadows (the input box on the right) to 60 (Fig. 27) PhotoShop 6.0 - The Forest The Lens Flares Reduce the Glare • A lens flare in its own layer can be edited in many ways Fig. 27 First Flare Levels Midtones Shadows Highlights 29
32: Edit the Hue and Saturation Fig. 28 Hue/Saturation Fig. 29 Blue Lens Flare • You don’t have to stick with the colour of the flare, it can be shifted to whatever hue and saturation (the amount of colour) as you like; • Select Image > Adjust > Hue/Saturation (Ctrl+U) (Fig. 28) • Make sure Colorize is not ticked • As you drag the Hue slider, the colours of the flare shift through the spectrum in relation to each other. • Set it to -140 • Dragging the Saturation slider either floods the flare with colour, or drains it to greyscale. • Increase it to 50 • Click OK • The logo should now look like Fig. 29 PhotoShop 6.0 - The Forest The Lens Flares Shifting the Colours • Adjusting the Hue moves all the colours in relation to each other 30
33: Create the Second Flare Fig. 30 Area to Erase Into • Next you’ll create a golden flare at the bottom-right of the logo; • Create another new layer within the set, name it “Lens 2”, and fill it with black (Shift+F5) • Paint a 10-15 pixel white dot behind the bottom-right corner of the last N • Again, toggle the Logo Set on and off to make sure the dot has been painted • Select Filter > Render > Lens Flare, and choose 105 mm Prime as the Lens Type • Set the brightness to 100%, locate the dot as the flare centre, and click OK • Choose Screen as the blending mode for the Lens 2 layer • Scale the new flare down to 35% and reposition it (Edit > Transform > Scale) • This time, the area down to the bottom-right is too light; • Select the Eraser tool (click on it, or hold Shift and tap the E key until the Eraser is selected) • Choose a 300-pixel brush, 0% hardness, and carefully delete into the lightened areas around the flare, taking care to erase only the straight edges (Fig. 30) • Increase the Saturation to +80 (Ctrl+U) and shift the Hue to -180, (Fig. 31) Erase into this area PhotoShop 6.0 - The Forest The Lens Flares Another Type of Flare 31
Fig. 31 Lens Flare Area Erased and Colour-Shifted 34: Create the Final Flare • There is one final flare to render; • Create another layer in the Lenses Set and name it “Lens 3” • Fill it with black • This time, paint a 10-15 pixel dot at the base point of the V • Render the flare, using the 50-300 mm Zoom lens, set at 100% brightness • Set the layer blend mode to Screen • If necessary, use the cursor keys to nudge it into position • In the Levels dialog (Ctrl+L), set the Input Levels as follows; • Shadows: 15 • Midtones: 1 • Highlights: 215 • Collapse the Lenses Set and link it to the Logo Set • The composition should now look like Fig. 32 PhotoShop 6.0 - The Forest The Lens Flares The Final Flare 32
Fig. 32 The Completed Logo PhotoShop 6.0 - The Forest The Lens Flares Experimentation is King 33
PhotoShop 6.0 - The Forest Section 6 The Stampede
Fig. 33 Deer.psd 35: Create a New Layer Set • Create a new layer Set, under the Lenses Set, and name it “Deer” • Open the file S:\Training Department\Staff Personal Training\PS Training – The Forest\Forest Files\deer.psd and maximise it (Fig. 33) 36: Flip the Deer 37: Despeckle • The deer is facing the wrong way, so flip it horizontally; • Select Image > Rotate Canvas > Flip Horizontal • Whenever you scan from an image that has already been printed, rather than an original photograph, a Moiré (interference) pattern will form. But because in this case it is only slight, it can be overcome by Despeckling it; • Select Filter > Noise > Despeckle • More intense Moiré patterns can be overcome by using the Dust and Scratches filter, or a Gaussian Blur PhotoShop 6.0 - The Forest The Stampede Preparing the First Deer • Use the Despeckle filter to combat minor Moiré patterns 34
38: Create a Quick Mask 39: Jump the Selection • Create a Quick Mask around the deer to isolate it from the background • Quick Masks are covered in depth in previous work-throughs, such as “Creative Compositing Part 1 - Argos”, and “Blue Book Faces”. • Before you begin, double-click the Quick Mask icon to open the Options and set the “Colour Indicates” selection to “Masked Areas” • Create the mask using 50 - 75% Opacity so that you can see through it • Use a 20-pixel brush, set at 75% Hardness for most of the outline, and then set the Hardness to 0% to fade the back legs (Fig. 34) • Once the mask is complete, set the Opacity back to 100% so that you can close any gaps • Return to Standard Mode so that the “Marching Ants” indicate the selection • A selection can be made to ‘jump’ into its own layer; • Select Layer > New > Layer via Copy (Ctrl+J) • The deer should now be in a layer by itself • Rename the layer “Deer 1” • View both images together by selecting Window > Tile, and drag the Deer 1 layer into the Deer Layer Set in the developing composition • Close deer.psd 40: Defringe • There might be a trace of stray pixels leaving a slight border around your deer; • Delete this by selecting Layer > Matting > Defringe and set the width to 10 pixels • Scale the deer down slightly, rotate it to give the appearance of leaping into the logo, and put it into position PhotoShop 6.0 - The Forest The Stampede Removing the Background • “Jumping” creates a copy of the selection contents into its own layer 35
Fig. 34 The Complete Quick Mask PhotoShop 6.0 - The Forest The Stampede The Complete Quick Mask 36
41: Preserve the Transparency Fig. 35 Preserve Transparency • With the Deer 1 layer still selected, preserve the transparency by clicking the chequer icon at the top of the layer list (Fig. 35) • A padlock icon appears next to the layer name to indicate an attribute of the layer is locked. Now, no matter what you do to the layer, the current transparent areas will remain transparent. 42: Prepare a Gradient • The deer is going to have a gradient applied to it so that it looks as though it is leaping into the light; • Select the Gradient Tool and set it to flow from the foreground to background colours (blue to orange) • If you set the foreground and background colours first, the gradient will appear in the Presets • Select Linear Gradient from the gradient Option Menu (Fig. 9) and make sure Reverse and Transparency are not ticked • Dithering is the method for smoothing the transition from one colour to the next, and should be left on. PhotoShop 6.0 - The Forest The Stampede Locking the Layer • Dithering is the method for smoothing the transition form one colour to the next Preserve Transparency Transparency Locked 37
43: Apply the Gradient Fig. 36 First Deer in Position • Set the Mode to Colour (Fig. 9). • This will allow the greyscale definition (shading) to remain, while taking the colour value of the gradient • Click and drag from the deer’s back legs to its nose • Because the transparent areas are locked, the colour is applied to just the deer, and not the whole layer. The deer should now be half blue and half orange. • Lighten it slightly by opening the Levels (Ctrl+L), and set the highlights Input Level to 240 • The deer should now look like Fig. 36. 44: Duplicate the Deer 45: Increase the Shadows • Now to create the rest of the herd; • Make just one copy of the deer layer. The layer’s attributes are copied with it, so Preserve Transparency is already set • Select Edit > Fill (Shift+F5) to fill the layer with the Foreground blue, making sure that the Mode is set to Colour (Fig. 23) • Click OK, and move it into view • The deer is now all blue, but a bit too bright and luminous; • Open the Levels, and set the Shadows Input Level to 10 • This darkens it by increasing the depth of shadow, but the highlights are too bright, and the Input Levels will only let you increase them. PhotoShop 6.0 - The Forest The Stampede Out of the Blue 38
46: Limit the Highlights Fig. 37 Limiting Highlights Via Output Levels • The gradient at the bottom of the Levels dialog box controls the Output Levels (Fig. 37), which limits the amount of shadows and highlights. Dragging the controllers under the gradient limits the maximum levels. So by dragging the Highlights Output Level controller from the white into the grey, no highlights will be allowed to be any brighter than that setting, and by dragging the Shadows Output Level controller from the black into the grey, no shadows will be darker than that. • Set the Highlights Output Level to 215 • With the luminosity reduced, the deer now looks as though it belongs in the picture, rather than having been just pasted in. 47: Unlock the Layer • This is the deer from which the others will be cloned. As you can see from Fig. 38, these deer are going to be motion-blurred, but with the transparency locked, none of the image can be blurred into the transparent areas; • Click the Preserve Transparency check box to unlock the layer Shadows Highlights PhotoShop 6.0 - The Forest The Stampede Blending-in With the Crowd • Output Levels control the maximum shadows and highlights 39
48: Copy the Layer 49: Motion Blur • Make six more copies of this layer • Don’t worry about the order just yet • Drag each deer into position, usingFig. 38for reference, rotating as necessary to give the impression of galloping; • The easiest way to do this is to select “Show Bounding Box” in the Move Tool Options at the top of the screen. To rotate, just move the mouse near the corner handles until the correct cursor appears • Confirm the changes (transformations) by pressing Enter • Once in position, re-order the layers so that the deer positioned at the back are behind those at the front, etc. • There are three rows; a row of three at the back, three in the middle, and one at the front, and in each row, the layer for deer at the back is below the others, etc • Now to add some movement with the Motion Blur filter. The deer at the back will be blurred more than those at the front • By selecting the Move tool, and having “Show Bounding Box” ticked in the Options, you will find it easy to tell which layer has been activated; • Activate the layer containing the deer at the back of the back row (this should be the bottom layer in the Deer Set • Select Filter > Blur > Motion Blur • Set the Angle to 0o, and the Distance to 20 pixels • Select the next deer in the same row (should be the next layer up) • Press Ctrl+Alt+F to select the last filter used, and set the Distance to 18 pixels • Select the next deer in that row, and blur it by 15 pixels • In the next row, the deer at the rear should be blurred by 10, the next by 8 and the front deer by 5 pixels • The deer in the front row should be blurred by 3 pixels PhotoShop 6.0 - The Forest The Stampede Adding Movement 40
50: Limit the White Output Level 51: Graduated Blur • To give the herd some extra depth, they could do with some more shading; • Select the bottom layer again • Open the Levels (Ctrl+L) and set the White Output Level to 195 to darken the deer • On the next layer set the White Output Level to 205 • Repeat this for each layer, incrementing the White Output Level by 10 each time • When you have finished, the Level for deer at the front should have been left at 255 • All that remains for the herd is to apply a graduated blur on the deer leaping into the light; • Select the layer containing the front deer • Make sure Preserve Transparency is switched off (Fig. 35) • Double-click the Quick Mask Mode icon to open the Quick Mask Options • Set Colour Indicates to Selected Areas, and the Opacity to 100% • Make sure black is the Foreground colour and white is the Background colour. Remember, black is going to represent the selected area • Select the Gradient Tool, and choose a gradient to run from the black to white • Click and drag from the bottom of the deer’s back legs, up to the tip of its nose • Return to Standard Mode. The Marching Ants appear as a triangle in the bottom-left corner of the composition, intersecting the front deer • Apply a Motion Blur at 45o, with a Distance of 15 pixels • Deselect (Ctrl+D) • The herd should now look like Fig. 38 • Collapse the Deer set PhotoShop 6.0 - The Forest The Stampede Creating Depth 41
Fig. 38 The Gathered Herd PhotoShop 6.0 - The Forest The Stampede The Gathered Crowd 42