Download
1 / 12
120 likes | 197 Views
How does charge affect the strength of homemade magnets?. Hypothesis. If there are more turns of copper wire wrapped around the electromagnet, the magnet will be stronger. If there are less turns of copper wire wrapped around the electromagnet, the magnet will be weaker. Facts.

E N D
Hypothesis • If there are more turns of copper wire wrapped around the electromagnet, the magnet will be stronger. If there are less turns of copper wire wrapped around the electromagnet, the magnet will be weaker.
Facts • The bigger the battery the more magnetic it becomes. • You can make a magnetic nail at home. • If you use a small battery the experiment will not work. • The more times the copper wire is wrapped around the nail the more magnetic the nail becomes.
Experiment Materials and Equipment • Large iron nails (5) • Insulated copper wire • Wire cutters • Wire strippers • 9-V battery • Iron filings • Paper cups (several) • Permanent marker • Kitchen scale • Lab notebook • Graph paper
Experiment Steps 1. You will use four of the nails to make magnets, and save one nail as a negative control. That means that you will not charge the control magnet, and will see if it has any magnetic properties on its own. 2. To make the four magnets, wrap insulated copper wire clockwise around each nail, tightly, with different numbers of wraps: 5, 10, 15, and 20. 3. Leave about 3 inches of loose wire at each end of the nail. Cut the wire with wire cutters after you've wrapped each nail. You now have four electromagnets. 4. Strip the last 1/2 inch of wire at each end with the wire strippers. 5. Next, attach each electromagnet to the 9-V battery, one at a time, to test the strength of each magnet. Record the observations in your lab notebook.
Steps Continued 6. You will want to connect each electromagnet to the battery in the same way. Wrap the pointy end of the nail wire to the positive battery terminal, and the flat end of the nail wire to the negative battery terminal. 7. To measure the strength of each magnet, use iron shavings. Pour your iron filings into one of the paper cups. Dip the tip of one electromagnetic nail into a cup of iron shavings and remove. What do you see? Record all observations in your lab notebook. 8. If there are any iron shavings stuck to the nail, move the nail over a clean cup to remove them. While holding the nail and iron shavings over the cup, disconnect one of the ends of wire from the battery terminal. What happens? 9. If there are any pieces of iron shavings still stuck on the magnet, brush them off into the cup. 10. Label the cup with the type of electromagnet used (5, 10, 15, or 20 wraps) or with "control," and set the cup aside. 11. Repeat steps 6–10 with the other magnets, and steps 7–10 with your un-magnetized control nail. 12. Now you need to weigh each of your cups on the kitchen digital scale and write your data in a data table, like the one shown below, in your lab notebook:
Controls and Variables • Control: • Copper wire • Variable: • Number of wire wraps
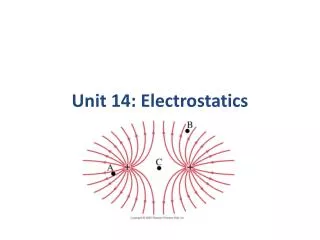
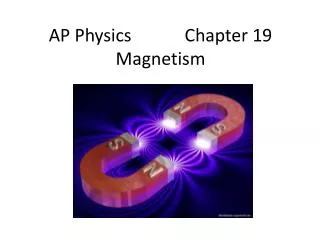
Observations • Magnets can have different patterns of magnetic fields, depending upon their shape. • Because magnets are polar, you can arrange a series of magnets to make a magnetic cushion. • You can see the shape of the magnetic field by placing a magnet on a piece of paper and dusting fine iron shavings around the paper. • A 9 volt battery will not pick up the metal but a D battery will.
Data Number of Wraps 5 10 15 20 0 Length ¼ ½ ¾ Full 0 Magnetic (Y/N) Yes Yes Yes Yes No Weight of shavings 1 gram 2 grams 3 grams 4 grams O
Analysis of Data • The experiment tested my hypothesis. My hypothesis was correct. More turns of copper wire wrapped around the electromagnet picked up more iron shavings. Less turns of copper wire wrapped around the electromagnet picked up less iron shavings. Therefore, more turns of copper wire makes a stronger electromagnet. • I changed the 9 volt battery to a D battery so the electromagnet would be stronger. My new question is why does a bigger battery pick up more iron shavings?
Conclusion • More turns of copper wire wrapped around the electromagnet picked up more iron shavings. • Less turns of copper wire wrapped around the electromagnet picked up less iron shavings.
References • http://www.sciencebuddies.org/science-fair-projects/project_ideas/Phys_p020.shtml?fave=no&isb=cmlkOjQzMDQ1NjMsc2lkOjIscDox&from=TSW • Gagnon, S. (2005). How do I make an electromagnet? Thomas Jefferson National Accelerator Facility, Office of Science Education. Retrieved December 23, 2005, from http://education.jlab.org/qa/electromagnet.html • KidsCanMakeIt.com (2001). Kids Can Make It: Electromagnet Activity. Retrieved December 23, 2005, fromhttp://www.kidscanmakeit.com/SN0002.htm • www.newton.dep.anl.gov/newton/skasci/…/PHY105.HTM • www.school-for-champions.com/SCIENE/magnetism.htm