Download
1 / 17
170 likes | 300 Views
Attachments, Signatures, Auto Replies and Mail Delivery Options. SkillPort course: Managing Attachments, Graphics, Signatures and Auto Replies in Outlook 2010. Viewing Attachments Attachments are indicated by a paper-clip symbol in your inbound mail list.

E N D
Attachments, Signatures, Auto Replies and Mail Delivery Options SkillPort course: Managing Attachments, Graphics, Signatures and Auto Replies in Outlook 2010
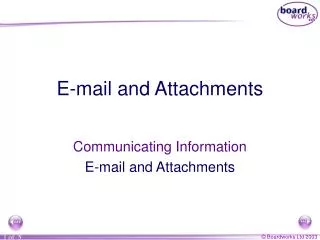
Viewing Attachments Attachments are indicated by a paper-clip symbol in your inbound mail list. Double -click on the attachment in the reading pane to open the attachment tools dialog box. You can choose to Open, Print, Save As or Save All Attachments if there is more than one.
Sending Attachments Use the Insert tab in the New E-mail dialog box for attachments. Use Attach File to browse to a file. Use Outlook Item to attach other emails in your mailbox. Use the Business Card selection to attach contacts information. Use Calendar to attach views of your calendar from one day to one month. Use Signature to select a different signature from the one set as the default. E-mail dialog box
Your Email Signature To create your email signature, select New E-mail from the Home tab in the Mail area. In the E-mail dialog box click Signature and select Signatures from the dropdown menu. Outlook lets you create multiple signatures so that you can have a different signature for specific audiences. E-mail dialog box
Your Email Signature From the Signatures and Stationary dialog box select New. Give the signature a name. You may want different signature for your internal and external correspondence. Example: John Smith_internal and John Smith_external. Then use the edit signature textbox to create the text of the named signature. Use the Choose default signature area to select your default signature.
Insert Images Use the Insert tab in the New E-mail dialog box for inserting images and hyperlinks. Click on the Picture button in the Illustrations group to browse and insert an image. Click on the Hyperlink button to insert a hyperlink into your email.
Delivery Options Use the Options tab in the New E-mail dialog box for delayed delivery and priority settings. Select Delay Delivery from the More Options group. Use the Settings area to set priority: high, normal or low. Use the Delivery Options area to set delayed delivery of emails.
Blind Copy (BCC) If you do not see the blind copy option on your email dialog box you can add it. Select the Options tab on the new email dialog box and click the BCC button. This will add the blind copy field to the email.
Auto Replies versus Rules Auto replies are used to respond to incoming mail or appointments when you are out of the office or unavailable over time. When you will be out of the office an auto reply will be used to notify incoming mail clients. Rules manage how incoming mail items are handled such as moving them to a folder.
1 2 3 Auto Replies To create an auto reply select the FILE tab (1). Select Info (2) and click on the Automatic Replies button (3). The auto replies dialog box will display. Select the Send Automatic Replies radio button.
Auto Replies You can choose to check Only send during this time range to set a specific range for auto replies to take effect. Auto replies allows you to tailor a different message to your internal and external audience.
Auto Replies You must select the Auto-reply checkbox on the Outside My Organization to send auto replies to external audiences. Select Anyone outside my organization. Click OK when complete. Note that the Out of Office will turn orange on the FILE tab and a Turn Off button appears to use to disable the auto-reply.
Auto Replies A yellow banner will appear just below the ribbon indicating that Automatic Replies is active within the Outlook interface. You can turn it off by clicking the Turn Off button on the banner.
Rules Rules manage how incoming mail items are handled such as moving them to a folder. There are two types of rules in Outlook. Server-side rules run all the time as they are on the cloud hosted server. Client-side rules only run when Outlook is open on your local Office computer desktop.
Rules To create a simple rule to move incoming email to a specific folder, at the Create Rule dialog box check subject and enter the specific terms in the subject you are looking for. Check Sent to me only. Check move item to folder and click Select Folder to browse and select the appropriate folder. Then click OK.
Rules For creating more granular and advanced rules select Advanced Options. Be aware that many advance rules are client-side only and will only run when your Outlook is open at your Office desktop.
Rules Using advanced options you will be notified when you finish creating a rule that it is a client-side rule. It is best to avoid creating client-side rules as they cannot be changed, or turned off with the Outlook Web version.