Download
1 / 35
520 likes | 1.1k Views
LabVIEW: Tips & Tricks. Ihor Korolov. March 2011. Contents. GPIB communication VISA: GPIB and Serial port configuration and communication How to create and use *.dll in LabVIEW (C++ example) LabVIEW Tips and tricks: VI hierarchy Event structure

E N D
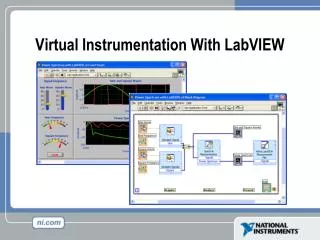
LabVIEW: Tips & Tricks Ihor Korolov March 2011
Contents • GPIB communication • VISA: GPIB and Serial port configuration and communication • How to create and use *.dll in LabVIEW (C++ example) • LabVIEW Tips and tricks: VI hierarchy Event structure Application control (property node and invoke node) How to execute system command ….. • Creating an executable VIs • Remote panel connection manager and Web publishing tool I. Korolov: LabVIEW: Tips & Tricks
GPIB I. Korolov: Tips & Tricks
GPIB General Purpose Interface Bus (GPIB) (IEEE-488 is a short-range digital communications bus specification) 8 data lines, 3 Handshaking lines, 5 Interface management lines HS488 can transfer up to 8 Mbytes/s (2 m cable) All GPIB devices and interfaces must have a unique GPIB address between 0 and 30. Address 0 is normally assigned to the GPIB interface. The instruments on the GPIB can use addresses 1 through 30. GPIB devices can be talkers, listeners, or controllers. I. Korolov: LabVIEW: Tips & Tricks
GPIB General Purpose Interface Bus (GPIB) (IEEE-488 is a short-range digital communications bus specification) 8 data lines, 3 Handshaking lines, 5 Interface management lines HS488 can transfer up to 8 Mbytes/s (2 m cable) GPIB-USB GPIB-RS232 GPIB-PCI I. Korolov: LabVIEW: Tips & Tricks
GPIB - LabVIEW Use the GPIB 488.2 functions to exchange data and instructions between VIs and GPIB 488 devices You should consider initializing the bus with the "GPIB Initialization" function before starting R/W I. Korolov: LabVIEW: Tips & Tricks
Virtual Instrument Software Architecture I. Korolov: Tips & Tricks
NI-VISA Virtual Instrument Software Architecture (VISA) is a standard for configuring, programming, and troubleshooting instrumentation systems comprising GPIB, VXI, PXI, Serial, Ethernet, and/or USB interfaces. The majority of modern instrument drivers are based on theVISA NI-VISA is the National Instruments implementation of the VISA I/O standard Configuration programs (MAX) Software libraries Interactive utilities (NISpy, VISA interactive control) The creation of a new VISA driver in LabVIEW is relatively straightforward and quick process LabVIEW Application LabVIEW VI Library VISA Operating System Hardware Link (GPIB, Serial, VXI …) Instrument I. Korolov: LabVIEW: Tips & Tricks
GPIB - VISA Simple GPIB-VISA session Open Write command/data Read data Close • Open a VISA Session to the instrument resource. Also set the timeout. • Write command from the Write Buffer control to the device • Read the data returned from the NI • Close the VISA Session. If possible, try to use the VISA functions instead of GPIB because of VISAs versatility I. Korolov: LabVIEW: Tips & Tricks GPIB- VISA
Using serial ports Serial communication uses a transmitter to send data, one bit at a time, over a single communication line to a receiver Serial (RS-232) port RS-232 to USB 4 x RS-232 to PCI No Flow Control Device PC 2 2 3 3 5 5 Cable connection over RS-232 interface For hardware flow control (RTS/CTS) Connector pins definition I. Korolov: LabVIEW: Tips & Tricks
VISA serial Simple Serial-VISA session (similar to GPIB-VISA) Configure Serial port Write command/data Read data Close Write bytes to port. Read the number of bytes specified Close session to port Configure Serial port (baud rate, data bits, parity, stop bits and flow control) Closing the serial port allows it to be used by other applications without quitting LabVIEW. Note: To read an information from a serial instrument, first run the “Bytes at Port” vi. This VI checks how many bytes of information are waiting at the serial port. Use this VI in a while loop to wait for a specified number of bytes accumulated in the buffer before you read the information. I. Korolov: LabVIEW: Tips & Tricks Serial- VISA and driver
How to create and use DLL I. Korolov: Tips & Tricks
What is DLL? Dynamic-Link Library DLL is a file which does a particular job, and allows other programs to use its efforts in assisting the program's job. Some programs use a DLL so that they won't need to spend time figuring out how to do that job* Applications and DLLs can link to other DLLs How to create *.dll (C++ example) Borland C++ Compiler (Free) (Free) Code::Blocks (New project) Our function This function is called when DLL is loaded or unloaded The WinAPI, is Microsoft core set of application programming interfaces (APIs) available in Microsoft Windows op. systems *www.dynamiclink.nl/frames/about_dll.htm I. Korolov: LabVIEW: Tips & Tricks
How to create DLL? The syntax of a function declaration In Borland C/C++ DWORD WINAPI Function (DWORD a, DWORD b, …..); Long WINAPI Function (float *a, long b, float *c, ….); In Microsoft C++ _declspec (dllexport) DWORD Function (DWORD a, DWORD b, …..); _declspec (dllexport) long WIAPI Function (float *a, long b, float *c, ….); Func1 = a + b a0 = a*a*a b0 = b*b avg = (a[0] + a[1] +…+ a[size-1]) / size I. Korolov: LabVIEW: Tips & Tricks Code blocs
How to create DLL? Our dll The header file *.h All of the functions we have created in the source code are available to other applications Build dll I. Korolov: LabVIEW: Tips & Tricks Code blocs
How to use DLL in LabVIEW? ??? The DLL can be called by using the LabVIEW Call Library Function 1. Path (dll location) 2. Function name I. Korolov: LabVIEW: Tips & Tricks
How to use DLL in LabVIEW? ??? Data types LabVIEW/C++ unsigned char BYTE; // 8-bit unsigned short WORD; // 16-bit unsigned long DWORD; // 32-bit ………………. ………………….* *http://msdn.microsoft.com/en-us/library/cc230309%28v=PROT.10%29.aspx Instrument 1.dll 2.dll I. Korolov: LabVIEW: Tips & Tricks ExampleDLLs
Tips & Tricks I. Korolov: Tips & Tricks
VI hierarchy View VI Hierarchy The “VI Hierarchy” window displays a graphical representation of all open LabVIEW projects and targets, as well as the calling hierarchy for all VIs in memory, which includes type definitions, global variables, LabVIEW classes and dynamic member VIs, etc. Use this window to view the subVIs and other nodes that make up the VIs in memory and to search the VI hierarchy*. *http://zone.ni.com I. Korolov: LabVIEW: Tips & Tricks Example LP MD
Event structure The Event structure waits until an event happen, then executes appropriate case to handle that event • Place the event structure on the block diagram • Right click on the structure border Add event case • Configure which events to handle I. Korolov: LabVIEW: Tips & Tricks Example Event
Scroll Through Structure • Use Ctrl + Mouse Scroll to scroll through: • Case Structures • Event Structures • Stacked Sequence Structures • Diagram Disable Structures Ctrl + I. Korolov: LabVIEW: Tips & Tricks Example Scroll
Property node and Invoke node Right click Property nodes is used to get and set VI, object, or application properties Invoke nodes is used to perform actions, or methods on VI object, or application Property node The “OK” button will start blinking if the “Blinking” button is pressed I. Korolov: LabVIEW: Tips & Tricks Example PN
Property node: Cursors Cursors: • assist in viewing data points • can be assigned to different plots • lock to plot to help reading data I. Korolov: LabVIEW: Tips & Tricks Example PN
Open VI Reference This method requires a path to *.vi I. Korolov: LabVIEW: Tips & Tricks Example PN
Sound, Dialog and User interface Sound Dialog and User interface Run a system command This code will run a windows calculator I. Korolov: LabVIEW: Tips & Tricks Examples
Creating an Executable I. Korolov: Tips & Tricks
Creating an executable With the Application Builder, you can create an executable from any operational LabVIEW VI that will run as a standalone program onany other machine with the same operating system. • Save Vi • New project (add) • Build specification ->Right click • New -> Application (exe) I. Korolov: LabVIEW: Tips & Tricks
Creating an executable Build specification ->Right click New -> Application (exe) 2 3 1 4 I. Korolov: LabVIEW: Tips & Tricks
Creating an executable • After you have pressed the "Build" button and Application Builder finishes writing the executable to disk, you are ready to run it. • Regardless of your Application Builder and LabVIEW version, you must always install any required driver files on the target machine (e.g. NI-DAQ, NI-488.2) • Install LabVIEW Runtime engine on your target computer (~100 MB). The runtime engine allows you to run LabVIEW executables without needing further LabVIEW on your or target PC. • Run your application.exe on the target computer Build specification ->Right click New -> Installer You can also create an installer: I. Korolov: LabVIEW: Tips & Tricks example
Remote panel Web publishing tool I. Korolov: Tips & Tricks
Remote panel and VI/Web server Remote Panels allow multiple clients to simultaneously view/control the front panel of the same VI Client machine Controlling remote panel LAN WAN Server machine Main panel and Application Client machine Viewing remote panel I. Korolov: LabVIEW: Tips & Tricks
Remote panel connection manager • Enable the LabVIEW VI/Web Server on the server machine • Connect and execute remote panels on the client machine Two main steps to connect: 1 • Allow access 2 Tools Options Operate Connect to remote panel… I. Korolov: LabVIEW: Tips & Tricks example
Web server The “web publishing tool” is used to view the front panels of VIs on the Web. ! Do not forge to enable the LabVIEW Web Server on the server machine Web publishing tool Tools Web browser To display front panels on the Web, the VIs must be in memory on the computer Local PC I. Korolov: LabVIEW: Tips & Tricks Example MD
Useful links National instruments www.ni.com/labview Tips and Tricks on the LabVIEW Wiki http://labviewwiki.org/Tips_and_tricks Learn LabVIEW http://learnlabview.blogspot.com Books http://astore.amazon.com/lealab-20 NI forum www.forums.ni.com I. Korolov: LabVIEW: Tips & Tricks
Köszönöm for your attention! I. Korolov: LabVIEW: Tips & Tricks