Download
1 / 27
270 likes | 361 Views
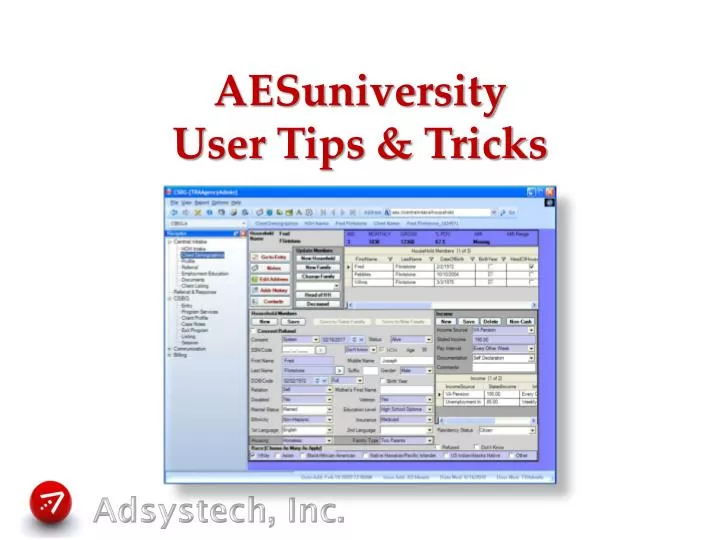
AESuniversity User Tips & Tricks. Where to Search – NEW client. 1. 2. 3. 4. Quickest search for New Client is Demographics page in HOH Check field Or enter Social Security Number and it will find matches Or enter First Name, Last Name, Date of Birth and it will find matches

E N D
Where to Search – NEW client 1 2 3 4 Quickest search for New Client is Demographics page in HOH Check field Or enter Social Security Number and it will find matches Or enter First Name, Last Name, Date of Birth and it will find matches Any match will cause popup window to appear
Where to search – Caseload 2 1 Search for Client on any page in Services section Enter Client name and click SEARCH Client will stay active on other pages in the same Library
Searching in Central Intake 1 If you search and find a Client, but all fields are grayed out, that means the Client was created at another Agency! Click ADD to give permission for your Agency to use Client
Searching Tips Use keyboard TAB and ENTER keys Blank/no entry at Search displays everyone in database Fuzzy searches can help find unusual names or misspellings % is a wildcard - %on finds all entries with ON in their name
Searching in Grids Number listed above grid shows number of returned matches Search sets become available when large amount of matches return Funnel symbol allows filtering Remove item from search field using CLEAR button or DELETE key Some Listing pages have right click FIND and QUERY
Using Grids • Click Column heading to sort by that item • Click second time to sort in reverse order • Double click right edge of heading to resize or click and drag • Click and drag heading to other location to temporarily rearrange column order • Select Record by clicking to the left of record • Select Multiple records by pressing keyboard CTRL key and clicking records • SHIFT selects a range of records
Keyboard Shortcuts • HOME key takes you to start of field • END key takes you to end of line or field • To Copy & Paste: • CTRL + C = Copy • CTRL + V = paste • CTRL + X = Cut • Entering Dates • Type in dates (use 2 digits for month and day) • OR use dropdown to access calendar • Click on Date to use • Use arrows to change months • Click on Month or Year to change it
Snapshot All Client information – demographics, income, household members MUST be collected BEFORE entering into Program Reports use the information that is current at the time of Entry It is collected in the “Income Snapshot” If there was a mistake, the information can be corrected easily Do not change a Snapshot except to make a correction
Correcting the Snapshot – take 1 1 2 3 5 4 • Click EDIT INCOME to open Snapshot • Select Client in Grid • Make corrections to income and SAVE • DEMOGRAPHICS opens window with all demographic information • Make changes if needed • Click SAVE • Change Date if needed, then click SAVE DATE This does NOT change information in Central Intake
Correcting the Snapshot – take 2 1 2 3 4 Click JUMP TO DEMOGRAPHICS On the Household page, make the corrections as needed Click GOTO ENTRY button Click EDIT INCOME Click RESET Change Date if needed, then click SAVE DATE
Navigating between Libraries • Clients will not follow you when switching Libraries unless you use the buttons to switch pages! • Going from Central Intake to Program/Services pages: Use GO TO ENTRY button • One of these buttons is on all Central Intake pages • Both will open Program Entry page with this Client active • Going from Program/Services to Household page:Use JUMP TO DEMOGRAPHICS button • Button is on all Services pages in top right area • Opens Household page in Central Intake with this Client active
Searching for Active Clients 1 2 • Search for Client(s) on Listing page by • Status • Program • Name/Identifier • Staff • These Clients will then be active on all Service pages in customer dropdown • Find your entire caseload by using Program and Staff
Searching – take 2 2 3 1 • Active Clients from Listing page appear in Customer dropdown • Or use Blue arrows to move to next Client record • Arrows become blue when records are available • SHRINK buttons cause Household members or Caseworker Clients to appear in dropdown
Switching to other Program 1 4 2 3 • Click VIEW ALL PROGRAMS button • All Programs are displayed in popup • Active status • Entry date • Exit date • Select Program and click LOCATE to view that Program • Current Programs will also be displayed in Customer dropdown
Switching to other Application/Module 1 Dropdown at top of page lists all available Roles User must have Permission assigned to the Role in Security Manager first
Services page 1 2 Services created on other pages appear here, but grayed out, so they cannot be edited here Sessions activities will show any notes created there in the Comments field
Editing Activities • Activities can be deleted if needed, and multiple records can be deleted all at one time • They can be deleted only on the page where they were created • Activities can be moved to a different Milestone by using the Move to Milestone dropdown directly beneath the Activity grid • Case Note Milestones can be changed on that page • Program Components can be deleted only when no Activities exist
Printing Case Notes • Case Notes report available from Case Notes page and from Listing page • If printing ALL Case Notes for a Client, use the Listing page Case Notes report • Select the Client(s) on the Listing page • Right click and select Preview or Print Report • Select Case Notes report • ALL Case Notes for Client will be displayed • If printing specific Case Notes for a Client, use the report directly from the Case Notes page • Select the Case Note(s) you want to print • Right Click and select Preview or Print report • Only the selected Case Notes will be displayed
Printing Application Reports • Several Reports are available from Listing page • Application Report will show all demographic information for Client and household members and Program Entry questions • Select multiple Clients on Listing page to view reports for each Client • Use CTRL + click on each row to select multiple records
Change Head of Household 2 1 4 3 • Select person to be new HOH in Grid • Click HEAD OF HH • Click OK in message • Change Relation Status • HOH = Self • Check other members • The last HOH will be blank
Change Address 1 2 • For entire household, edit on demographics page • Make changes • Click SAVE • For one member of Household, use household page • Select client in Grid • Click EDIT ADDRESS • Make changes • Click SAVE This changes only the Central Intake information
Change Address in Snapshot 2 5 6 1 3 • Click DEMOGRAPHICS • Click PREV ADDRESS button • Active status • Entry date • Exit date • Select correct address in Grid • Click SELECT button • Click CLOSE button • Click CLOSE button 4
Move to new Household 2 1 3 4 You cannot move a HOH to a new HOH, unless they are the only HH member • Select Client(s) in Grid • Click NEW HOUSEHOLD • Select Client Name • This person will be new HOH • Click MOVE • Remember to change their address after the move
Move to an Existing Household 2 1 3 4 5 6 Select Client(s) in Grid Click NEW HOUSEHOLD Select Search for … and enter Name for existing HOH Click SEARCH Select Household in returned matches Click MOVE
Change Family 3 1 2 Select Client(s) to be moved Select Family to move Client TO Click CHANGE FAMILY This keeps Client in same Household, but moves them to different Family in that Household
Change starting Application 1 Select Options menu, Application Settings, Set as Default Application The next time you log in, the system will start with this Application