Download
1 / 15
150 likes | 280 Views
Google Lit Trips:. Cross-curricular Technology Integrated Learning Creating your own Google Lit Trip. Presented by: Laura Bliss, Kelly Hollenkamp, Gretchen Kassel, and Jenifer Phillips University of Missouri-Fall, 2009 ISLT-9471. Reasoning.

E N D
Google Lit Trips: Cross-curricular Technology Integrated Learning Creating your own Google Lit Trip Presented by: Laura Bliss, Kelly Hollenkamp, Gretchen Kassel, and Jenifer Phillips University of Missouri-Fall, 2009 ISLT-9471
Reasoning • You have already learned how to use Google Lit Trips, as well as how to successfully incorporate them into your curriculum. • Now it is time to create your own Google Lit Trip for use in your classroom.
Benefits of creating your own • You can make your Google Lit Trip personalized to meet the needs of your classroom. • Google Lit Trips can be created for texts related to your curriculum. • Students can be part of the process, engaging them and providing a sense of ownership.
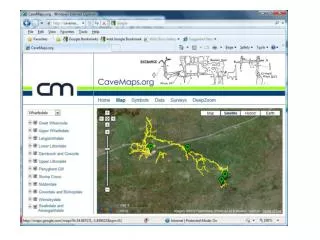
Step 1:Become familiar with Google Earth • In order to create a Google Lit Trip, one must be comfortable using the Google Earth program. Video: Google Earth Tour • There are more Google Earth resources located on the Google Lit Trip website Google Lit Trips
Step 2: Choose a text • Chosen literature must have a “journey” to places that can be accessed in Google Earth. • Effective Lit Trips are based on literature where the characters travel through most of the story. • However, characters can travel worldwide or through a single city. • Choose a text specific to your grade level, student interest, and ties to curriculum. • Brainstorm with your table about possible texts for Google Lit Trips.
Step 3: Choose content • Once you have selected a text, you must decide the content of your Google Lit Trip. • Here are some suggestions of what to look for when reading the text: • interesting images on the internet that might enhance or extend students’ appreciation of the story. • interesting websites that could provide supplementary information on historical or geographical • references, biographical information, or cultural connections, etc. appropriate to the story, • spots where the author is providing good material for thought-provoking questions and class discussion. • interesting vocabulary use Taken from the Google Lit Trips website
Step 4: Create place markers • Once you have decided on the places to include in your Trip, you must find them in Google Earth. • After locating a place, create your place marks by clicking on the yellow pushpin on the top toolbar.
Step 4: Creating place markers (cont.) • The place marker can be personalized to fit your lesson. • You have the option of changing the name, color, size, location, and style of the place marker. You can even create your own! Time to Share! • How can you use these varying place markers to make the most of your Lit Trip? • Discuss with your table.
Step 5: Editing your place markers • Once the place markers have been added, it is time to customize what students will see when they click on the marker. • This can be done by right-clicking on the place marker and going to Properties.
Step 5: Editing your place markers • Once the editing place markers window is open, you can add words from the book, extra information about the topic, and images to enhance the trip. • Go to Google Lit Trips, click on Site Map, Lit Trip Tips, and Formatting Place Markers Descriptions to see steps on how to add these things.
Step 6: Organize Place Markers • Create a new folder for all of your place markers by going to Add and then Folder. • Your place markers must be arranged in the folder in the order of the “trip.” • This can easily be done by dragging them into the correct folder on the side bar.
Step 7: Creating the path • You must now “connect” your place markers with a path. This lets your students know where to start, where to go next, and when their journey is finished. • To create a path, click Add on the top toolbar, and then path. You can also click the path icon at the top. • A new path window will open. Click on the first place marker and then the next one. This will create a line connecting the two. • You can then name and customize the path. • To learn more about creating paths, go to Google Lit Trips, click on Site Map, Lit Trip Tips, and Adding Route Path to a Lit Trip.
Step 8: Save your Google Lit Trip • Whether you are in the process of creating the Lit Trip or finished, go to File and Save to ensure your work will be saved. • Click on “Save Place As.” • Make sure the box next to the entire trip is checked, not just pieces of it. • Save your trip as either a kmz or kml file.
Time to practice! • Access Google Earth. • Search for the city where you were born. • Create a blue push pin place marker, include the city name, and write a short description. • Search for a neighboring city in your state. • Create a star place marker, include the city name, and write a short description. • Create a path between the two cities.
Ready to start your journey? KWL Google Lit Trips: • What did you Learn? • How will this impact the integration of technology into your classroom’s curriculum.