Download
1 / 12
120 likes | 197 Views
Electronic Portfolio Menu. Your cropped photo (Delete this text box later.). Directions

E N D
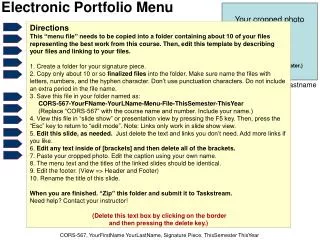
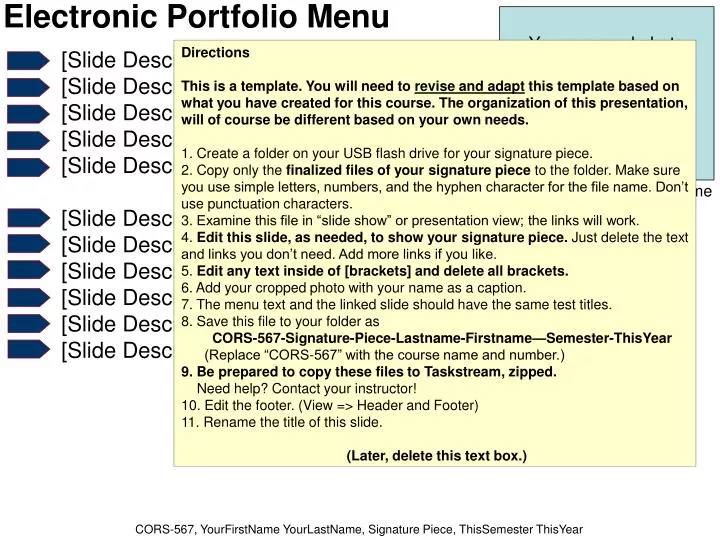
Electronic Portfolio Menu Your cropped photo (Delete this text box later.) • Directions • This is a template. You will need to revise and adapt this template based on what you have created for this course. The organization of this presentation, will of course be different based on your own needs. • Create a folder on your USB flash drive for your signature piece. • Copy only the finalized files of your signature piece to the folder. Make sure you use simple letters, numbers, and the hyphen character for the file name. Don’t use punctuation characters. • Examine this file in “slide show” or presentation view; the links will work. • Edit this slide, as needed, to show your signature piece. Just delete the text and links you don’t need. Add more links if you like. • Edit any text inside of [brackets] and delete all brackets. • Add your cropped photo with your name as a caption. • The menu text and the linked slide should have the same test titles. • 8. Save this file to your folder as CORS-567-Signature-Piece-Lastname-Firstname—Semester-ThisYear(Replace “CORS-567” with the course name and number.) • 9. Be prepared to copy these files to Taskstream, zipped.Need help? Contact your instructor! • 10. Edit the footer. (View => Header and Footer) • 11. Rename the title of this slide. • (Later, delete this text box.) [Slide Description 1] [Slide Description 2] [Slide Description 3] [Slide Description 4] [Slide Description 5] [Slide Description 6] [Slide Description 7] [Slide Description 8] [Slide Description 9] [Slide Description 10] [Slide Description 11] YourFirstname YourLastname CORS-567, YourFirstName YourLastName, Signature Piece, ThisSemester ThisYear
[Slide Description 1] Menu [Add description about the link to your file.] [Add text here that describes this slide and what happens when a person links on the blue arrow button, directly above. Edit This Slide 1. Select the blue arrow above and then right-click. Choose Edit Hyperlink. 2. Make sure you are in the correct folder by looking at the folder bar. 3. This hyperlink links to a file called file-description-01 4. Edit the hyperlink by clicking on the file you want to link to. The file name will appear in the hyperlink bar. (You can link to any file you like as long as it is in the same folder.) 5 When you are done editing the hyperlink, edit the brief description to the link, above. 6. Edit the rest of the text on this slide, including the title. The title should match the text on the very first slide. 7. Add an appropriate image or images. 8. Feel free to modify the design. Just be consistent. Make sure that there is plenty of contrast for text readability. 9. Use complete sentences. Use a spell checker. Check your grammar. 10. Finally, make sure all files, including this file, are in the same folder. This is very, very important. When you are finished, the folder with files will be “zipped”, an easy process. DELETE this text box. (Click twice on the border and press the delete key. CORS-567, YourFirstName YourLastName, Signature Piece, ThisSemester ThisYear
[Slide Description 2] Menu [Add description about the link to your file.] [Add text here that describes this slide and what happens when a person links on the blue arrow button, directly above. Edit This Slide 1. Select the blue arrow above and then right-click. Choose Edit Hyperlink. 2. Make sure you are in the correct folder by looking at the folder bar. 3. This hyperlink links to a file called file-description-02 4. Edit the hyperlink by clicking on the file you want to link to. The file name will appear in the hyperlink bar. (You can link to any file you like as long as it is in the same folder.) 5 When you are done editing the hyperlink, edit the brief description to the link, above. 6. Edit the rest of the text on this slide, including the title. The title should match the text on the very first slide. 7. Add an appropriate image or images. 8. Feel free to modify the design. Just be consistent. Make sure that there is plenty of contrast for text readability. 9. Use complete sentences. Use a spell checker. Check your grammar. 10. Finally, make sure all files, including this file, are in the same folder. This is very, very important. When you are finished, the folder with files will be “zipped”, an easy process. DELETE this text box. (Click twice on the border and press the delete key. CORS-567, YourFirstName YourLastName, Signature Piece, ThisSemester ThisYear
[Slide Description 3] Menu [Add description about the link to your file.] [Add text here that describes this slide and what happens when a person links on the blue arrow button, directly above. Edit This Slide 1. Select the blue arrow above and then right-click. Choose Edit Hyperlink. 2. Make sure you are in the correct folder by looking at the folder bar. 3. This hyperlink links to a file called file-description-03 4. Edit the hyperlink by clicking on the file you want to link to. The file name will appear in the hyperlink bar. (You can link to any file you like as long as it is in the same folder.) 5 When you are done editing the hyperlink, edit the brief description to the link, above. 6. Edit the rest of the text on this slide, including the title. The title should match the text on the very first slide. 7. Add an appropriate image or images. 8. Feel free to modify the design. Just be consistent. Make sure that there is plenty of contrast for text readability. 9. Use complete sentences. Use a spell checker. Check your grammar. 10. Finally, make sure all files, including this file, are in the same folder. This is very, very important. When you are finished, the folder with files will be “zipped”, an easy process. DELETE this text box. (Click twice on the border and press the delete key. CORS-567, YourFirstName YourLastName, Signature Piece, ThisSemester ThisYear
[Slide Description 4] Menu [Add description about the link to your file.] [Add text here that describes this slide and what happens when a person links on the blue arrow button, directly above. Edit This Slide 1. Select the blue arrow above and then right-click. Choose Edit Hyperlink. 2. Make sure you are in the correct folder by looking at the folder bar. 3. This hyperlink links to a file called file-description-04 4. Edit the hyperlink by clicking on the file you want to link to. The file name will appear in the hyperlink bar. (You can link to any file you like as long as it is in the same folder.) 5 When you are done editing the hyperlink, edit the brief description to the link, above. 6. Edit the rest of the text on this slide, including the title. The title should match the text on the very first slide. 7. Add an appropriate image or images. 8. Feel free to modify the design. Just be consistent. Make sure that there is plenty of contrast for text readability. 9. Use complete sentences. Use a spell checker. Check your grammar. 10. Finally, make sure all files, including this file, are in the same folder. This is very, very important. When you are finished, the folder with files will be “zipped”, an easy process. DELETE this text box. (Click twice on the border and press the delete key. CORS-567, YourFirstName YourLastName, Signature Piece, ThisSemester ThisYear
[Slide Description 5] Menu [Add description about the link to your file.] [Add text here that describes this slide and what happens when a person links on the blue arrow button, directly above. Edit This Slide 1. Select the blue arrow above and then right-click. Choose Edit Hyperlink. 2. Make sure you are in the correct folder by looking at the folder bar. 3. This hyperlink links to a file called file-description-05 4. Edit the hyperlink by clicking on the file you want to link to. The file name will appear in the hyperlink bar. (You can link to any file you like as long as it is in the same folder.) 5 When you are done editing the hyperlink, edit the brief description to the link, above. 6. Edit the rest of the text on this slide, including the title. The title should match the text on the very first slide. 7. Add an appropriate image or images. 8. Feel free to modify the design. Just be consistent. Make sure that there is plenty of contrast for text readability. 9. Use complete sentences. Use a spell checker. Check your grammar. 10. Finally, make sure all files, including this file, are in the same folder. This is very, very important. When you are finished, the folder with files will be “zipped”, an easy process. DELETE this text box. (Click twice on the border and press the delete key. CORS-567, YourFirstName YourLastName, Signature Piece, ThisSemester ThisYear
[Slide Description 6] Menu [Add description about the link to your file.] [Add text here that describes this slide and what happens when a person links on the blue arrow button, directly above. Edit This Slide 1. Select the blue arrow above and then right-click. Choose Edit Hyperlink. 2. Make sure you are in the correct folder by looking at the folder bar. 3. This hyperlink links to a file called file-description-06 4. Edit the hyperlink by clicking on the file you want to link to. The file name will appear in the hyperlink bar. (You can link to any file you like as long as it is in the same folder.) 5 When you are done editing the hyperlink, edit the brief description to the link, above. 6. Edit the rest of the text on this slide, including the title. The title should match the text on the very first slide. 7. Add an appropriate image or images. 8. Feel free to modify the design. Just be consistent. Make sure that there is plenty of contrast for text readability. 9. Use complete sentences. Use a spell checker. Check your grammar. 10. Finally, make sure all files, including this file, are in the same folder. This is very, very important. When you are finished, the folder with files will be “zipped”, an easy process. DELETE this text box. (Click twice on the border and press the delete key. CORS-567, YourFirstName YourLastName, Signature Piece, ThisSemester ThisYear
[Slide Description 7] Menu [Add description about the link to your file.] [Add text here that describes this slide and what happens when a person links on the blue arrow button, directly above. Edit This Slide 1. Select the blue arrow above and then right-click. Choose Edit Hyperlink. 2. Make sure you are in the correct folder by looking at the folder bar. 3. This hyperlink links to a file called file-description-07 4. Edit the hyperlink by clicking on the file you want to link to. The file name will appear in the hyperlink bar. (You can link to any file you like as long as it is in the same folder.) 5 When you are done editing the hyperlink, edit the brief description to the link, above. 6. Edit the rest of the text on this slide, including the title. The title should match the text on the very first slide. 7. Add an appropriate image or images. 8. Feel free to modify the design. Just be consistent. Make sure that there is plenty of contrast for text readability. 9. Use complete sentences. Use a spell checker. Check your grammar. 10. Finally, make sure all files, including this file, are in the same folder. This is very, very important. When you are finished, the folder with files will be “zipped”, an easy process. DELETE this text box. (Click twice on the border and press the delete key. CORS-567, YourFirstName YourLastName, Signature Piece, ThisSemester ThisYear
[Slide Description 8] Menu [Add description about the link to your file.] [Add text here that describes this slide and what happens when a person links on the blue arrow button, directly above. Edit This Slide 1. Select the blue arrow above and then right-click. Choose Edit Hyperlink. 2. Make sure you are in the correct folder by looking at the folder bar. 3. This hyperlink links to a file called file-description-08 4. Edit the hyperlink by clicking on the file you want to link to. The file name will appear in the hyperlink bar. (You can link to any file you like as long as it is in the same folder.) 5 When you are done editing the hyperlink, edit the brief description to the link, above. 6. Edit the rest of the text on this slide, including the title. The title should match the text on the very first slide. 7. Add an appropriate image or images. 8. Feel free to modify the design. Just be consistent. Make sure that there is plenty of contrast for text readability. 9. Use complete sentences. Use a spell checker. Check your grammar. 10. Finally, make sure all files, including this file, are in the same folder. This is very, very important. When you are finished, the folder with files will be “zipped”, an easy process. DELETE this text box. (Click twice on the border and press the delete key. CORS-567, YourFirstName YourLastName, Signature Piece, ThisSemester ThisYear
[Slide Description 9] Menu [Add description about the link to your file.] [Add text here that describes this slide and what happens when a person links on the blue arrow button, directly above. Edit This Slide 1. Select the blue arrow above and then right-click. Choose Edit Hyperlink. 2. Make sure you are in the correct folder by looking at the folder bar. 3. This hyperlink links to a file called file-description-09 4. Edit the hyperlink by clicking on the file you want to link to. The file name will appear in the hyperlink bar. (You can link to any file you like as long as it is in the same folder.) 5 When you are done editing the hyperlink, edit the brief description to the link, above. 6. Edit the rest of the text on this slide, including the title. The title should match the text on the very first slide. 7. Add an appropriate image or images. 8. Feel free to modify the design. Just be consistent. Make sure that there is plenty of contrast for text readability. 9. Use complete sentences. Use a spell checker. Check your grammar. 10. Finally, make sure all files, including this file, are in the same folder. This is very, very important. When you are finished, the folder with files will be “zipped”, an easy process. DELETE this text box. (Click twice on the border and press the delete key. CORS-567, YourFirstName YourLastName, Signature Piece, ThisSemester ThisYear
[Slide Description 10] Menu [Add description about the link to your file.] [Add text here that describes this slide and what happens when a person links on the blue arrow button, directly above. Edit This Slide 1. Select the blue arrow above and then right-click. Choose Edit Hyperlink. 2. Make sure you are in the correct folder by looking at the folder bar. 3. This hyperlink links to a file called file-description-10 4. Edit the hyperlink by clicking on the file you want to link to. The file name will appear in the hyperlink bar. (You can link to any file you like as long as it is in the same folder.) 5 When you are done editing the hyperlink, edit the brief description to the link, above. 6. Edit the rest of the text on this slide, including the title. The title should match the text on the very first slide. 7. Add an appropriate image or images. 8. Feel free to modify the design. Just be consistent. Make sure that there is plenty of contrast for text readability. 9. Use complete sentences. Use a spell checker. Check your grammar. 10. Finally, make sure all files, including this file, are in the same folder. This is very, very important. When you are finished, the folder with files will be “zipped”, an easy process. DELETE this text box. (Click twice on the border and press the delete key. CORS-567, YourFirstName YourLastName, Signature Piece, ThisSemester ThisYear
[Slide Description 11] Menu [Add description about the link to your file.] [Add text here that describes this slide and what happens when a person links on the blue arrow button, directly above. Edit This Slide 1. Select the blue arrow above and then right-click. Choose Edit Hyperlink. 2. Make sure you are in the correct folder by looking at the folder bar. 3. This hyperlink links to a file called file-description-11 4. Edit the hyperlink by clicking on the file you want to link to. The file name will appear in the hyperlink bar. (You can link to any file you like as long as it is in the same folder.) 5 When you are done editing the hyperlink, edit the brief description to the link, above. 6. Edit the rest of the text on this slide, including the title. The title should match the text on the very first slide. 7. Add an appropriate image or images. 8. Feel free to modify the design. Just be consistent. Make sure that there is plenty of contrast for text readability. 9. Use complete sentences. Use a spell checker. Check your grammar. 10. Finally, make sure all files, including this file, are in the same folder. This is very, very important. When you are finished, the folder with files will be “zipped”, an easy process. DELETE this text box. (Click twice on the border and press the delete key. CORS-567, YourFirstName YourLastName, Signature Piece, ThisSemester ThisYear