Download

1 / 65
650 likes | 872 Views
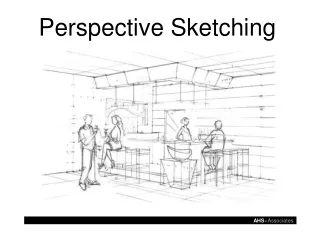
Perspective Sketching. Perspective Drawings. A perspective drawing offers the most realistic three-dimensional view of all the pictorial methods, because it portrays the object in a manner that is most similar to how the human eye perceives the visual world. Perspective Drawings.

E N D
Perspective Drawings A perspective drawing offers the most realistic three-dimensional view of all the pictorial methods, because it portrays the object in a manner that is most similar to how the human eye perceives the visual world.
One-Point Perspective The one-point perspective is relatively simple to make, but is somewhat awkward in appearance when compared to other types of pictorials. • A horizontal line represents the horizon. • Onevanishing point is identified on the horizon line. • A series of lines are drawn from distinctive points on the object to the vanishing point, outlining the object being constructed.
One-Point Perspective The following slides show the steps in creating a one-point perspective of the puzzle piece shown below. Two different methods will be demonstrated.
V.P. METHOD 1 – The Box Method 1. Sketch a horizontal line across the upper portion of the paper to represent the horizon, and identify a vanishing point. The vanishing point can be placed anywhere along the horizon line.
2. Sketch the front face of a “box” representing the overall size of the object. The front face is constructed with vertical height lines and horizontal width lines.
3. Sketch construction lines from the corners of the front face of the “box” back to the vanishing point.
4. Sketch the visible back edges of the “box” to represent the overall size of the object. Note that you will have to estimate the depth of the object.
5. Locate points and construction lines to identify corners and edges of the object on the surface of the “box”.
6. Use object lines to trace over the edges of the object on the visible surface of the “box”.
7. Continue to use construction lines to delineate the remaining corners and edges of the object inside the “box”.
PLTW 8. Trace over the construction lines with object lines to define the object.
One-point Perspective V.P. METHOD 2 1. Sketch a horizontal line across the upper portion of the paper to represent the horizon, and identify a vanishing point. The vanishing point can be placed anywhere along the horizon line.
One-point Perspective 2. Sketch the front most face of the object such that the height lines are vertical and the width lines are horizontal.
One-point Perspective 3. Project the corners of the front face back to the vanishing point using construction lines.
One-point Perspective 3. Project the corners of the front face back to the vanishing point using construction lines.
One-point Perspective 3. Project the corners of the front face back to the vanishing point using construction lines.
One-point Perspective 4. Sketch vertical object lines to represent the height edges of the object as necessary.
One-point Perspective 5. Sketch horizontal object lines to represent the width edges of the object as necessary.
One-point Perspective 6. Trace over the receding object lines to represent the depth edges of the object as necessary.
One-point Perspective 6. Trace over the receding object lines to represent the depth edges of the object as necessary.
One-point Perspective 6. Trace over the receding object lines to represent the depth edges of the object as necessary.
One-point Perspective 7. Continue to sketch height and width object lines as vertical and horizontal lines as necessary to define parts of the object.
One-point Perspective 7. Continue to sketch height and width object lines as vertical and horizontal lines as necessary to define parts of the object.
One-point Perspective 7. Continue to sketch height and width object lines as vertical and horizontal lines as necessary to define parts of the object.
One-point Perspective 8. Continue to use construction lines to project object corners back to the vanishing point as necessary.
One-point Perspective 8. Continue to use construction lines to project object corners back to the vanishing point as necessary.
One-point Perspective 9. Continue to sketch object lines along the construction lines to represent the depth edges as necessary.
One-point Perspective 9. Continue to sketch object lines along the construction lines to represent the depth edges as necessary.
One-point Perspective 9. Continue to sketch object lines along the construction lines to represent the depth edges as necessary.
One-point Perspective 10. You may use tonal shading to enhance the appearance of the perspective sketch and create a more realistic representation.
Two-Point Perspective The two-point perspective is the most common perspective drawing. • A step-by-step procedure will be explained for the perspective.
Two-Point Perspective The following slides show the steps in creating a two-point perspective of the puzzle piece shown below.
Two-point Perspective 1. Sketch a horizontal line across the upper portion of the paper to represent the horizon, and identify two vanishing points. The vanishing points should can be placed toward each end of the horizon line.
Two-point Perspective 2. Sketch a vertical construction line to represent the front edge of the object. The construction line can be drawn below, above, or through the horizon line. Front Edge
Two-point Perspective An imaginary “box” encloses the entire object 3. Locate two points on the construction line to represent the top and bottom corners of the “box” within which the object will be sketched.
Two-point Perspective 4. Sketch a construction line from each point on the vertical line to each vanishing point.