Download
1 / 52
520 likes | 589 Views
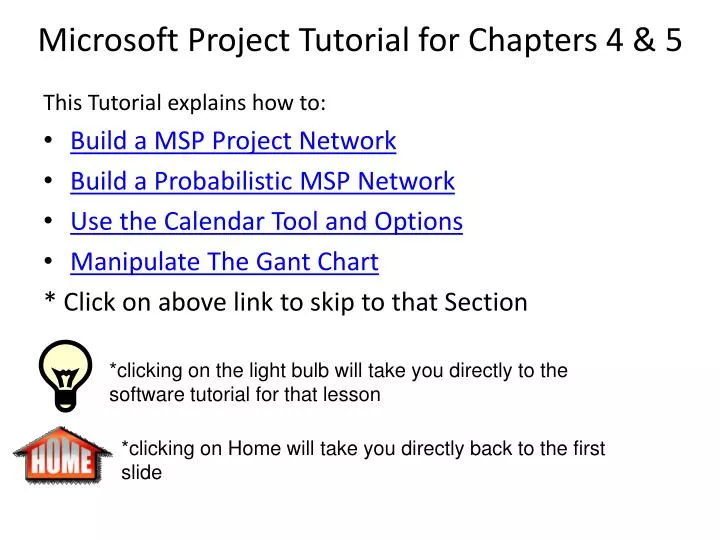
Microsoft Project Tutorial for Chapters 4 & 5. This Tutorial explains how to: Build a MSP Project Network Build a Probabilistic MSP Network Use the Calendar Tool and Options Manipulate The Gant Chart * Click on above link to skip to that Section.

E N D
Microsoft Project Tutorial for Chapters 4 & 5 This Tutorial explains how to: • Build a MSP Project Network • Build a Probabilistic MSP Network • Use the Calendar Tool and Options • Manipulate The Gant Chart * Click on above link to skip to that Section *clicking on the light bulb will take you directly to the software tutorial for that lesson *clicking on Home will take you directly back to the first slide
Building A Project Network in MSP Launch Microsoft Project Click on “New” Refer to Table 5-2 in Text (p.149)
Click on Project, then Project Information Building A Project Network in MSP If a specific start date is given, we can enter it into MSP as well • Then select the start date that is given:
Under the View option, make sure the “View Bar” option is checked Building A Project Network in MSP Transfer information from action plan to Gantt Sheet • Then select the Gantt Chart box:
Building A Project Network in MSP The MSP entry table looks similar to the action plan template * Be sure to save your New project both when you start it, and periodically as you make progress
Building A Project Network in MSP Plug the information from Table 5-2 into the Gantt Table • The software automatically numbers each activity that is entered • Predecessors are indicated by task ID #’s rather than their names
Building A Project Network in MSP The Task’s dates are adjusted accordingly Notice that the Gantt Chart is also constructing automatically
Highlight the first task by clicking on the task # (1) • Go to Insert, New Task. Building A Project Network in MSP To simplify things, add Start & Finish as milestones to make the network easier to understand • We now can add the Start Milestone to the top of the action plan • Notice that the existing list of predecessors has updated accordingly
Building A Project Network in MSP • In MSP, Milestones have a duration of 0 • Task A & B will now have Start as a predecessor • The last two activities, I & J, are predecessor's to Finish To simplify things, add Start & Finish as milestones to make the network easier to understand
To View: • click on the Network Diagram box on the view bar Building A Project Network in MSP • To change the size of the viewed network screen: • Click on View, Zoom & adjust accordingly Once the action plan data is entered, MSP will automatically draw an AON PERT/CMP network
Building A Project Network in MSP • To see the entire network, choose “Entire Project” Your Network Should look similar: Once the action plan data is entered, MSP will automatically draw an AON PERT/CMP network
Building A Project Network in MSP • First, Right-Click on white background of Network Diagram • Select “Layout” option We can get rid of the crossing by simply dragging the nodes to their desired location. • Choose “Allow manual box positioning” and press ok
Building A Project Network in MSP Now MSP will allow us to grab and relocate the Nodes We can get rid of the crossing by simply dragging the nodes to their desired location. Click and Drag the C Node down to the bottom of the network and re-arrange as necceasy
Before Building A Project Network in MSP After
Go to View, then to More Views… • Choose “Detailed Gantt,” and click apply • Go to View, Table: and choose Schedule 1st Building A Project Network in MSP MSP can show us the Free & Total Slack in our Project 3rd 2nd
Building A Project Network in MSP MSP can show us the Free & Total Slack in our Project In the chart portion of the view, slack appears as thin bars to the right of tasks, with slack values adjoining the regular Gantt bars. The tasks in red are those which are critical.
Building A Project Network in MSP • Go to Project • Select Filtered For: • Choose Critical MSP can filter our Tasks to help Identify the Critical Path
Building A Project Network in MSP MSP can filter our Tasks to help Identify the Critical Path Now MPS will only display the tasks that are along the Critical Path, to display all tasks again, simply re-filter for all tasks
Building A Project Network in MSP Summary Tasks can also be used to help organize a project: Using information from Table 3-5, a template for an LAN Installation project, we create our MSP action Plan on the Gantt Table
Building A Project Network in MSP • In this Particular example, our Summary tasks are Phases I-IV • Select all the tasks under Phase I • Select the Indent option to indent all the Tasks under Phase I • All the selected tasks will now appear under the summary task for Phase I • Do the same for Phases II-IV Summary Tasks can also be used to help organize a project:
Building A Project Network in MSP Your Gantt table will display summary tasks, making the project more organized and the Gantt Chart more legible.
To enter in the figures for the three-time duration estimates in Table 5-6: Building A Probabilistic Network in MSP • Go to “View” • Choose “Toolbars” • Check PERT Analysis The PERT Analysis toolbar will appear:
To enter in the figures for the three-time duration estimates in Table 5-6: Building A Probabilistic Network in MSP To eliminate future problems, lets set the duration periods to a consistent value, in this case we will use weeks, since it is used most frequently. So entries with days must be converted to weeks. (5 day work week) i.e. 4 days = 4/5= .8 wks
Go to Tools • Select Options Building A Probabilistic Network in MSP • Click on Schedule Tab • Select Weeks in the Duration is Entered in: dropdown • Click ok • * The schedule tab is where you modify the default settings for entering tasks.
To enter in the figures for the three-time duration estimates in Table 5-6: Building A Probabilistic Network in MSP • Enter in action plan from Table 5-6 into Gantt Table • Include Task Name & predecessors. • Ignore Duration for now, these will be calculated • Ignore Resource Names, we will learn this in a later lesson • notice Duration is now in weeks… 1day/5days= .2wks
To enter in the figures for the three-time duration estimates in Table 5-6: Building A Probabilistic Network in MSP Once the action plan has been built, select the PERT Entry Sheet: The PERT Entry Sheet should appear:
To enter in the figures for the three-time duration estimates in Table 5-6: Building A Probabilistic Network in MSP • Now Enter in the Values from Table 5-6 • Optimistic = a • Expected (normal) = m • Pessimistic = b Remember to convert a, m, & b durations from days to weeks when necessary i.e. 2 days= .4 wks, or, 6 days = 1.2 wks
Once the information from the 3X-duration table is entered into the Pert Entry Form: Building A Probabilistic Network in MSP • Select “Calculate PERT” from the PERT Toolbar • Click Yes ( you may want to save the pre-existing project before doing this, as it will overwrite any previous entries in duration).
After running the PERT Calculator, the est. Duration (Te) is available: Building A Probabilistic Network in MSP *The estimated duration will also be visible in the Original Gantt View as well
MSP defaults to a Standard, or base, calendar because it serves at the basis for scheduling calculations • This Standard Calendar assumes: • Eight hour work day • 5 work days in a week (40 hours) Creating a Project Calendar • To View the Project Calendar: • Simply click on the Calendar button on the view bar * Calendars can be created for Project Wide, Task, or Resource specific. (For this lesson, we will focus on Project Wide)
The Calendar will display your project from the start date specified Creating a Project Calendar
The Calendar’s display period options are easily modified • To quickly change the schedules display period: • Click on the buttons at the upper left side of the calendar • The calendar can display one month or one week at a time, or.. • Click Custom to choose a specific period of time Creating a Project Calendar
The Calendar’s structure is also modifiable • To modify the Calendar’s structure: • Go to Format • Choose “Timescale…” Creating a Project Calendar • Here we can modify: • Monthly, daily, & weekly titles • Display all days/work days • Date boxes, shading, and more
Creating a project specific calendar • To create a project specific calendar: • Go to Tools • Select Change Working Time Creating a Project Calendar • In the Change Working Time Dialogue Box: • Select Create New Calendar *Make sure you are making changes for correct Calendar
Creating a project specific calendar • Create New Base Calendar Box: • Name your Project Calendar • Make a copy of the Standard Calendar to keep its formatting, exceptions can be added. • Click OK Creating a Project Calendar The Change Working Time box will now allow you to format it accordingly
Modifying Project Calendar • Adding a Vacation Day: (hypothetical) • Click on the day you wish to make an exception • On the Exception tab, Input the Name, Start and end of the exception • Click OK Creating a Project Calendar
Modifying Project Calendar Notice the Details button in the Change Working Time Box Creating a Project Calendar • Here you can: • Set non-working or working times for exceptions • Set a Recurrence Pattern for exceptions • Set Range of Recurrences for exceptions
Modifying Project Calendar • You can also Modify the schedule for the work week: (hypothetical, get off @ 1 on Fridays) • Choose the Work Weeks Tab (in the same Change Working Time box) • Enter the Name, Start date, and End date (in this ex., Early Fridays will apply for the length of the project) Creating a Project Calendar
Modifying Project Calendar • Click on Details • Select the day (Friday) • Choose Set day to these specific working times (for ex.=8 a.m. 1 pm) • Click OK Creating a Project Calendar • *In Work Weeks you can: • Use default times for certain days • Set certain days to non working time • Set days to specific work times
Set modified calendar to project • To apply project calendar to entire project: • Go to Project • Select Project Information Creating a Project Calendar • In the Project Information box: • Click on the Calendar dropdown • Select the new Calendar • Press OK
In The Calendar View you can now see Project has been applied to the modified (test) calendar. Creating a Project Calendar *Notice that May 5th is no longer scheduled
The Gantt Table (action plan) has also been updated automatically (go to Gantt View): Creating a Project Calendar
The Gantt Chart can be manipulated to display a variety of information Refer to Table 5-4 Manipulating the Gantt Chart
To Create WBS Codes • Highlight All tasks • Go to Project • Go to WBS • Choose Define Code Manipulating the Gantt Chart • In the WBS Code Def. box: • Select a Project Code Prefix (in this case none) • Select Sequence (in this case Numbers Ordered) • Check both options at bottom • Click OK
Display WBS Codes (MSP will not do this automatically) • Highlight the Task Name column • Right click on header (Task Name) • Choose Insert Column Manipulating the Gantt Chart • Under Field Name, Choose WBS • Click Best Fit • Select Ok
The WBS codes have now been assigned to the Tasks Manipulating the Gantt Chart
The Gantt Chart Wizard is used to format the Gantt Chart’s display options Manipulating the Gantt Chart • The Gantt Chart Wizard can be accessed by: • Going to Format • or Right-clicking on the Gantt Table • Selecting Gantt Chart Wizard
The Gantt Chart Wizard is used to format the Gantt Chart’s display options • The Gantt Chart Wizard display will appear, here you can change the Gantt Chart to Display: • Standard, Critical, and Baseline paths • Resources, Dates, both or neither • Option to link dependent tasks • Customize Gant Chart • Customize Task Information Manipulating the Gantt Chart
Modify the Gantt Chart to Display Task Names (Figure 5-23) • In The Gantt Chart Wizard • Click Next to begin customization • For this example, Choose Standard and click Next • Choose Custom Task Information and click Next • On the “Left” drop down menu select Name and then Click next through options • For this example, select No when asked to link dependent tasks • Click Format It and Exit Wizard Manipulating the Gantt Chart
Modify the Gantt Chart’s display period • Like the Project Calendar, The Gantt Table’s display Period can be modified: • Right Click on the Date Tier • Select Timescale… Manipulating the Gantt Chart • In the Timescale Box: • Select Months in the “Units” dropdown • Select One tier in the “Show” dropdown • Click OK