Download

1 / 23
230 likes | 386 Views
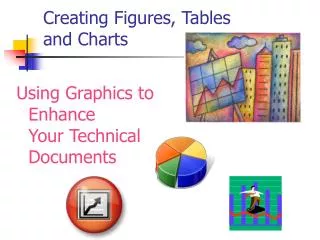
CREATING CHARTS. By: Dr. Ennis - Cole. OBJECTIVES. Identify the elements of an Excel chart Identify the type of chart represents your data most effectively Create an embedded chart Move and resize a chart Edit a chart Change the chart’s appearance. OBJECTIVES.

E N D
CREATING CHARTS By: Dr. Ennis - Cole
OBJECTIVES • Identify the elements of an Excel chart • Identify the type of chart represents your data most effectively • Create an embedded chart • Move and resize a chart • Edit a chart • Change the chart’s appearance
OBJECTIVES • Place a chart in a chart sheet • Select nonadjacent ranges • Work with 3-D chart types • Add a picture to a chart
Starting Excel and Renaming a File • Start Excel • Open the workbook • Documentation appears as the first sheet in the workbook • Type your name and date in the cells • Save the workbook • The new filename appears in the title bar
EXCEL CHART TYPES • Refer to figure 4-2 for Excel chart types • Refer to figure 4-3 for chart subtypes for column chart type • Refer to Figure 4-4 for the following Excel chart elements: • Chart area - is the entire chart • X-axis - horizontal axis • Y-axis - vertical axis
EXCEL CHART TYPES • A tick mark label - identifies the categories, values or series in the chart • A tick mark - small line that intersects an axis • Grid lines - extend the tick marks to make it easier to see the values of data markers
EXCEL CHART TYPES • Data point - is a single value originating from a worksheet cell • Data marker - a graphic representing a data point in a chart • Data series - a group of related data points
PLANNING A CHART • Identify the data points to be plotted • Choose an appropriate chart type • Sketch the chart • Decide on the chart’s location • Refer to Figure 4-5
CREATING A COLUMN CHART • Select the data • Click the Chart Wizard Button • Follow the series of steps • Click the Column chart type • Press and Hold to View Sample button • Click Next Button • Follow the steps to to change data series
Moving and Resizing a Chart • Select the chart • Position the pointer, click and hold down the mouse and drag the chart • Release the mouse to view the chart in the new position • Hold and drag the mouse button to resize • Refer to Figure 4-14
Update and Modify a Chart • Click the cell that needs correction • Type the content and press Enter • Select the chart • Click the data marker within the series you want to delete • Press the Delete Key • Refer to Figures 4-16 and 4-17
Editing Chart Text • Three categories of text: • Label • Attached • Unattached • Select the chart title • Press the space bar and type the new title • Similarly, change the Y-axis title
Adding Data Labels • Select the chart • Select a single data marker • Click Chart, chart Options and then click data labels • Click the option for the type of label • Click OK • Refer to Figures 4-19 and 4-20
Enhancing the Chart’s Appearance • Select a pattern for a data marker: • Select the chart • Select the data marker • Click the format data series button • Click the Pattern tab, click Fill Effects button and then click the Pattern tab to display a list of patterns • Click the pattern you want and click OK
Previewing and Printing the Chart • Save the workbook • Click the Print Preview button • Click the Print button • Refer to Figure 4-23
CREATING A PIE CHART • Click and select the first range • Press and hold the Ctrl Key while you select additional cells • After selection, release the Ctrl Key • Click the Chart Wizard Button • Click the Pie chart type • Click Press and Hold to view Sample
CREATING A PIE CHART • Click the Next button • Click the Titles tab, click chart title, and type the title • Click the data Labels and then click Show Label and Percent option • Click Legend and then click Show Legend • Click next and place the chart As new sheet • Click Finish
EXPLODING A SLICE OF A PIE CHART • Click the chart type and click 3-D pie chart • Click the slice you want to explode • Drag the selected slice away from the center of the chart • Click Chart, 3-D view, Clockwise rotation arrow button • Click OK to apply changes • Refer to Figures 4-27, 4-28, and 4-30
Applying Texture - Fill Effect • Select the chart area • Click Format, Chart Area • Click Patterns, Fill Effects, and then Texture • Click Blue tissue paper • Click OK - Figures 4-32 and 4-33 • Click Save • Click Print to print the chart
Creating a Bar Chart • Select any two non-adjacent ranges • Click the Chart Wizard Button • Click the Bar chart type • Click the Press and Hold to View Sample Button to preview the chart • Click Next twice • Click the Titles tab
Creating a Bar Chart • Click the Chart title text box • Type the text for the X and Y axes • Click the Legend tab and click show Legend • Click Next • Click As new sheet option • Type Bar Chart • Click Finish
Using Pictures in a Bar Chart • Create the bar Chart • Select the bars to be replaced with pictures • Click Insert, Point to Picture and then click From File to display the picture dialog box • Select the image file • Click Insert • Refer to Figure 4-35
Stretching and Stacking Pictures • Click the Format Data Series Button • Click the Patterns Tab • Click Fill Effects, click the Picture Tab • Click the Stack and Scale Option Button • Click OK twice ( Figure 4-36) • Click Documentation, Save • Close the workbook and Exit Excel