Download
1 / 16
160 likes | 319 Views
Slicer3 Tutorial Registration Library Case 06: Breast Cancer Follow-up. Dominik Meier, Ron Kikinis February 2010. Overview. takes how long to do?. Introduction Prerequisites Modules Used Loading Example Dataset 1 min Viewing Input Data 3 min

E N D
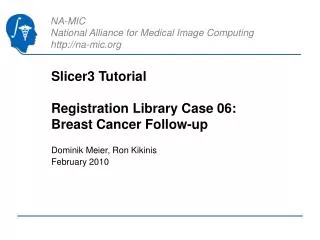
Slicer3 TutorialRegistration Library Case 06: Breast Cancer Follow-up Dominik Meier, Ron Kikinis February 2010
Overview takes how long to do? • Introduction • Prerequisites • Modules Used • Loading Example Dataset 1 min • Viewing Input Data 3 min • Build Thalamus Mask Images 10 min • Build Thalamus Surface Models 3 min • Register Surfaces 3 min • Apply Transform 5 min • Mask & Clip 5 min • Merge Labels & Save 5 min Note: if wish to skip parts of the tutorial, you will find the data generated by individual steps in the Example Data Folder. You may load these individually via the “File/Add Data…” menu. The SlicerScene file that comes with the tutorial will only load the initial volume data.
Introduction / Strategies • We have two breast MRI images acquired before and after treatment. To assess the local treatment effect, we want to align the two. • soft tissue deformations during image acquisition cause large differences in appearance • because of the strong changes in shape and position, we break the problem down and register each breast separately. • contrast enhancement and pathology and treatment changes cause additional differences in image content • the surface coils used cause strong differences in intensity inhomogeneity • we perform a bias-field correction on both images before registration • we have large differences in initial position, and strongly anisotropic voxel sizes with much less through-plane resolution • we use the Multires version of RegisterImages for an initial affine alignment • the nonlinear portion is then addressed with a BSpline algorithm “Old Atlas” contains Thalamic Nuclei “New Atlas” does not
Modules Used • we will use the following modules: • Extract Subvolume ROI • MRI Bias Field Correction • Register Images Multires • Deformable Bspline Registration • Data Module
Prerequisites • Slicer version 3.5 or later • Example Dataset: download and extract the dataset for this tutorial: RegLib_C06_BreastCancer_Data.zip. It should contain the original input images, parameter presets, intermediate results and the solution transforms: • Tutorials to complete first (helpful but not required): • Slicer3Minute Tutorial • Loading and Viewing Data • http://www.slicer.org/slicerWiki/index.php/Slicer3.4:Training
1. Loading Example Dataset To get the Example Dataset loaded into Slicer: • Menu: File: Load Scene… • Select the Slicer Scene file that comes with the downloaded example dataset, called: AtlasMerge_SlicerScene.mrml • This will load all the necessary images • Select Layout: From the icon bar, click on the Layout menu and select “Conventional Layout”. • Link Views: Click on the Ring Icon in any of the slice views to link all the views together. This will save you the work of making selections for each slice window separately. • Choose Foreground: RegLib_C06_BreastCancer_PostRx_left.nrrd • Choose Background: RegLib_C06_BreastCancer_PreRx_left_BiasCorr.nrrd • Choose Labelmap: none
Adjust Slice Views unregistered: To get an idea of the initial data and misalignment, perform the following: • Repeatedly click on the view toggle button to switch between the two images, creating the animation effect shown on the right. • Or set the Visibility Slider to halfway between foreground and background. This allows you to see both images. You can see the initial misalignment. animated gif, view in presentation mode
Preprocessing To get the data ready for registration, we need to perform a few preprocessing steps to address particular challenges: • Because of the strong soft-tissue deformations in acquisition and the differences in field of view (FOV), we process each breast image separately. The left side is shown in this tutorial. • Because of the surface coils we have strong intensity inhomogeneity, which should be corrected beforehand. • The ExtractSubvolumeROI and MRI Bias Field Correction modules perform the necessary actions. Their use is explained in a separate tutorial. For efficiency the cropped and corrected file is already included in the example dataset. You may therefore choose to skip the next step.
Extract Subvolume ROI • Go to the “Extract Subvolume ROI” module • As Input volume, select the PostRx image • under ROI: “Create New ROI” • drag the ROI boundaries in the 3D view to enclose the entire left breast. Alternatively, click in the 2D views to set the closest ROI wall boundary to the mouse location. Depending on your 3D navigation skill, the latter is likely faster. You should see the ROI update as the blue box shown on the right. • Once the ROI is placed, click “Apply” • Go back to the “Data” module, force an update of the MRML tree by selecting the • Rename the ROI and cropped image to “PostRx_left”, via the MRML Node Inspector
Initial Alignment: Affine Registration • Go to the “Register Images Multires” module • Fixed Image: “PreRx_left_BiasCorr” • Moving Image: “PostRx_left” • Resample: “none” • Output transform: “Create New Linear Transform”, then select “Rename” and rename to “Xform_Aff0_Mres” • StepSize (voxels): 5 • Click “Apply”. • Upon completion: go back to the “Data”module and drag the “PostRx_left” volume inside the newly generated transform
Affine Registration (2): Evaluate To evaluate the registration: : • Link Views • Choose Foreground: RegLib_C06_BreastCancer_PostRx_left.nrrd • Choose Background: RegLib_C06_BreastCancer_PreRx_left_BiasCorr.nrrd • Toggle views Affine Registered (initial pose for subsequent non-rigid registration) animated gif, view in presentation mode
Non-rigid Registration • Go to the “Deformable Bspline Registration” module • Select the presets from the “Parameter set” menu or manually set the following: • Initial Transform: “Xform_Aff0_Mres” • Fixed Image: “PreRx_left_BiasCorr” • Moving Image: “PostRx_left” • Output Transform: Create new transform, rename to “Xform_BSpline1_Aff0Init” • Output Volume: Create new volume, rename to “PostRx_left_BSpl1” • Set numeric values as shown on the right • Click “Apply”. Runtime 1-2 minutes.
Non-rigid Registration (2): Evaluate • Unlike the linear Affine registration we did at the beginning, the nonlinear Bspline transform cannot be visualized on the fly via a transform node. To view the effect, a resampled volume must be created. We requested one from the module in the previous step: • Choose Foreground: PreRx_left_BiasCorr • Choose Background: PostRx_left_BSpl1 • Toggle views After non-rigid Bspline registration: animated gif, view in presentation mode
Save • Select “Save” from the File Menu. • Check all boxes except the original input images • Create a new output directory, and select it via the “Change Destination For All Selected” button. • click “Save Selected”.
What Next Try the Registration Tutorial for other cases in the Registration Case Library. • http://na-mic.org/Wiki/index.php/Projects:RegistrationDocumentation:UseCaseInventory Visit the Slicer Training Compendium: • http://www.slicer.org/slicerWiki/index.php/Slicer3.4:Training • Feedback: anything amiss? If you have suggestions on how we can improve this and other documentation, please let us know: visit: • http://na-mic.org/Wiki/index.php/Projects:RegistrationDocumentation
Acknowledgements National Alliance for Medical Image Computing NIH U54EB005149 Neuroimage Analysis Center NIH P41RR013218 -12S1 (ARRA Suppl)